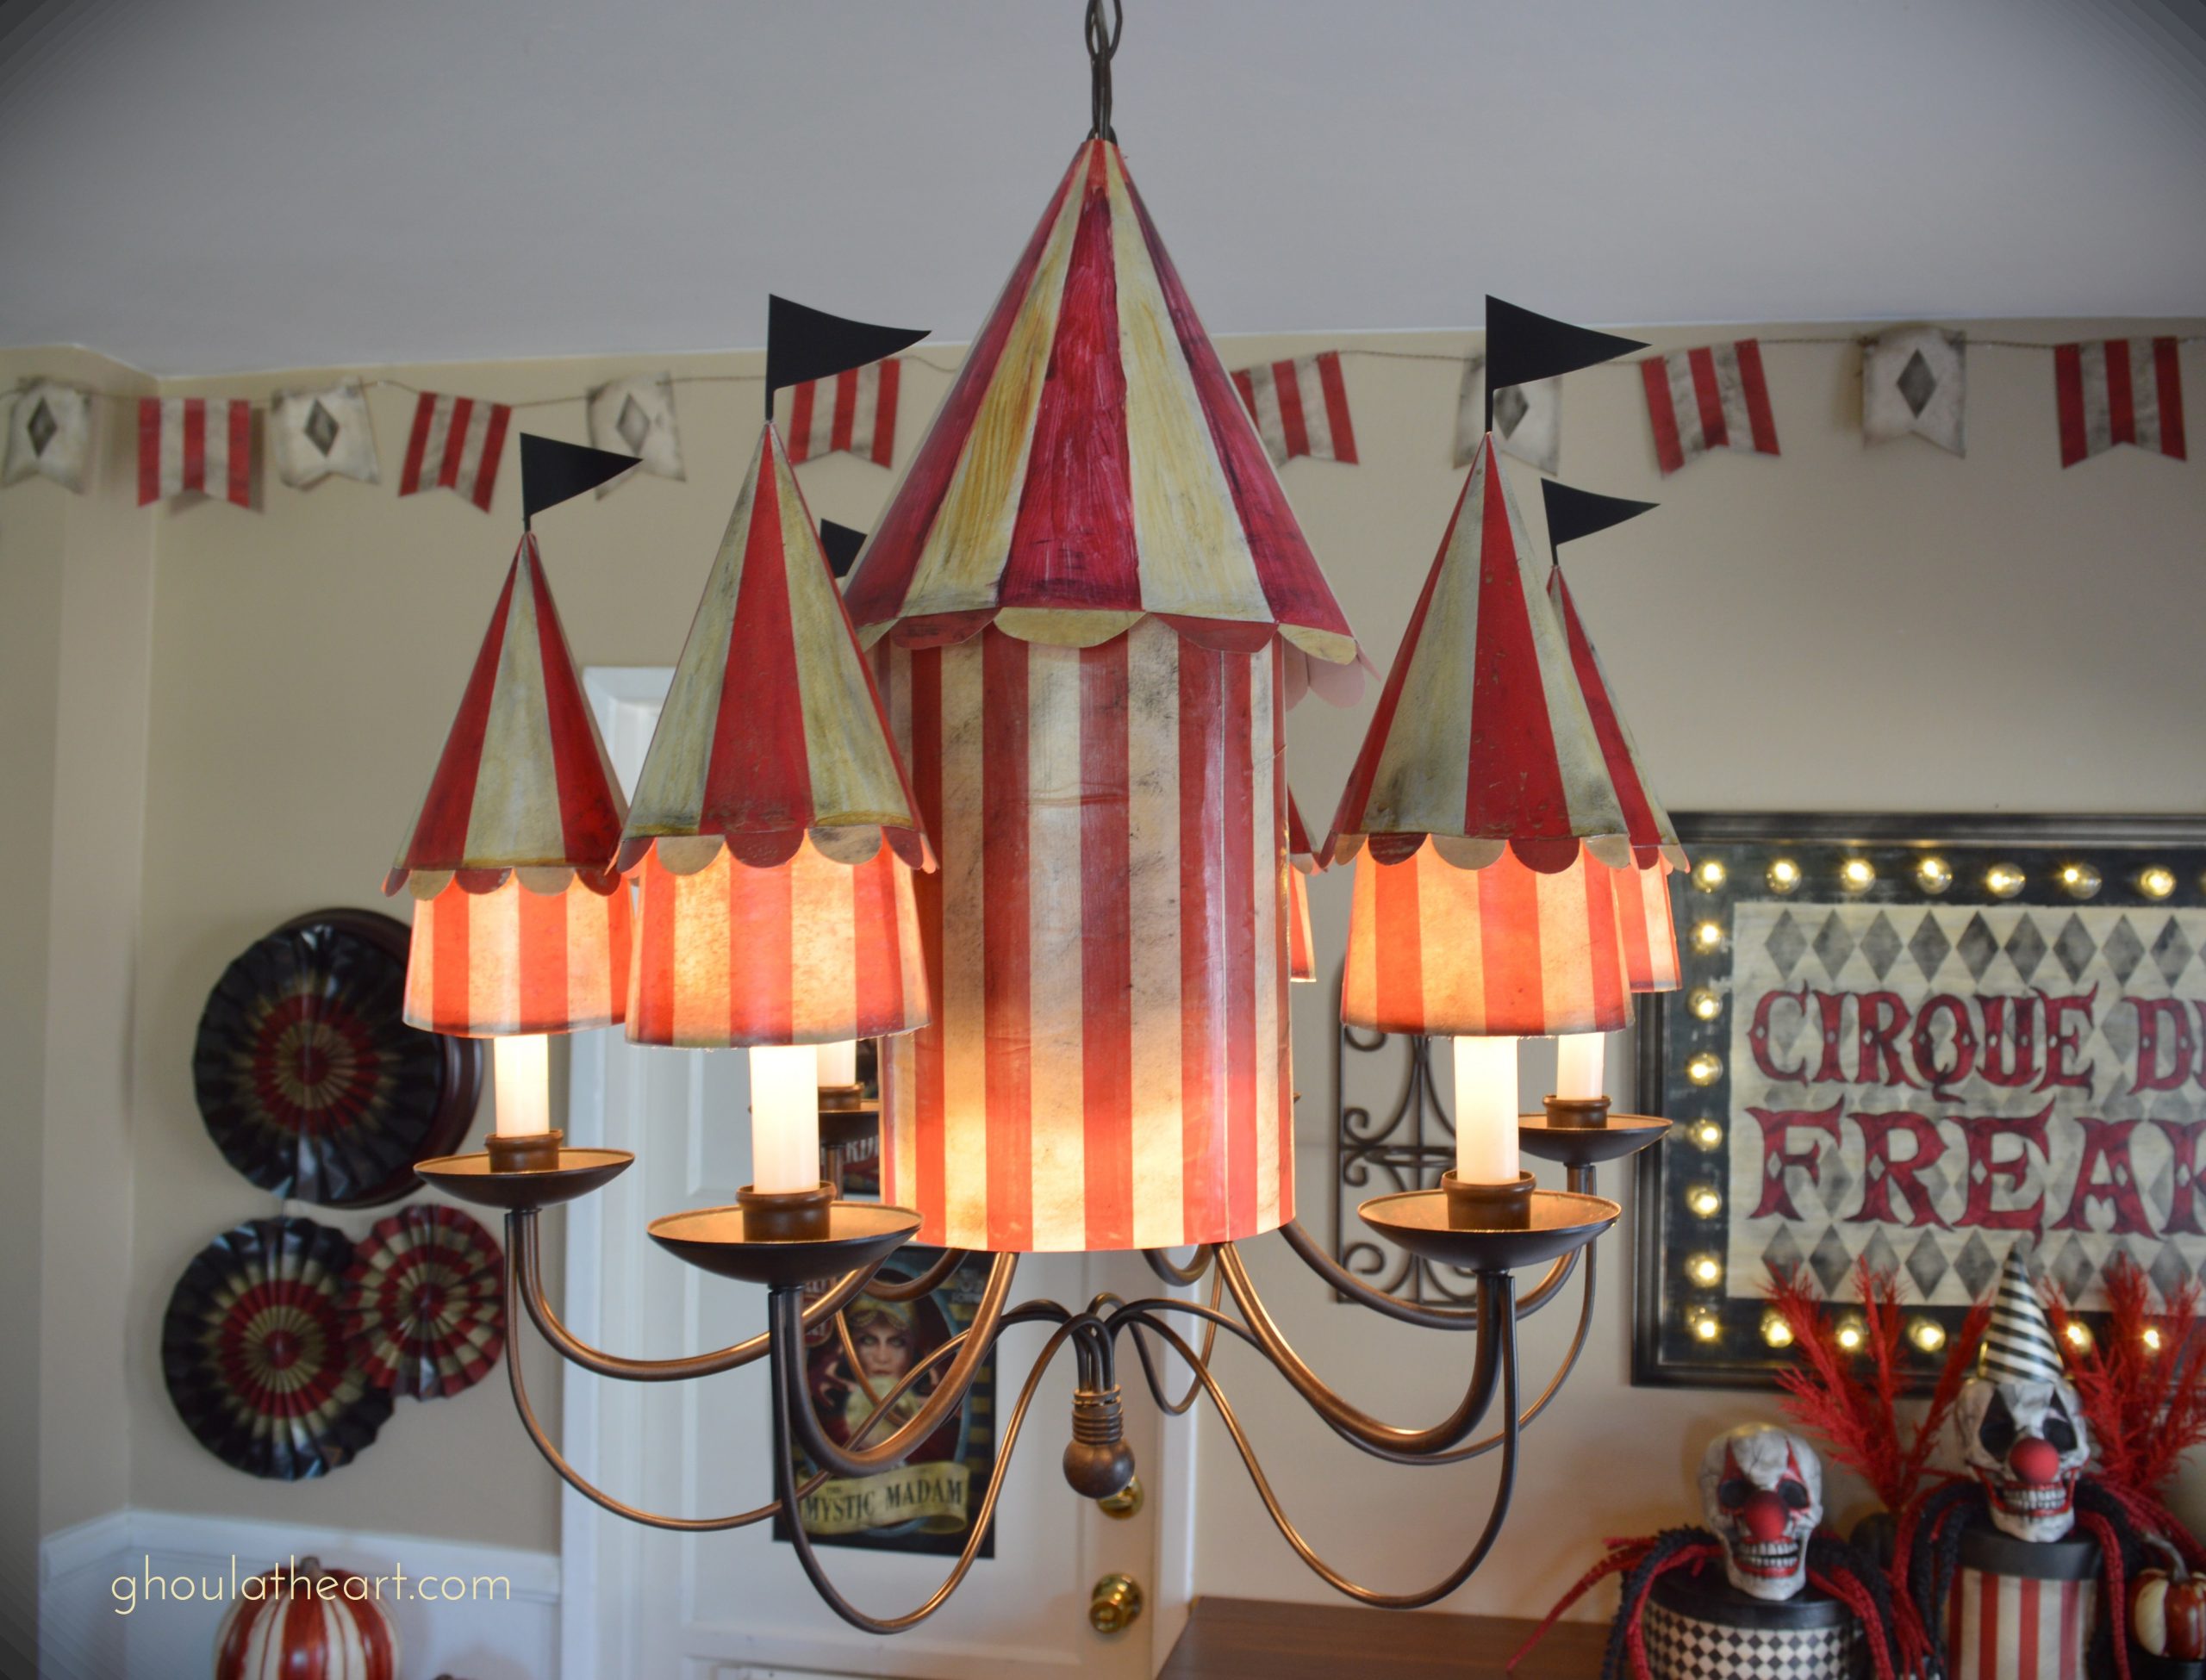
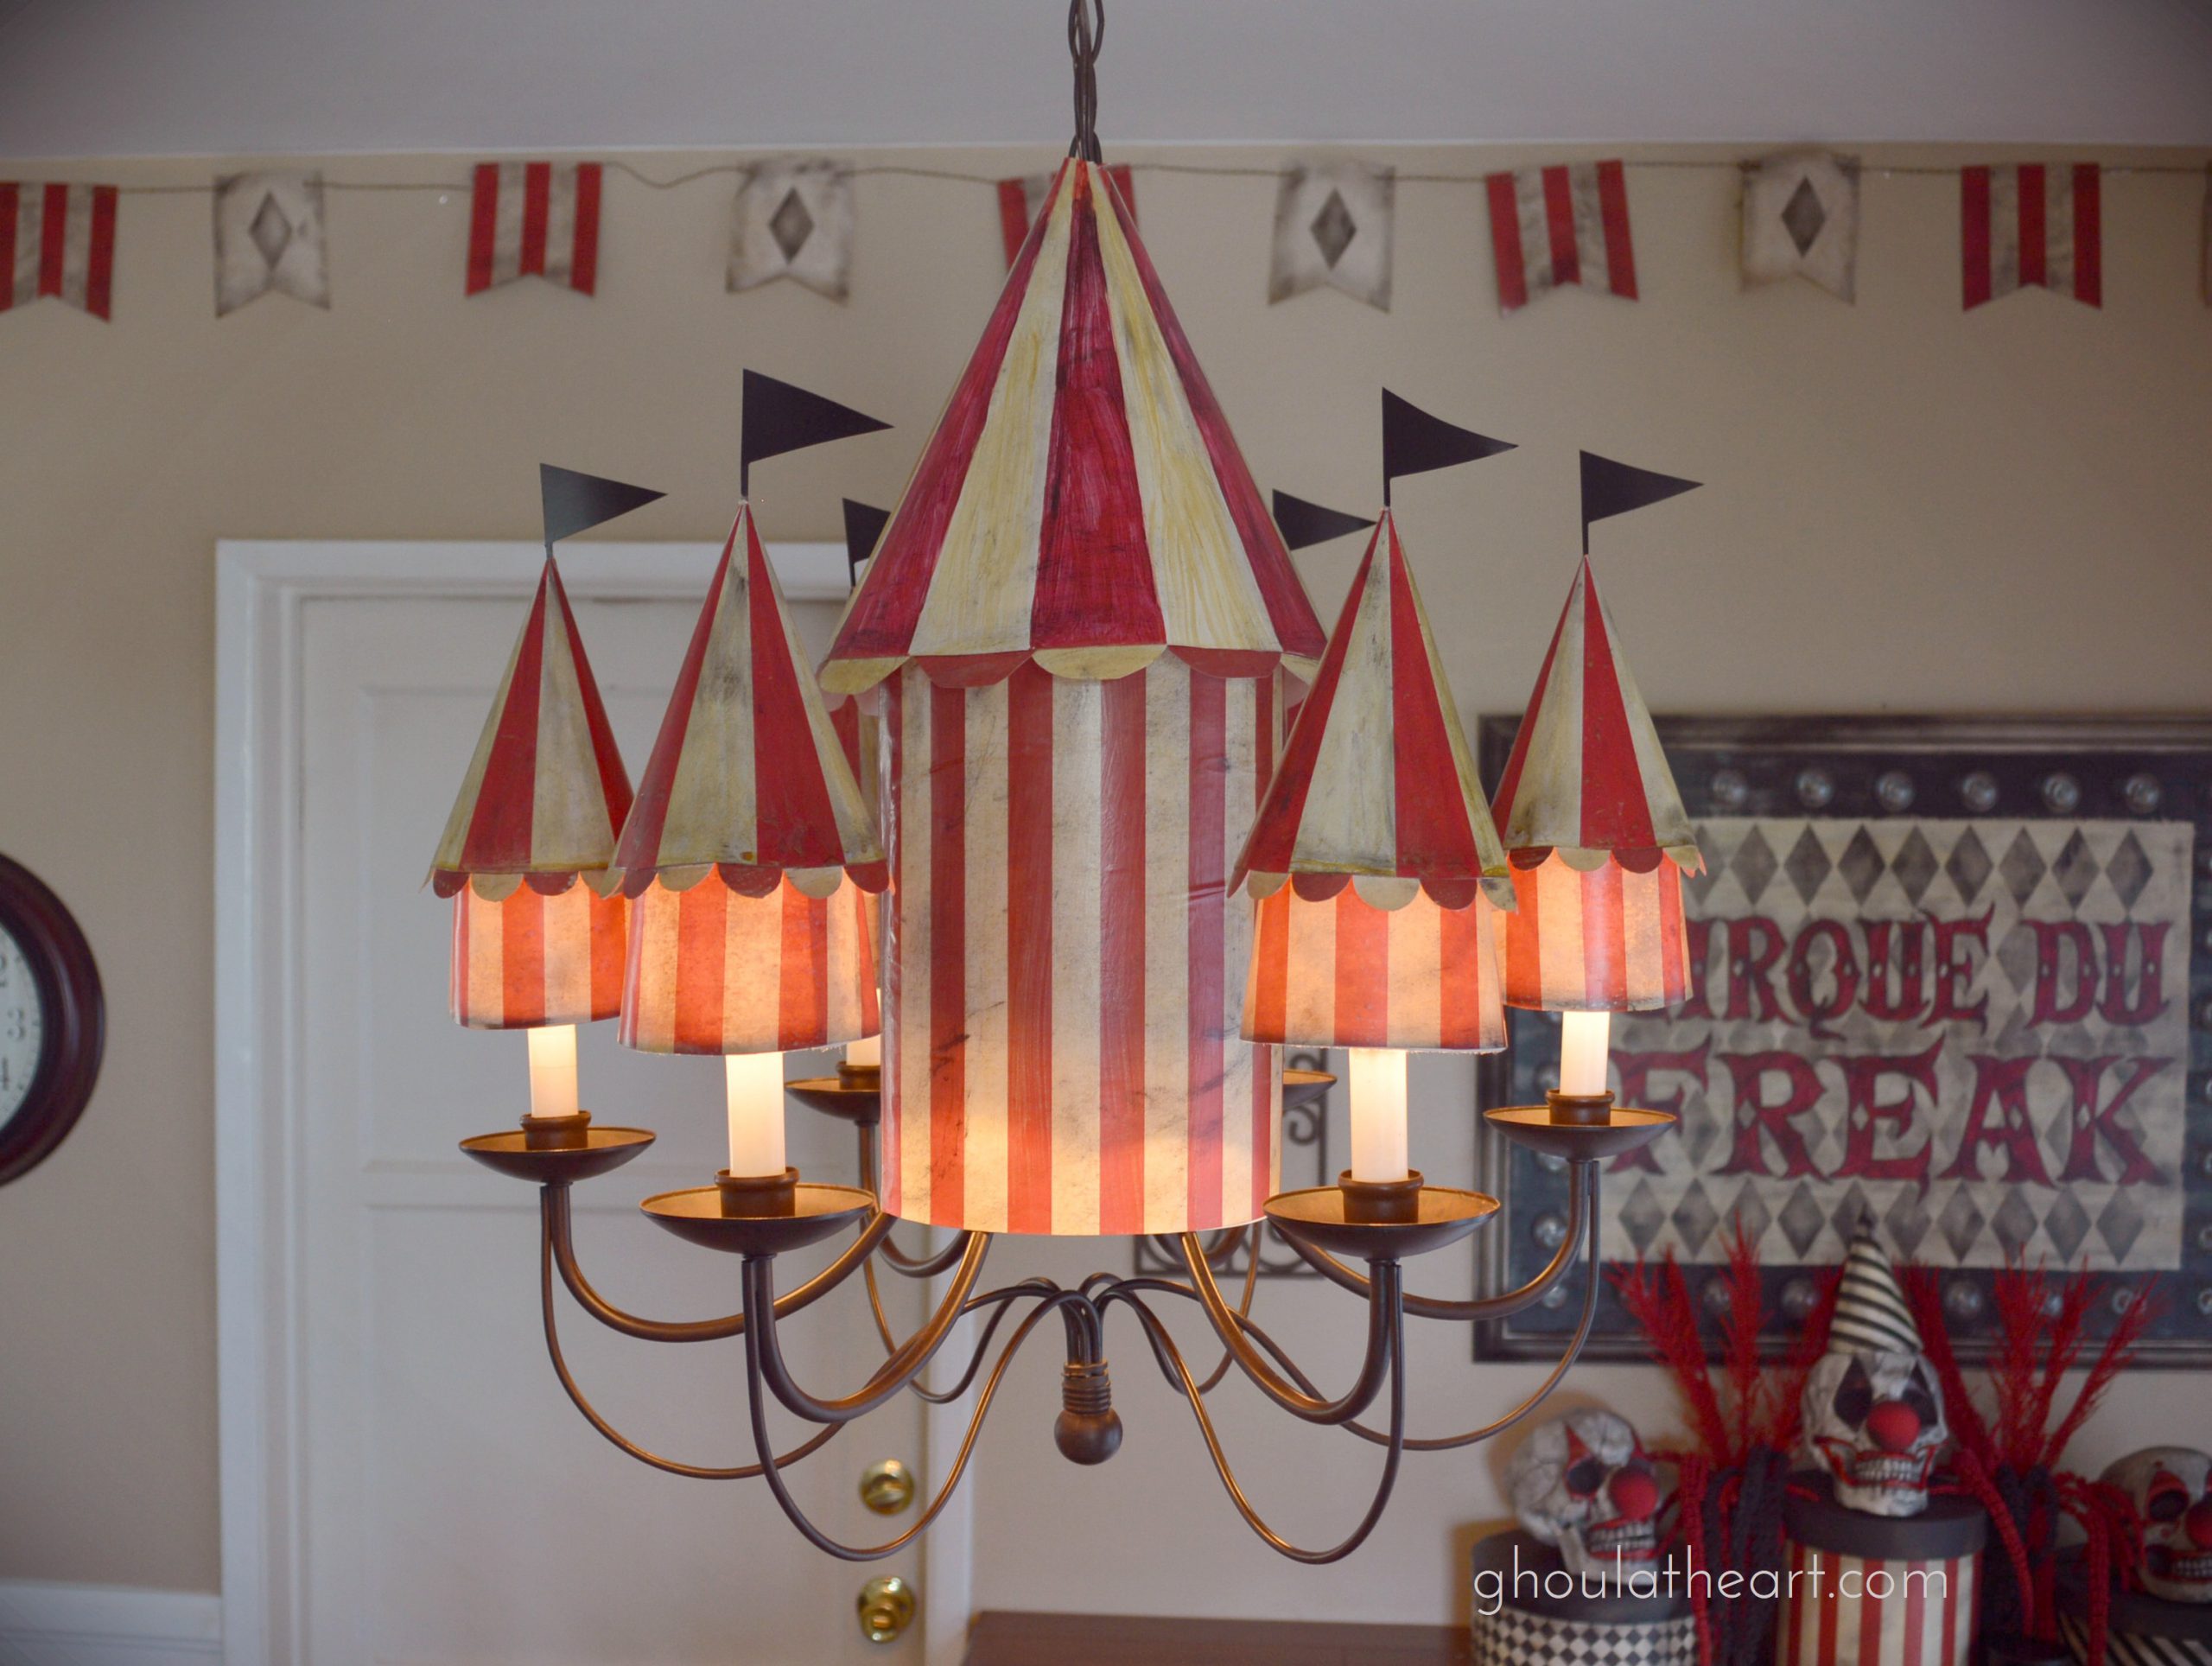
I like to decorate my dining room chandelier for the holidays and Halloween is no exception. My theme this year was vintage carnival or Carn’evil’, so instead of covering all my walls with swaths of aged circus tent fabric, which I initially planned to do, I decided instead to create tents out of the chandelier shades. I got the idea when I came across these cute circus themed hats at my local party supply store. They were perfect for circus tent tops for my chandelier. Initially I just made the 6 small tents but soon realized I needed the main Big Top Tent to really complete the look and since the party supply store didn’t sell big cone shaped hats for my big tent I had to make my own. I made this as a Halloween decoration but this is not all that scary or creepy so this can certainly be made for a kids circus or carnival themed party. Check out how I did it below.
SAFETY NOTE: Covering lamp shades with paper can increase the chance of fire. Take care to lessened the risk of fire by using cool LED bulbs in your light fixture.
Supplies Needed
2 sheets of white poster board
8 12″x12″ sheets of red striped scrapbook paper
6 striped party hats
red acrylic paint
yellow antiquing paint
black stencil paint
Modge Podge sealer
velcro tape
glue

Preparation- Antiquing
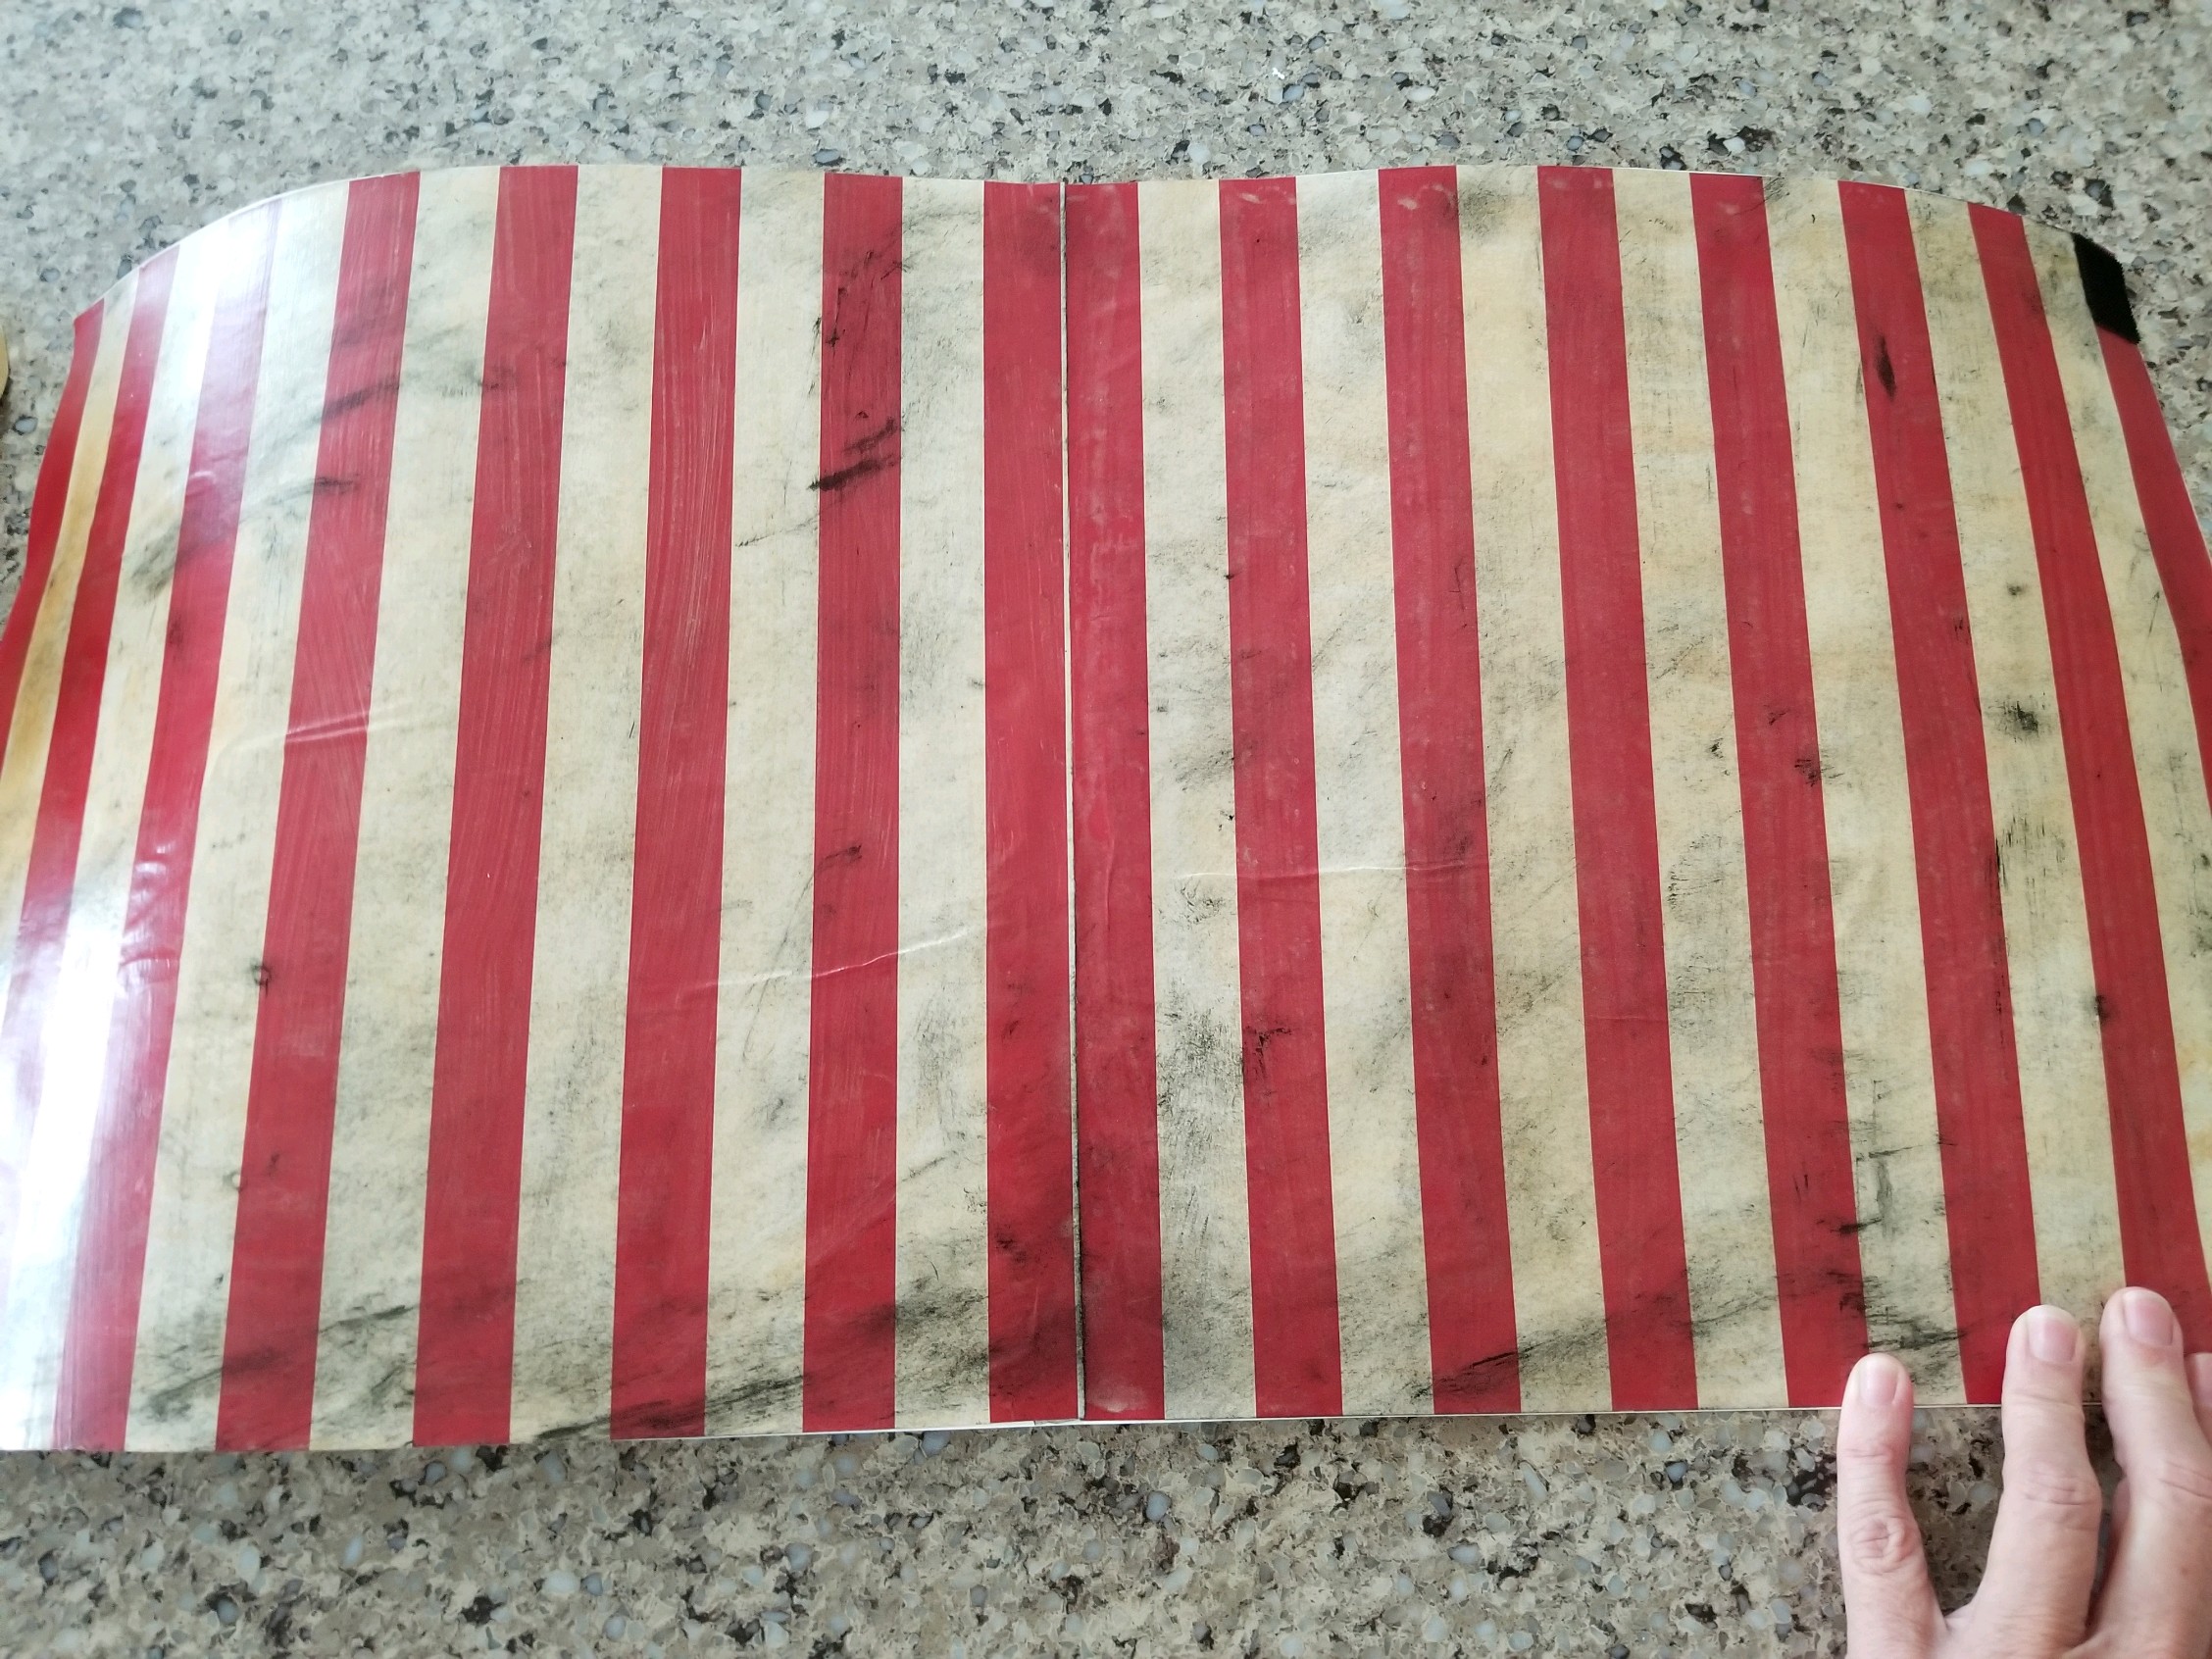
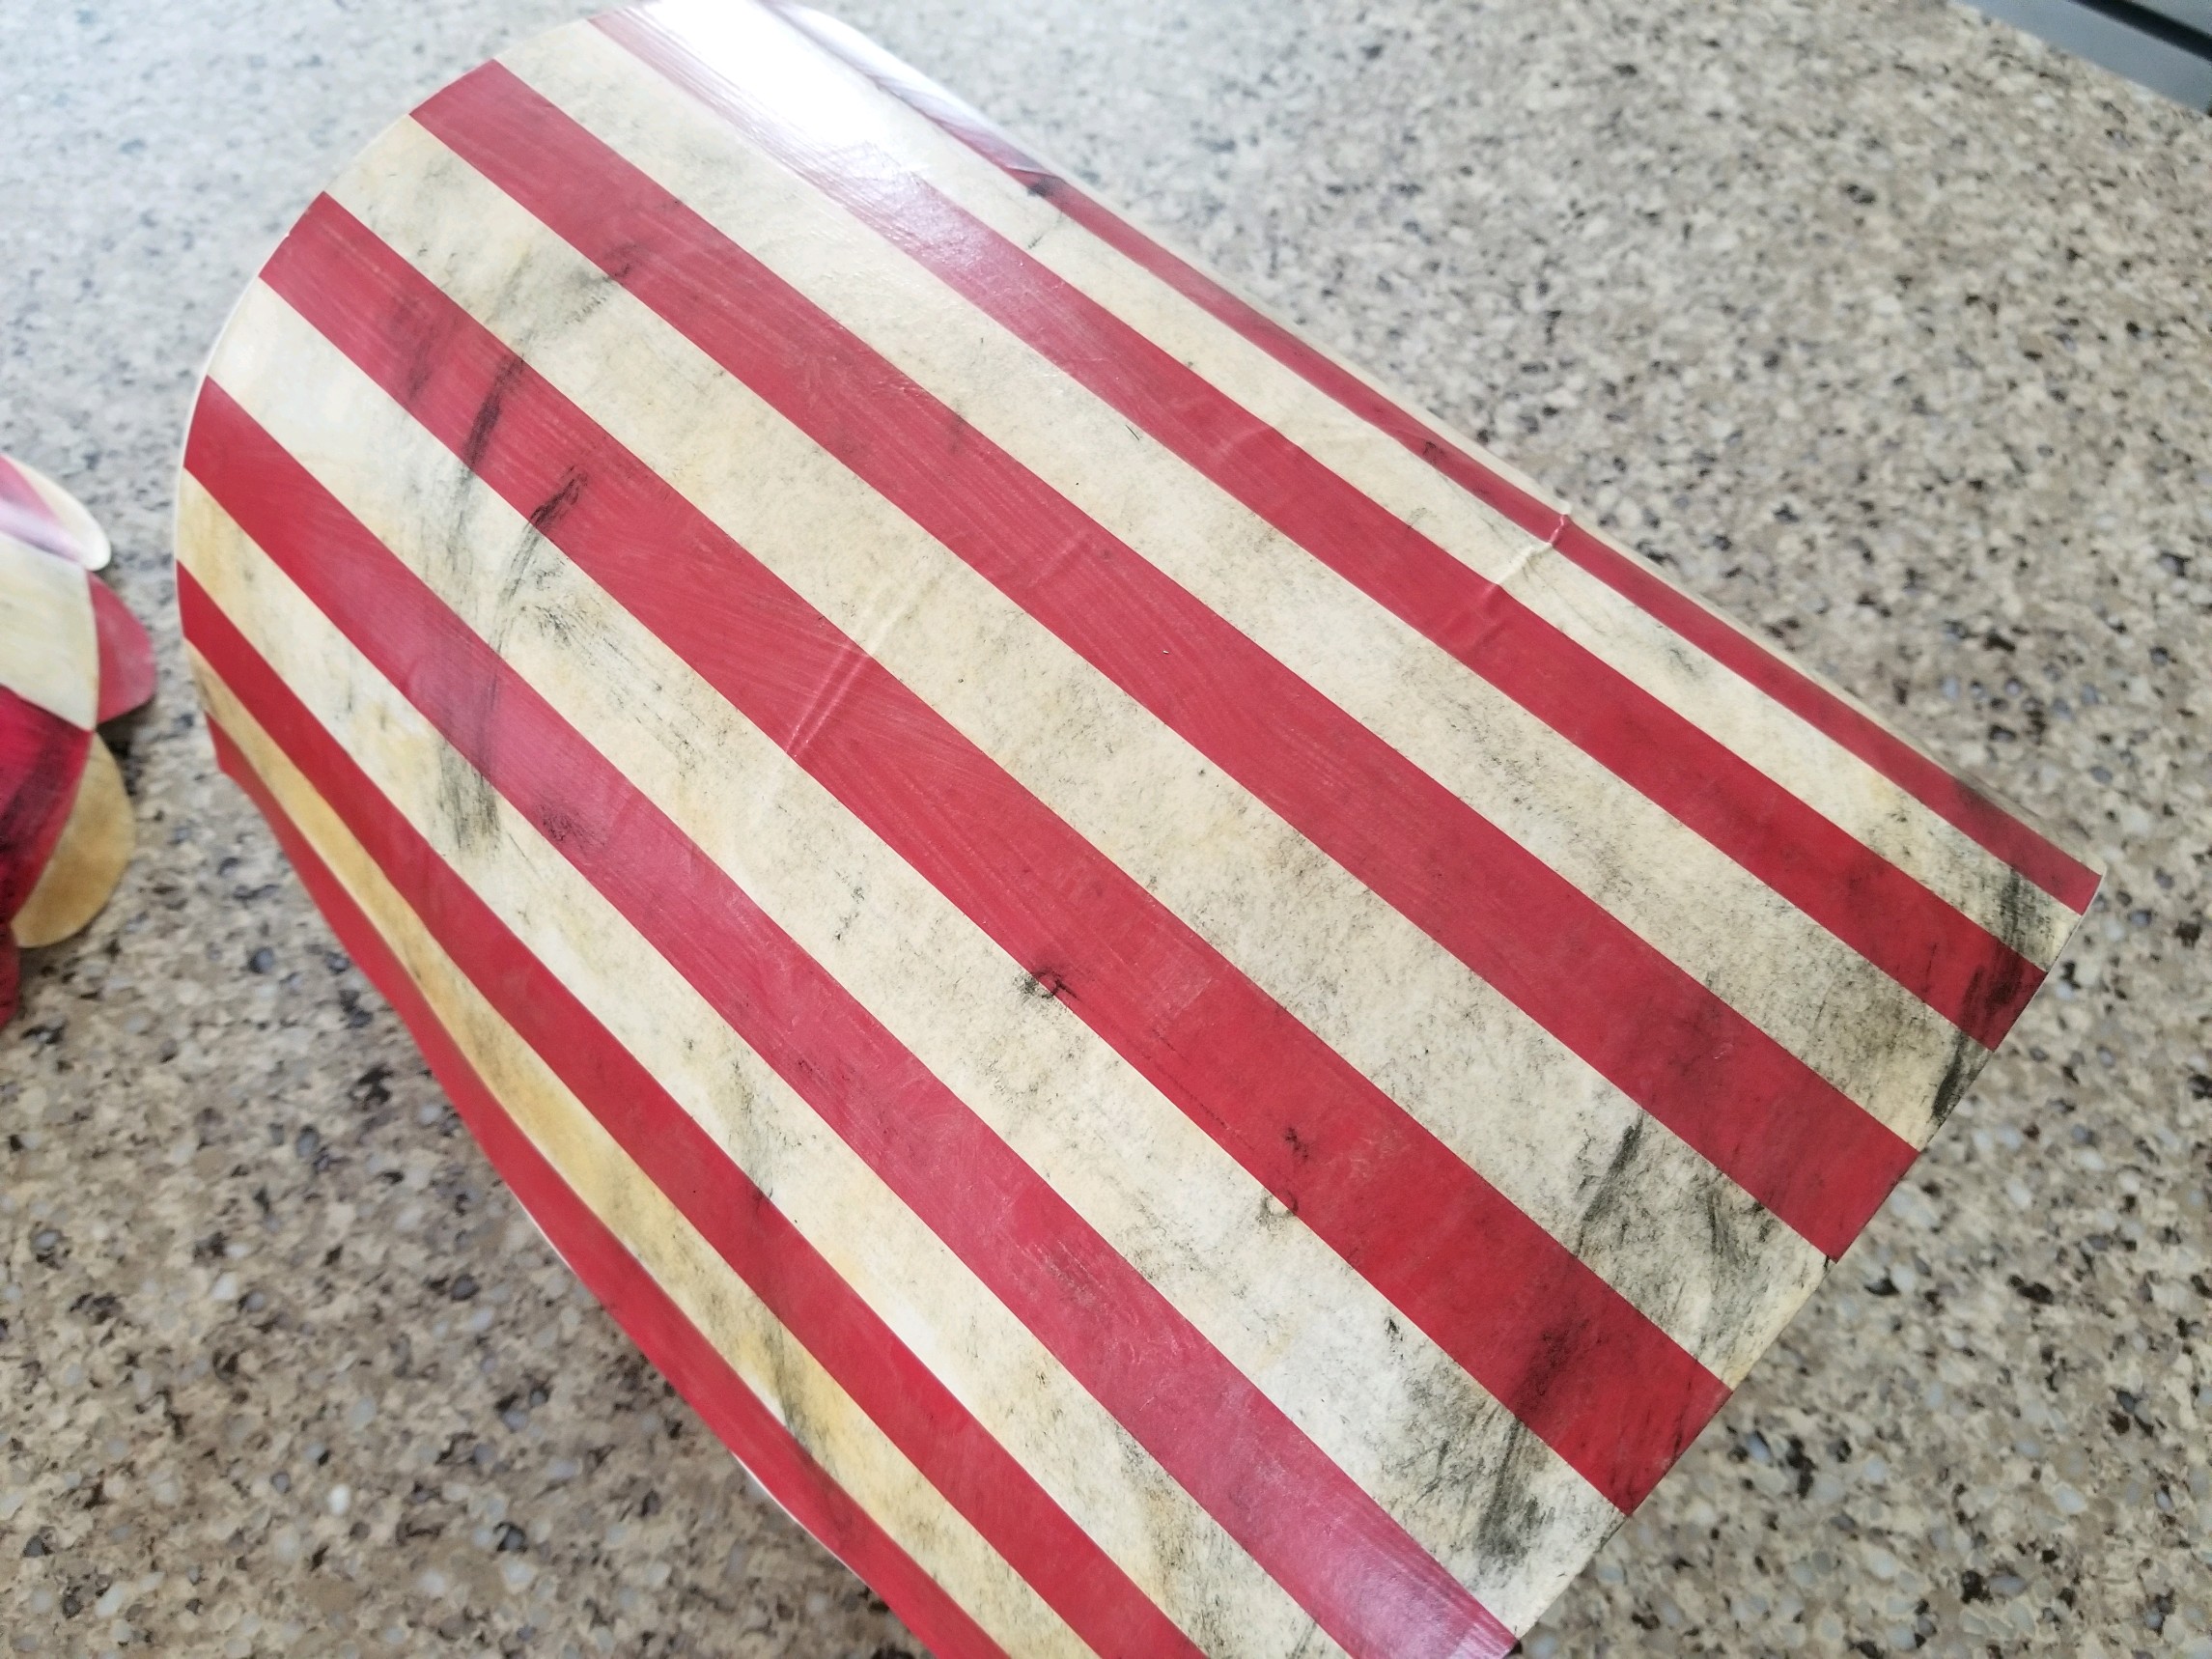
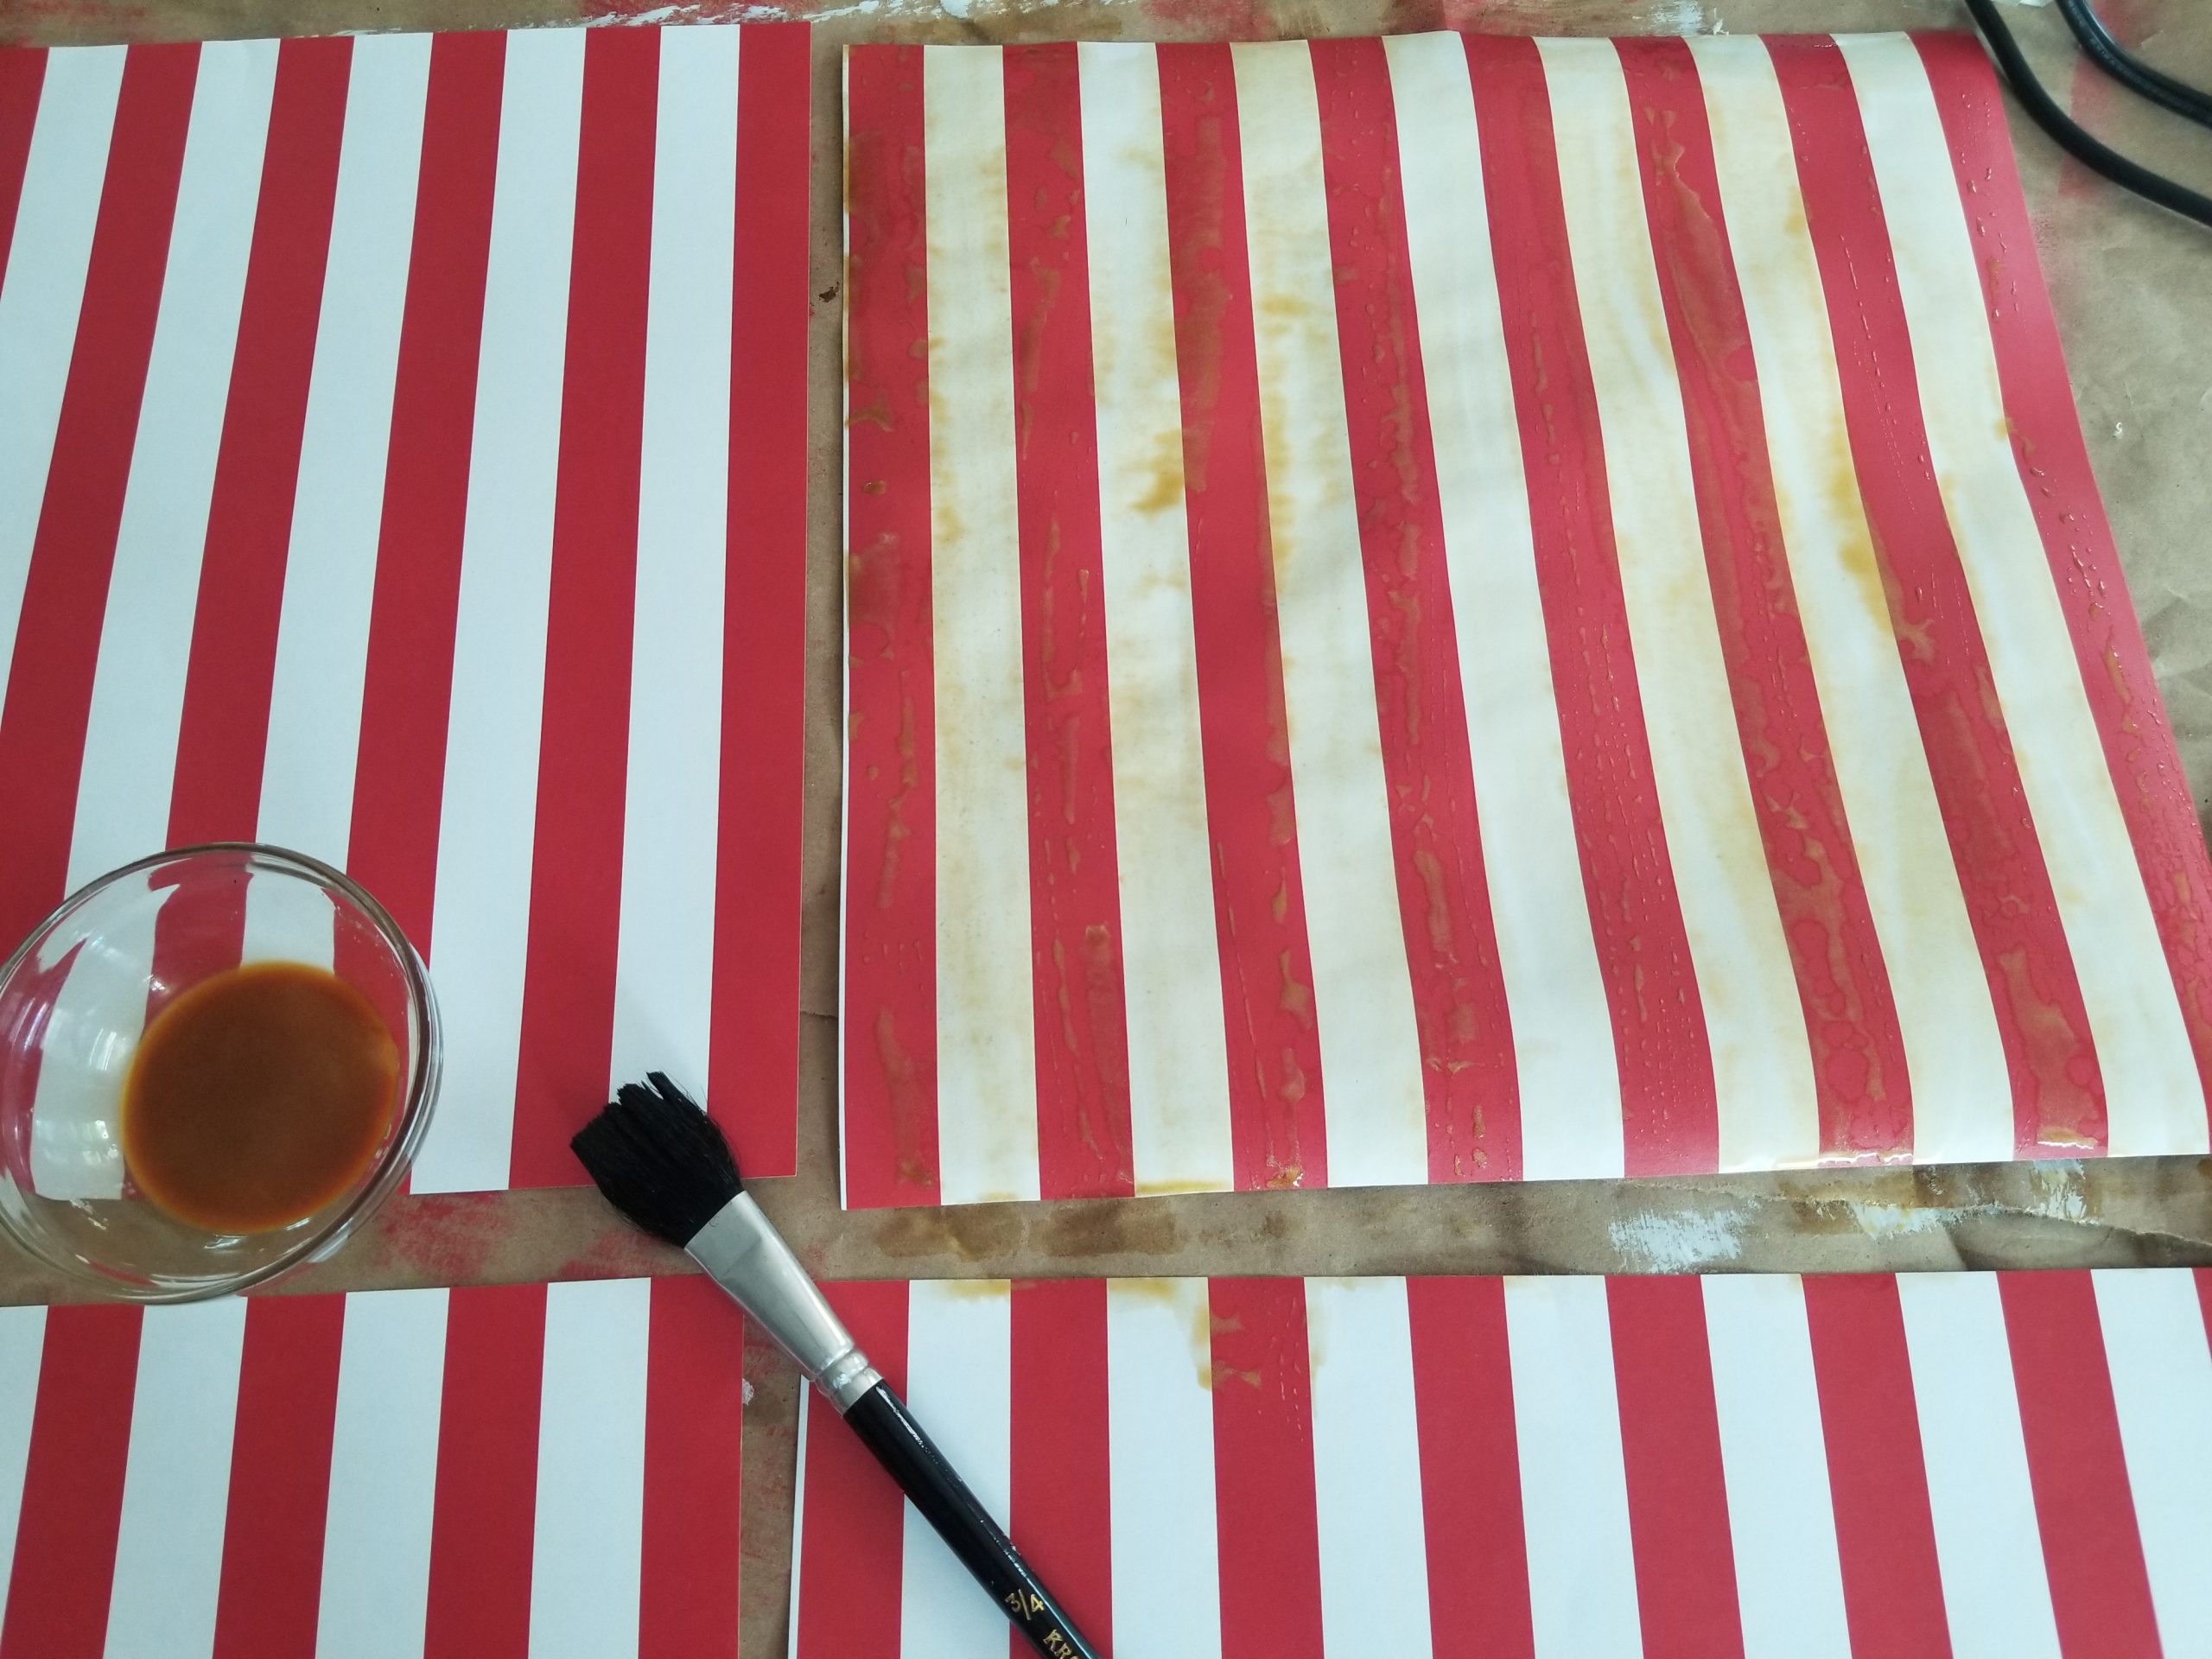
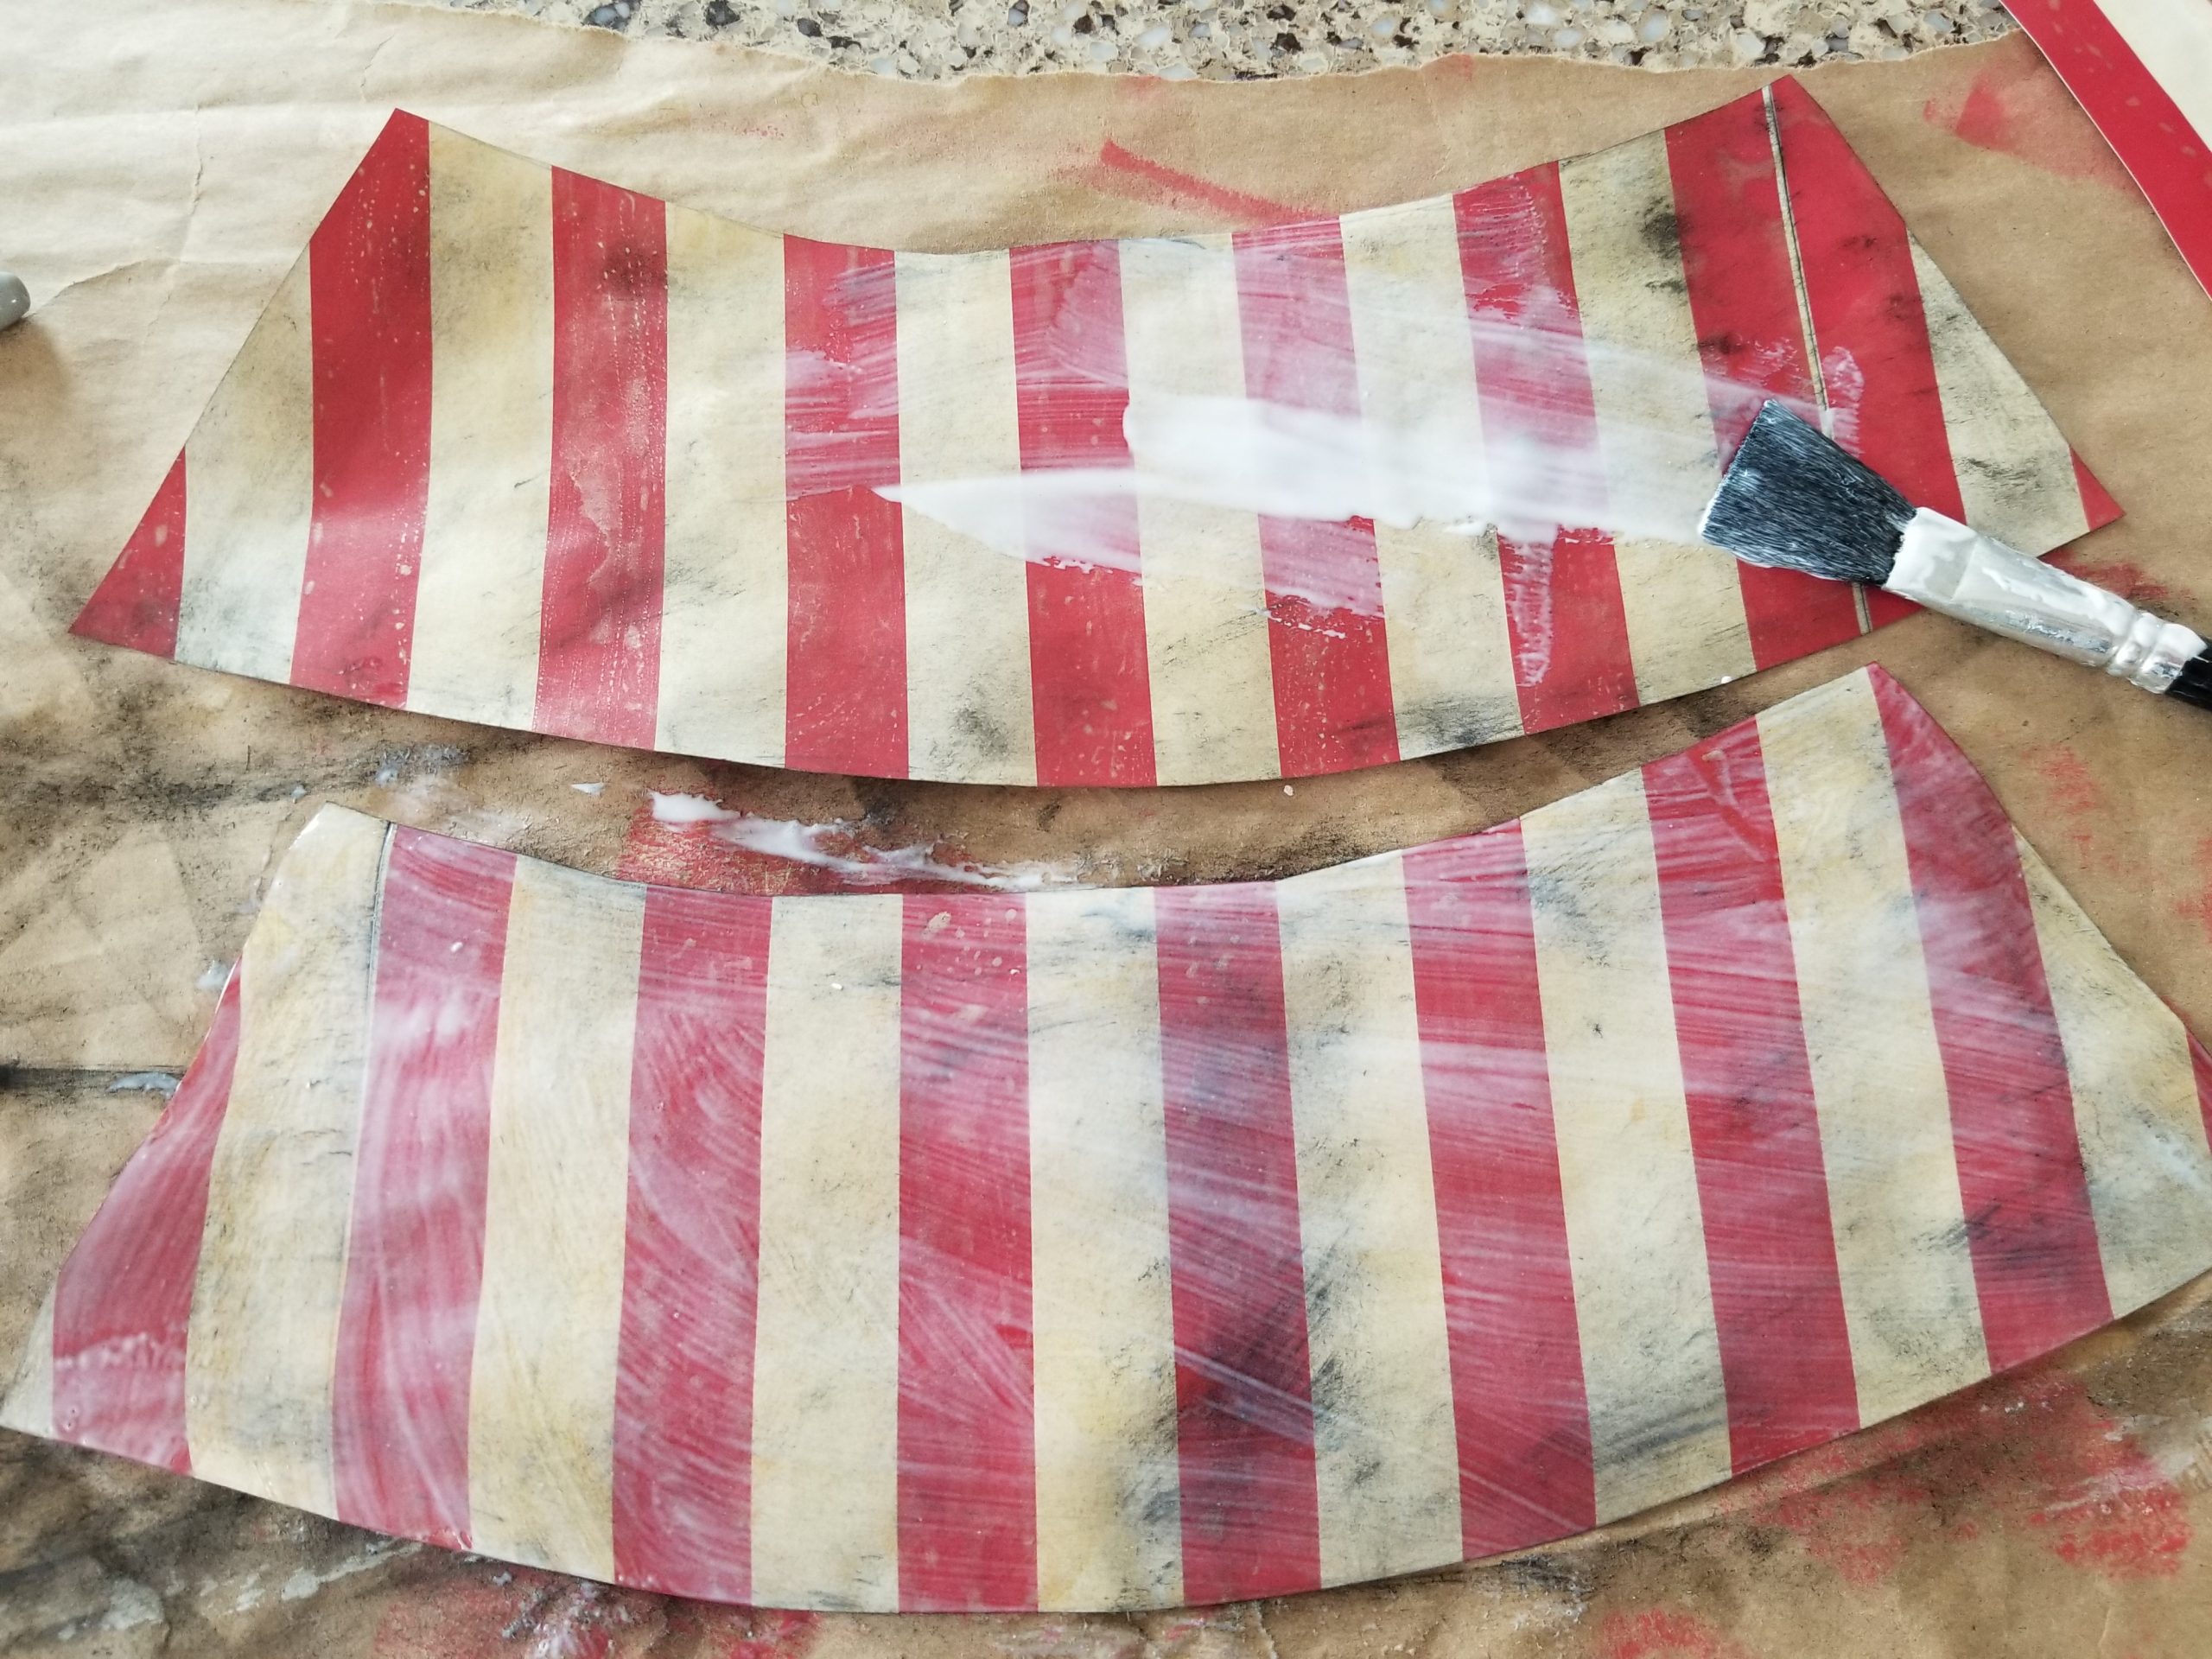
Take two pieces of 12″x 12″ scrapbook paper and tape them together with the stripes running in the same direction. (See picture) Repeat with remaining sheets until you have 4 pages of taped paper, each measuring 24″x 12″.
Paint the 24′ x 12″ scrapbook paper using antiquing paint or watered down yellow paint to give it a yellowed appearance. Allow to dry completely. Add dark aging to the yellowed paper by painting with a dry brush with black stencil paint until you achieve desired look.
How to Make the Little Tents
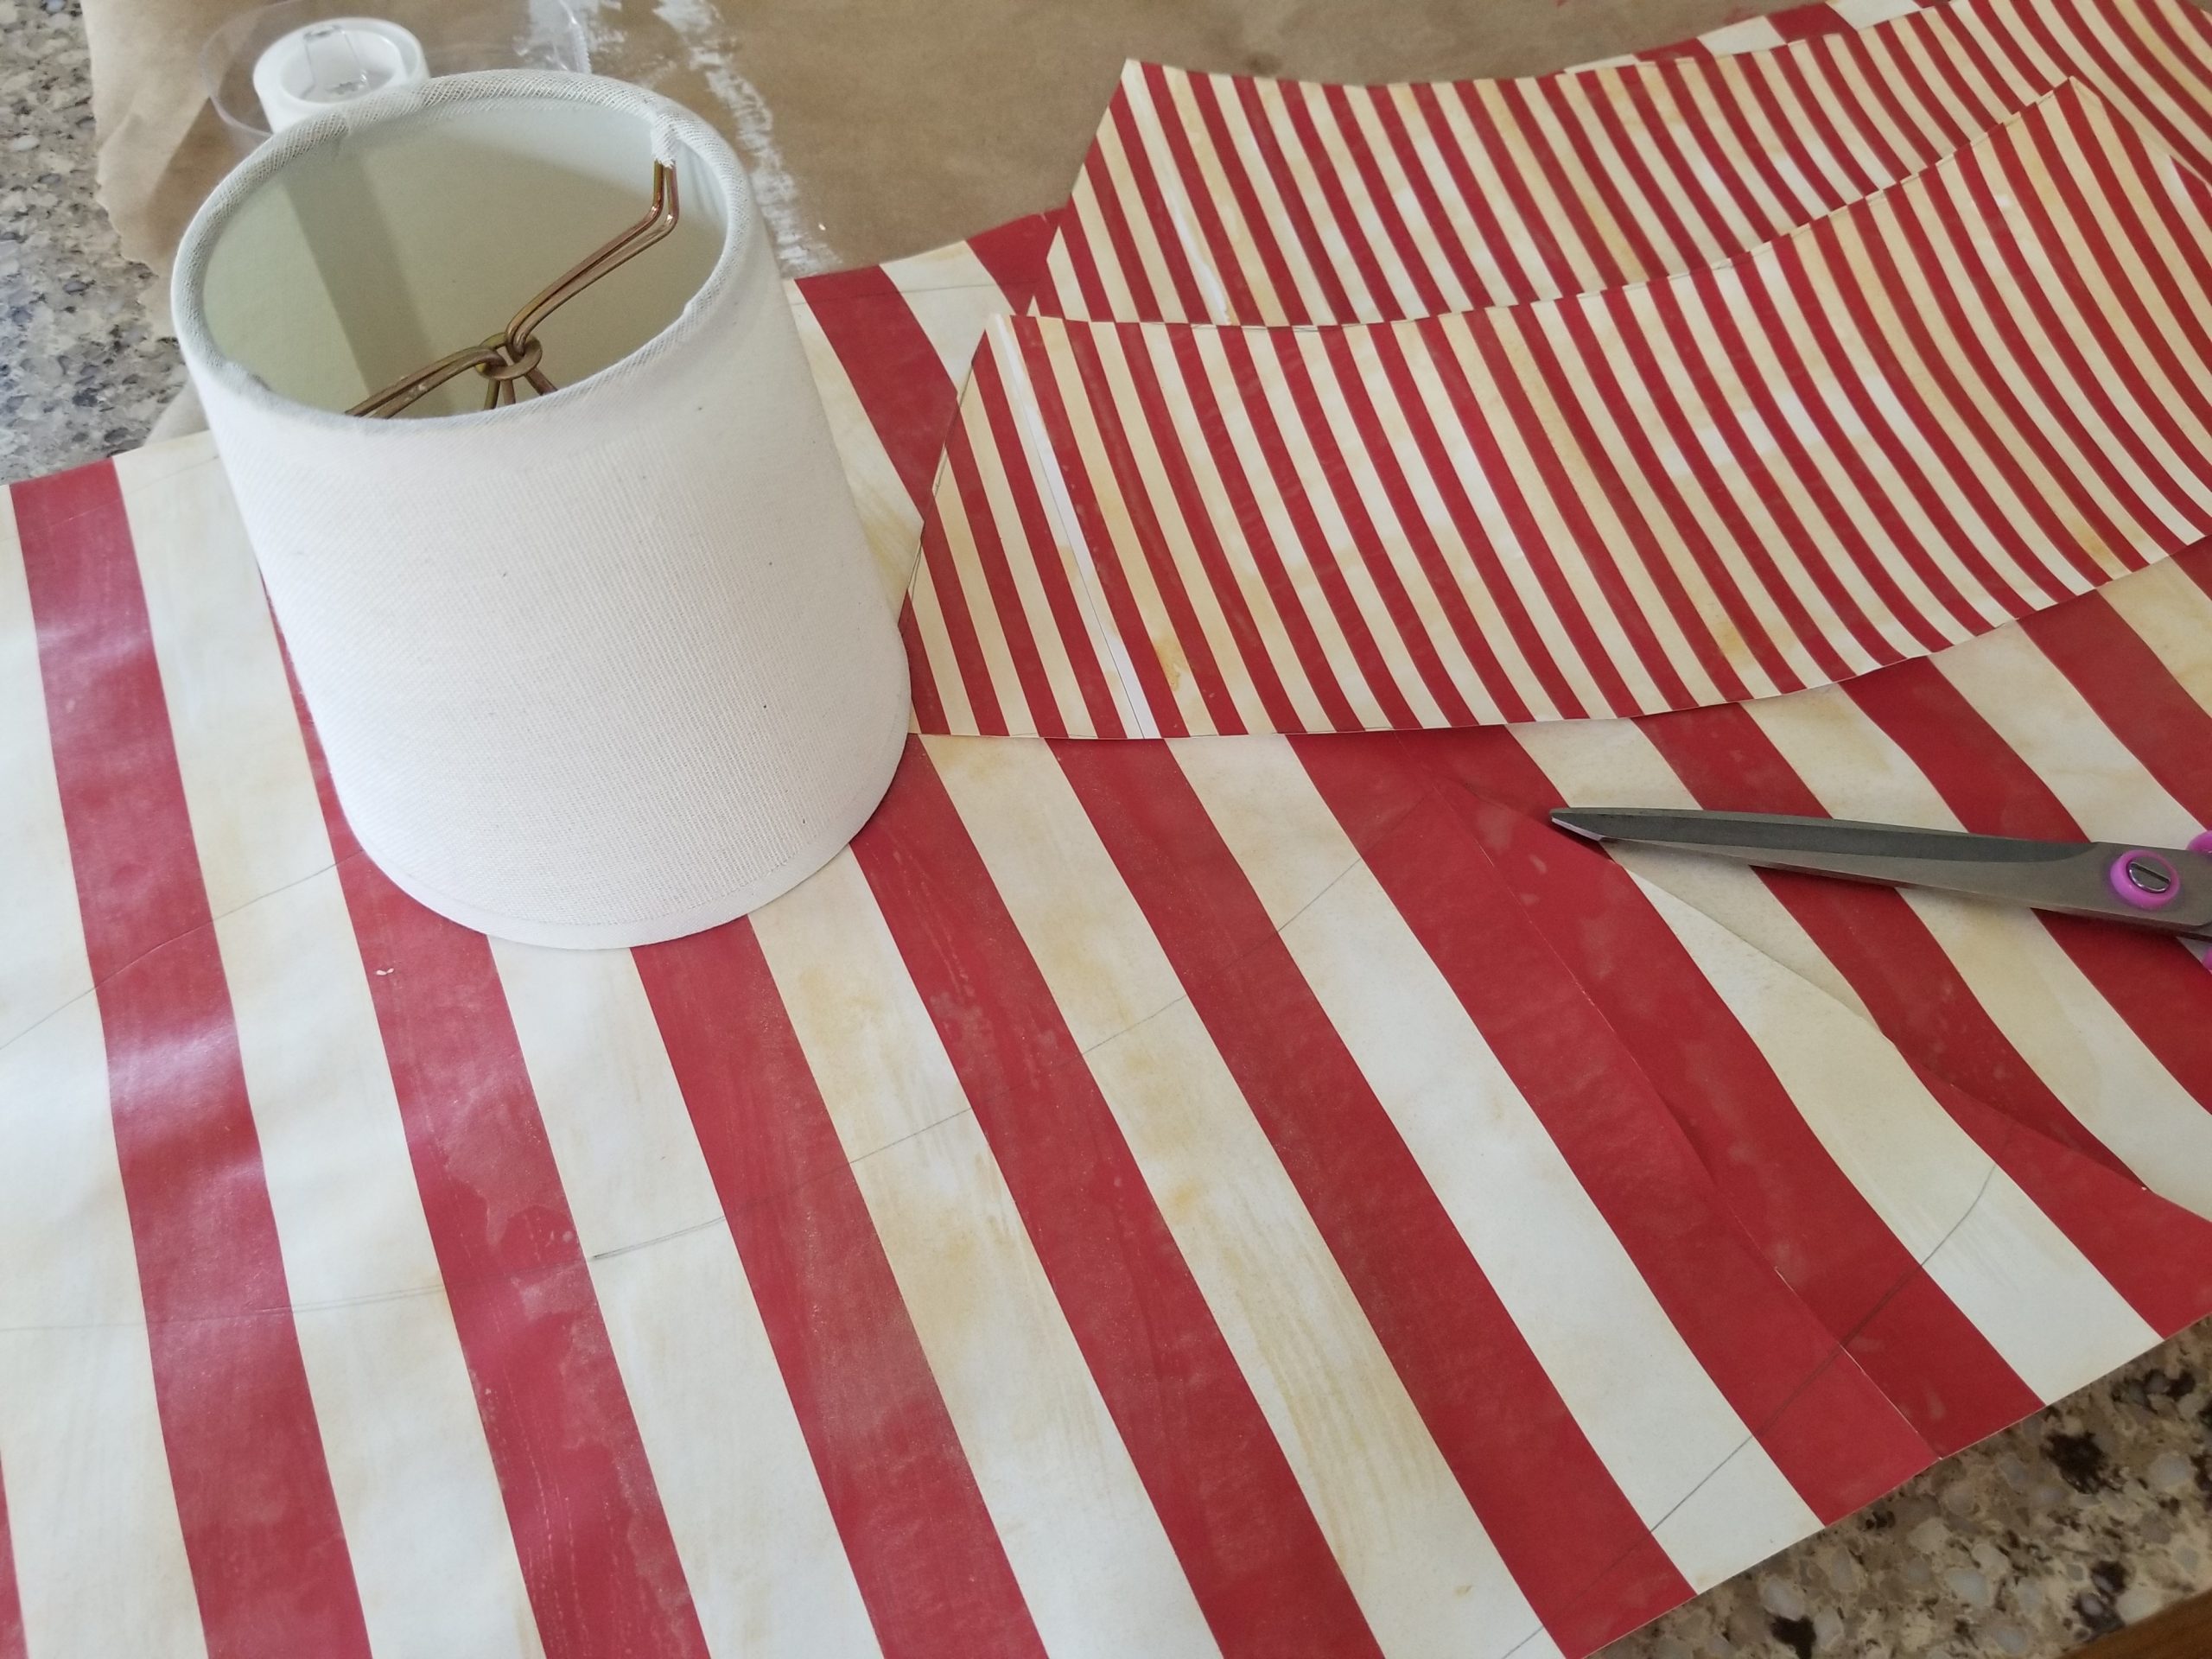
Remove one of the shades from the chandelier and use it as a template to trace the shape needed to cover it. Take one sheet of your aged 24″ x 12″ paper prepared in the step before and place the shade on the bottom edge of the 24″ side. Roll the shade to one side from a center point on the bottom edge of the paper. Trace both edges of the shade as it’s rolled with pencil. Roll shade to the other side marking as it’s rolled. Cut out the paper template, test fit the paper on the shade. Use this paper template to cut another shade from the other side of the sheet so each sheet of 24″x 12″ paper will give you 2 shades. Repeat until you have 6 shade covers total. Seal covers with a coat of Modge Podge and let dry completely. Tape or glue the shade covers so that they slip easily over the shade.
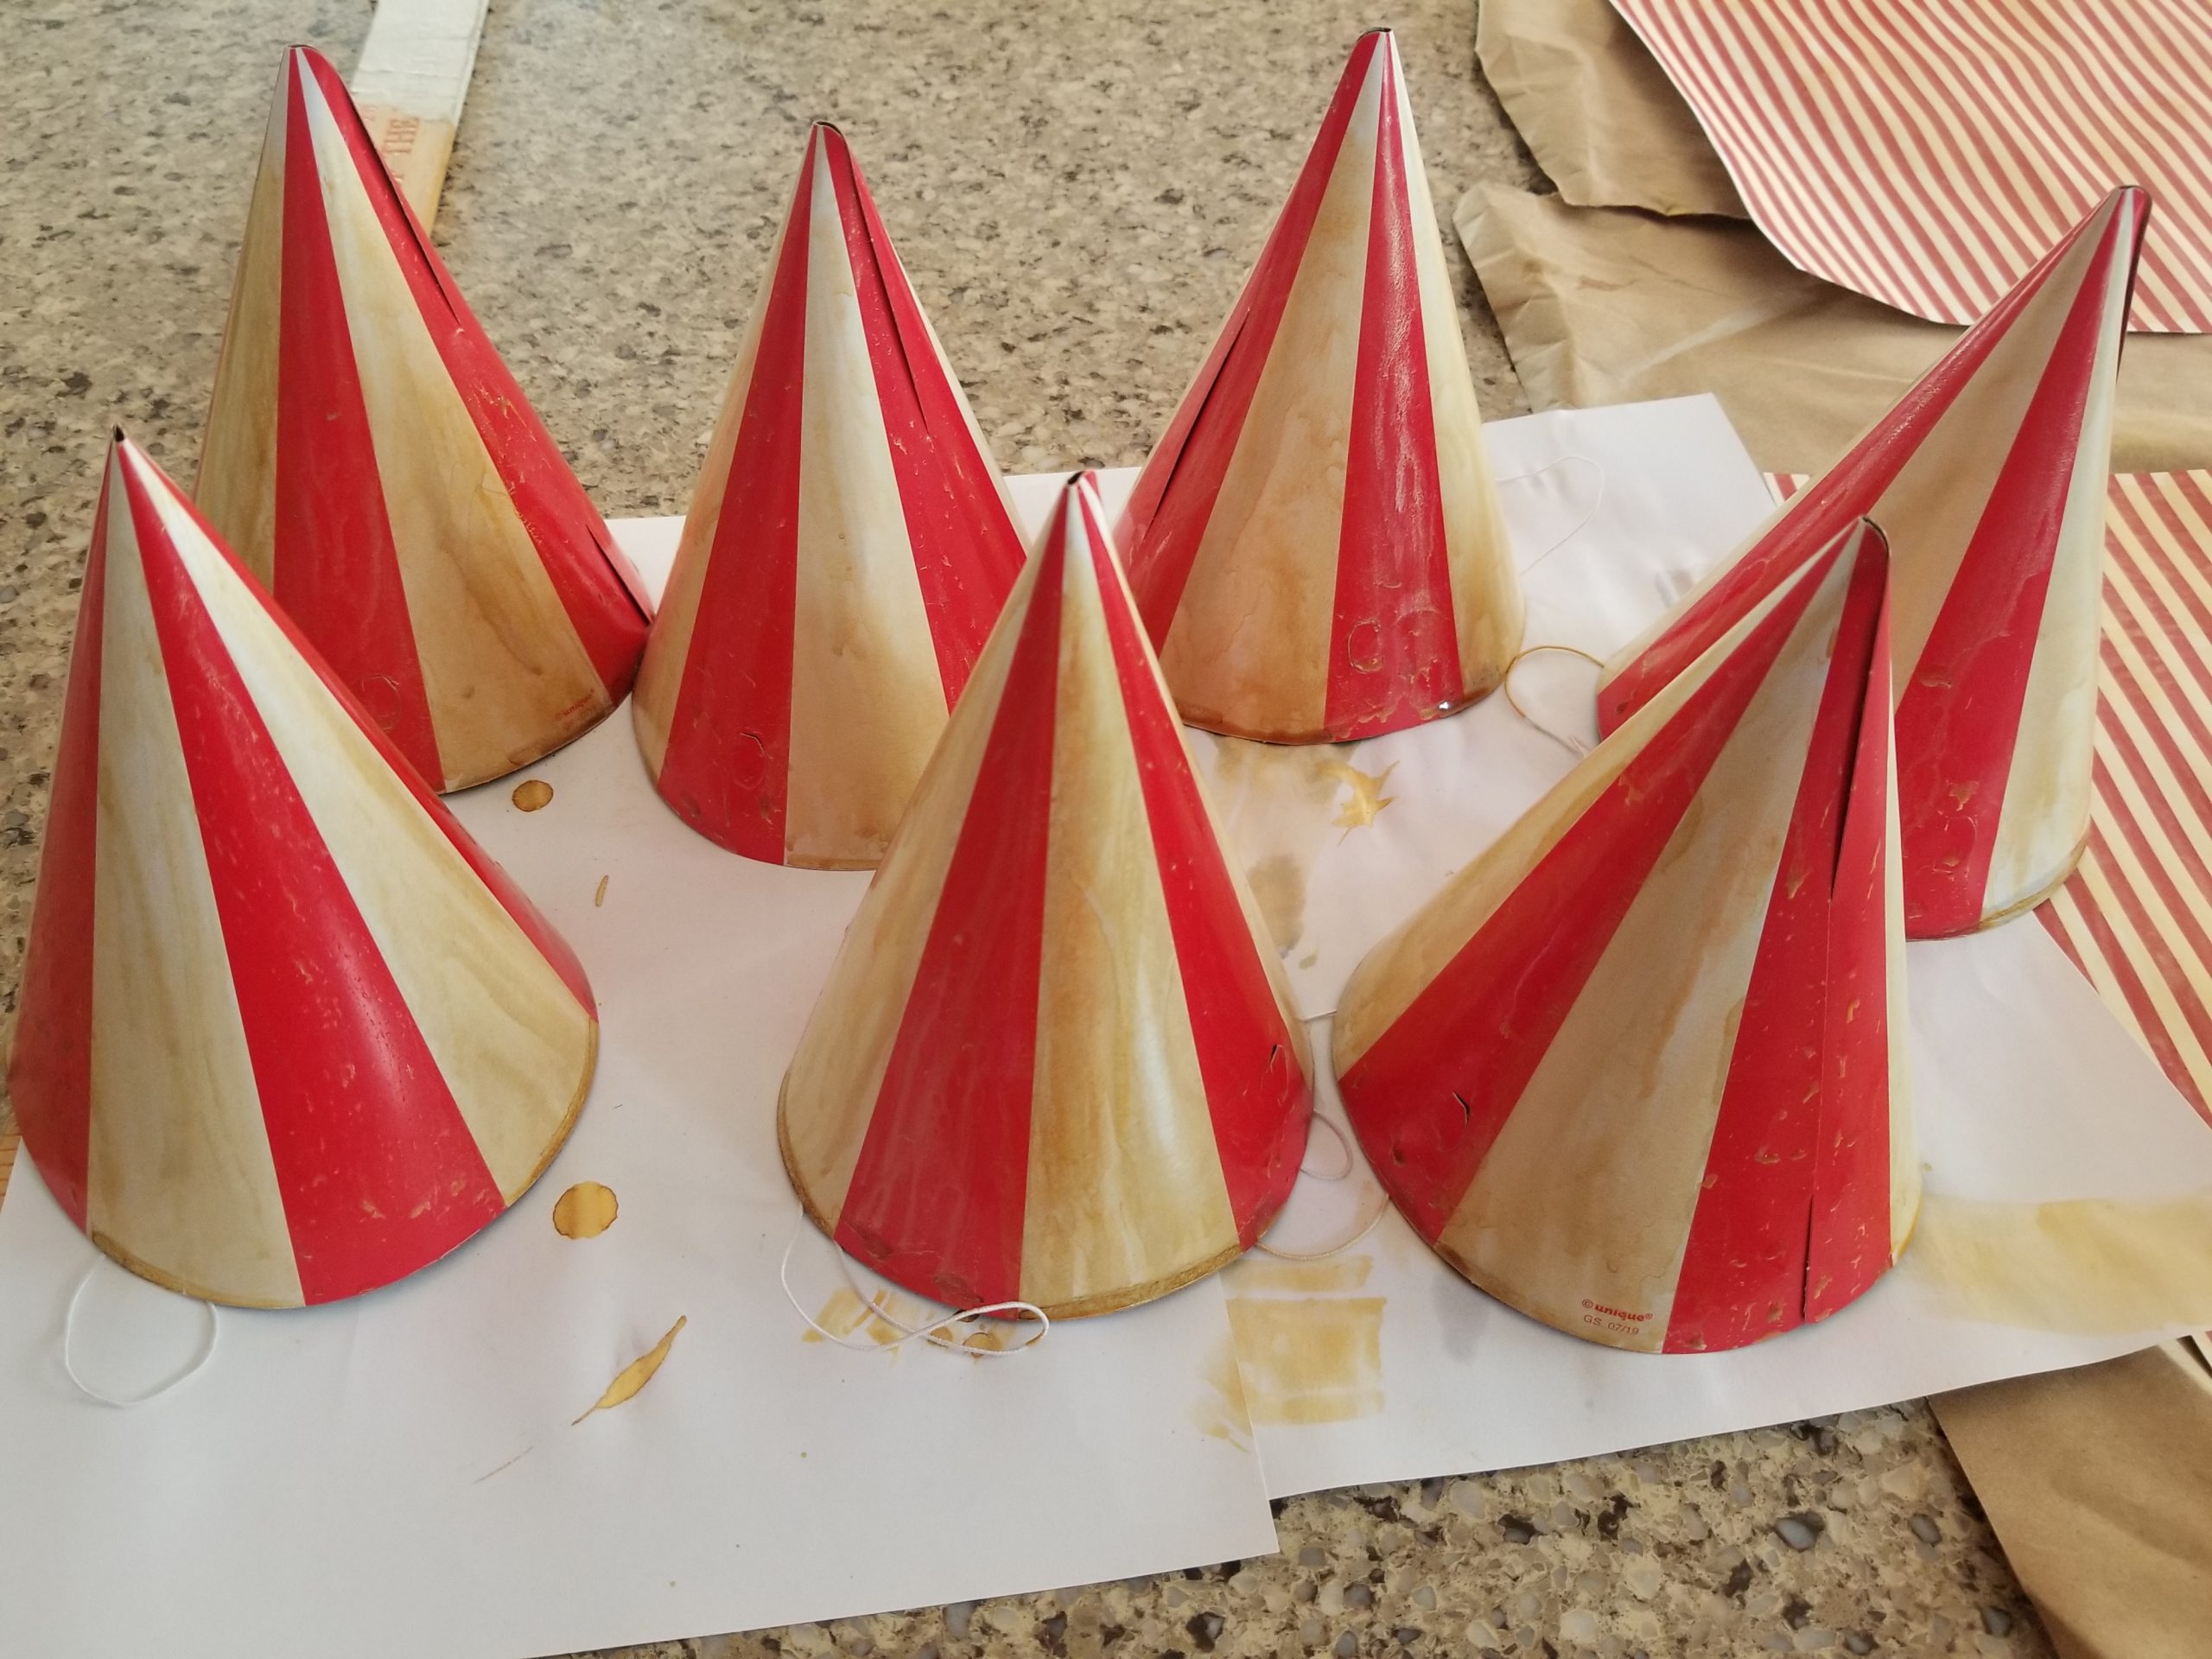
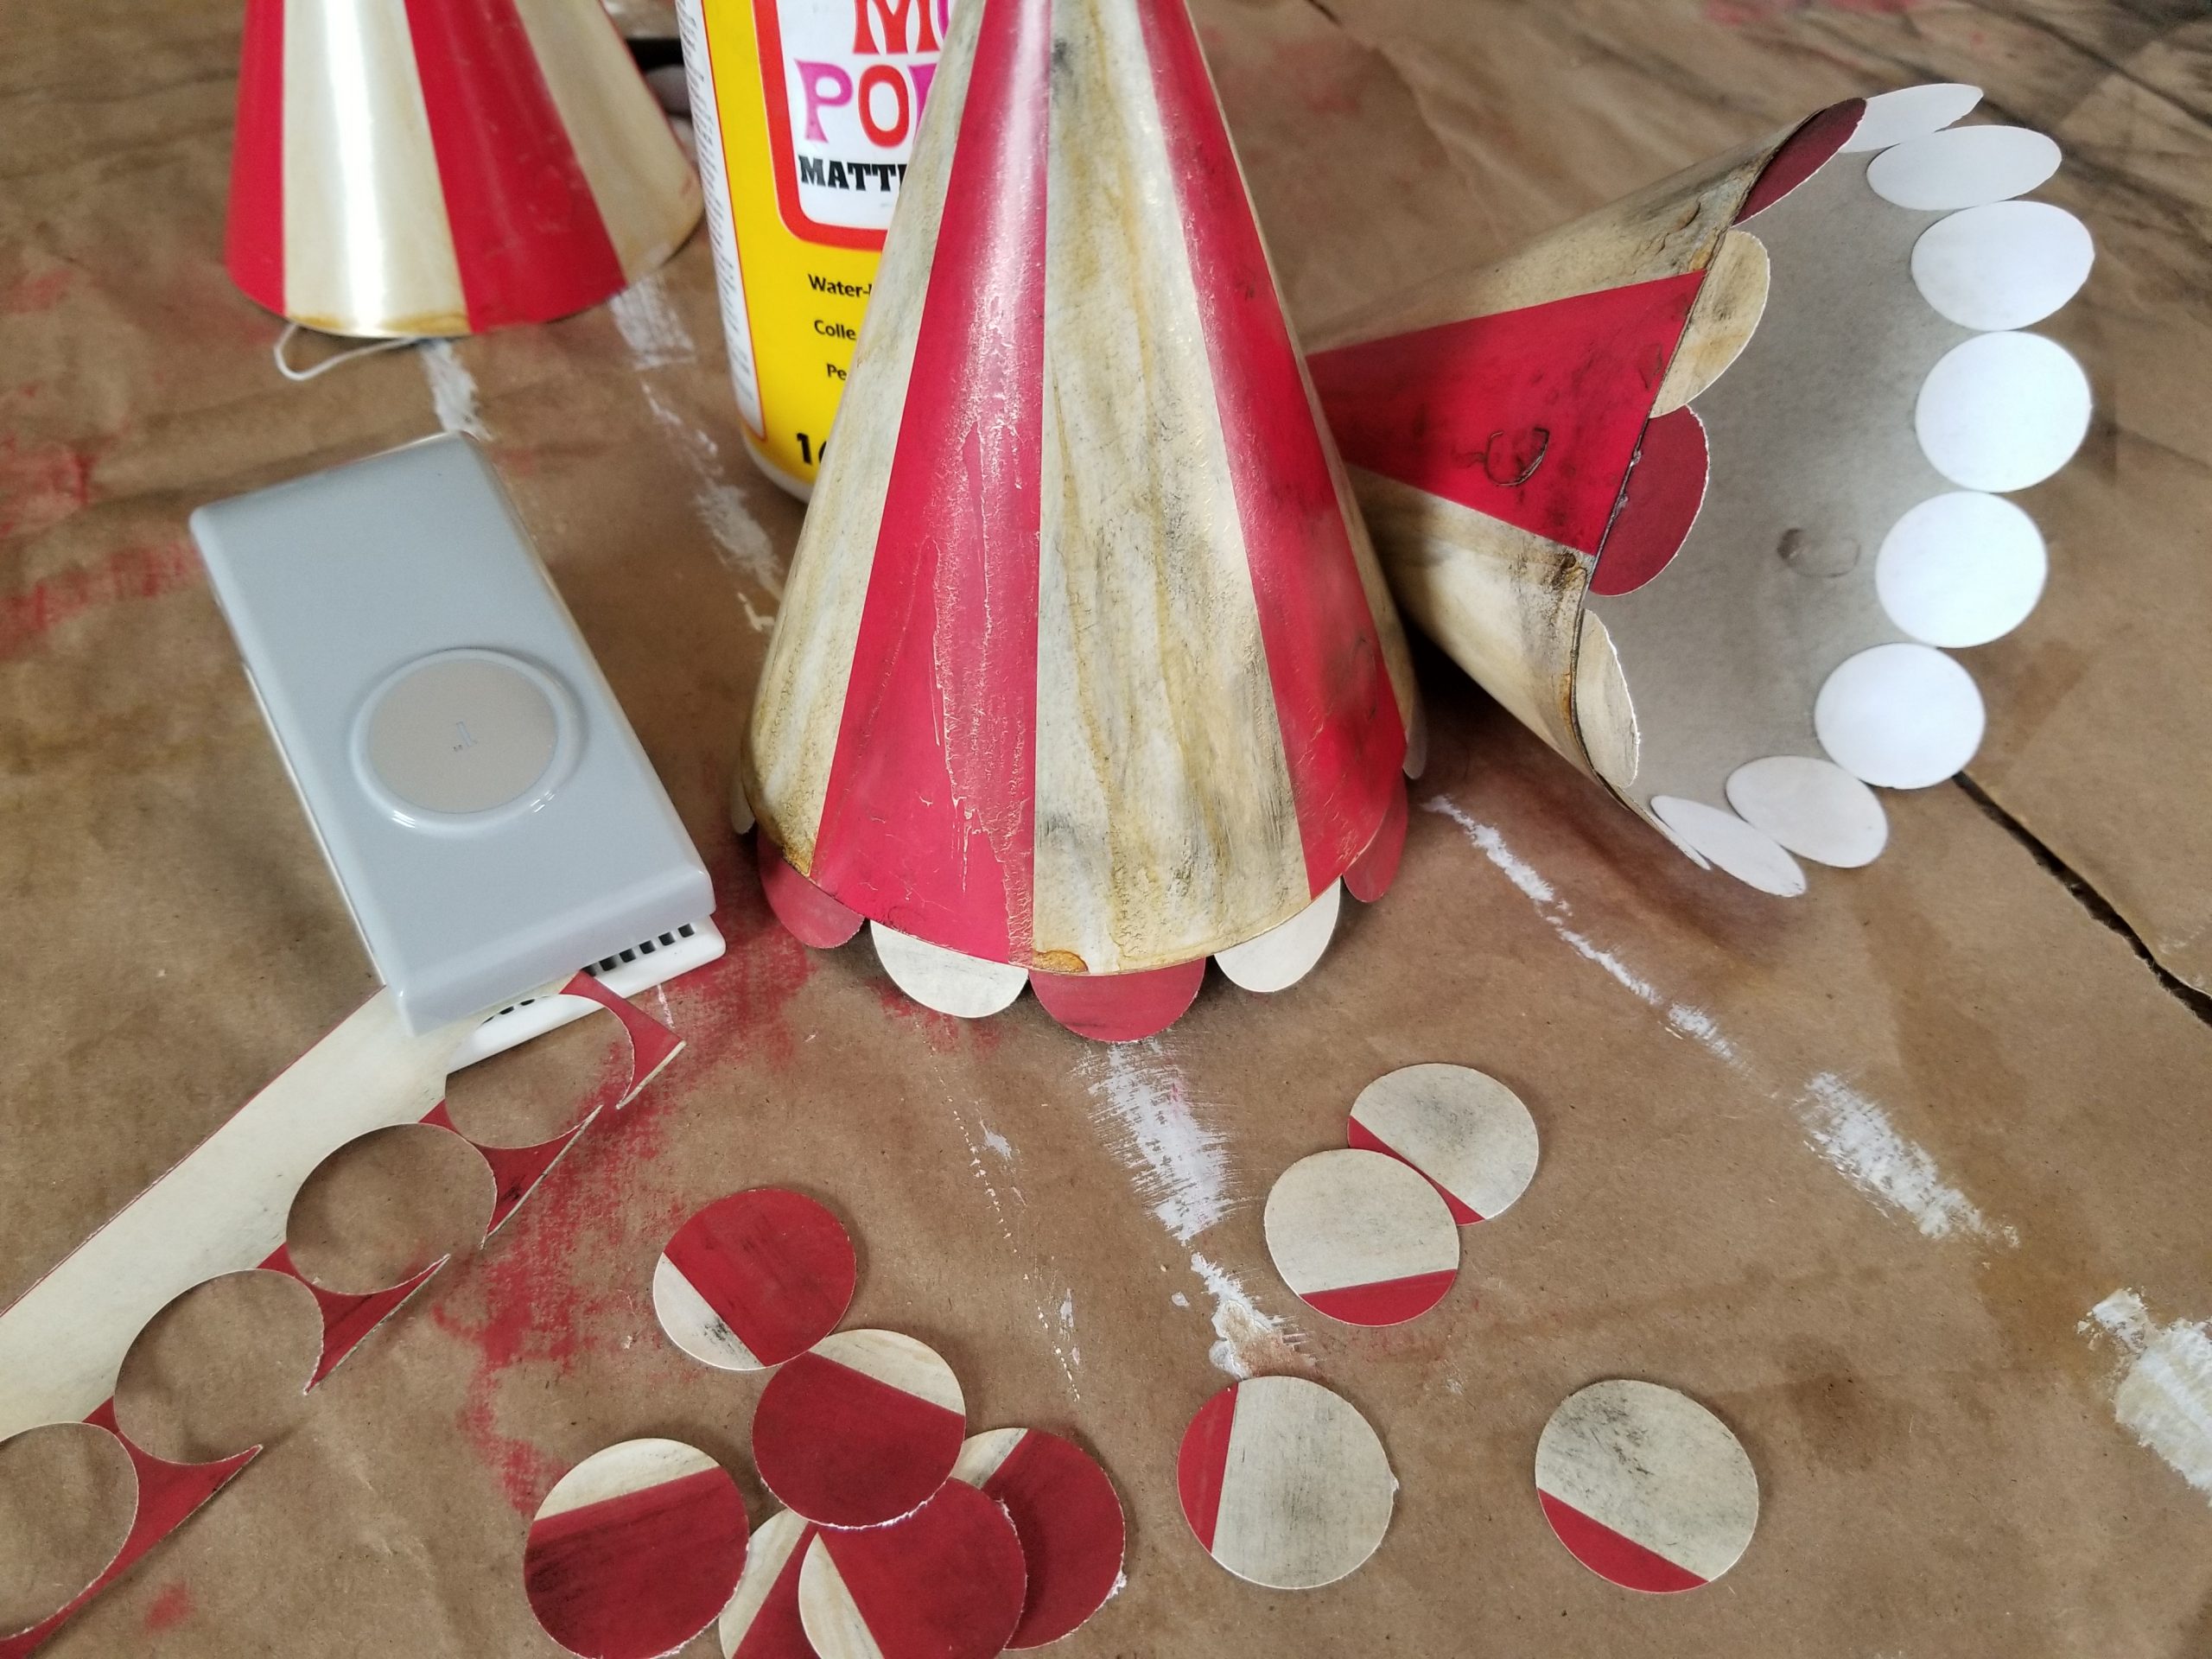
Just like we aged the paper to give it a vintage look, do the same with the party hats. First coat it with a diluted yellow and then the dry brush of black stencil paint and then seal with Modge Podge. Take scrap paper and punch out 1 inch circles to create the scallops of the tent tops. Glue circles onto the bottom of the hat. Seal with Modge Podge and let dry. These hats came with small flags that I sprayed black and then glued to the top. But you can also make the flags with a toothpick and a triangle cut out of black construction paper.
How to Make the Big Top Tent
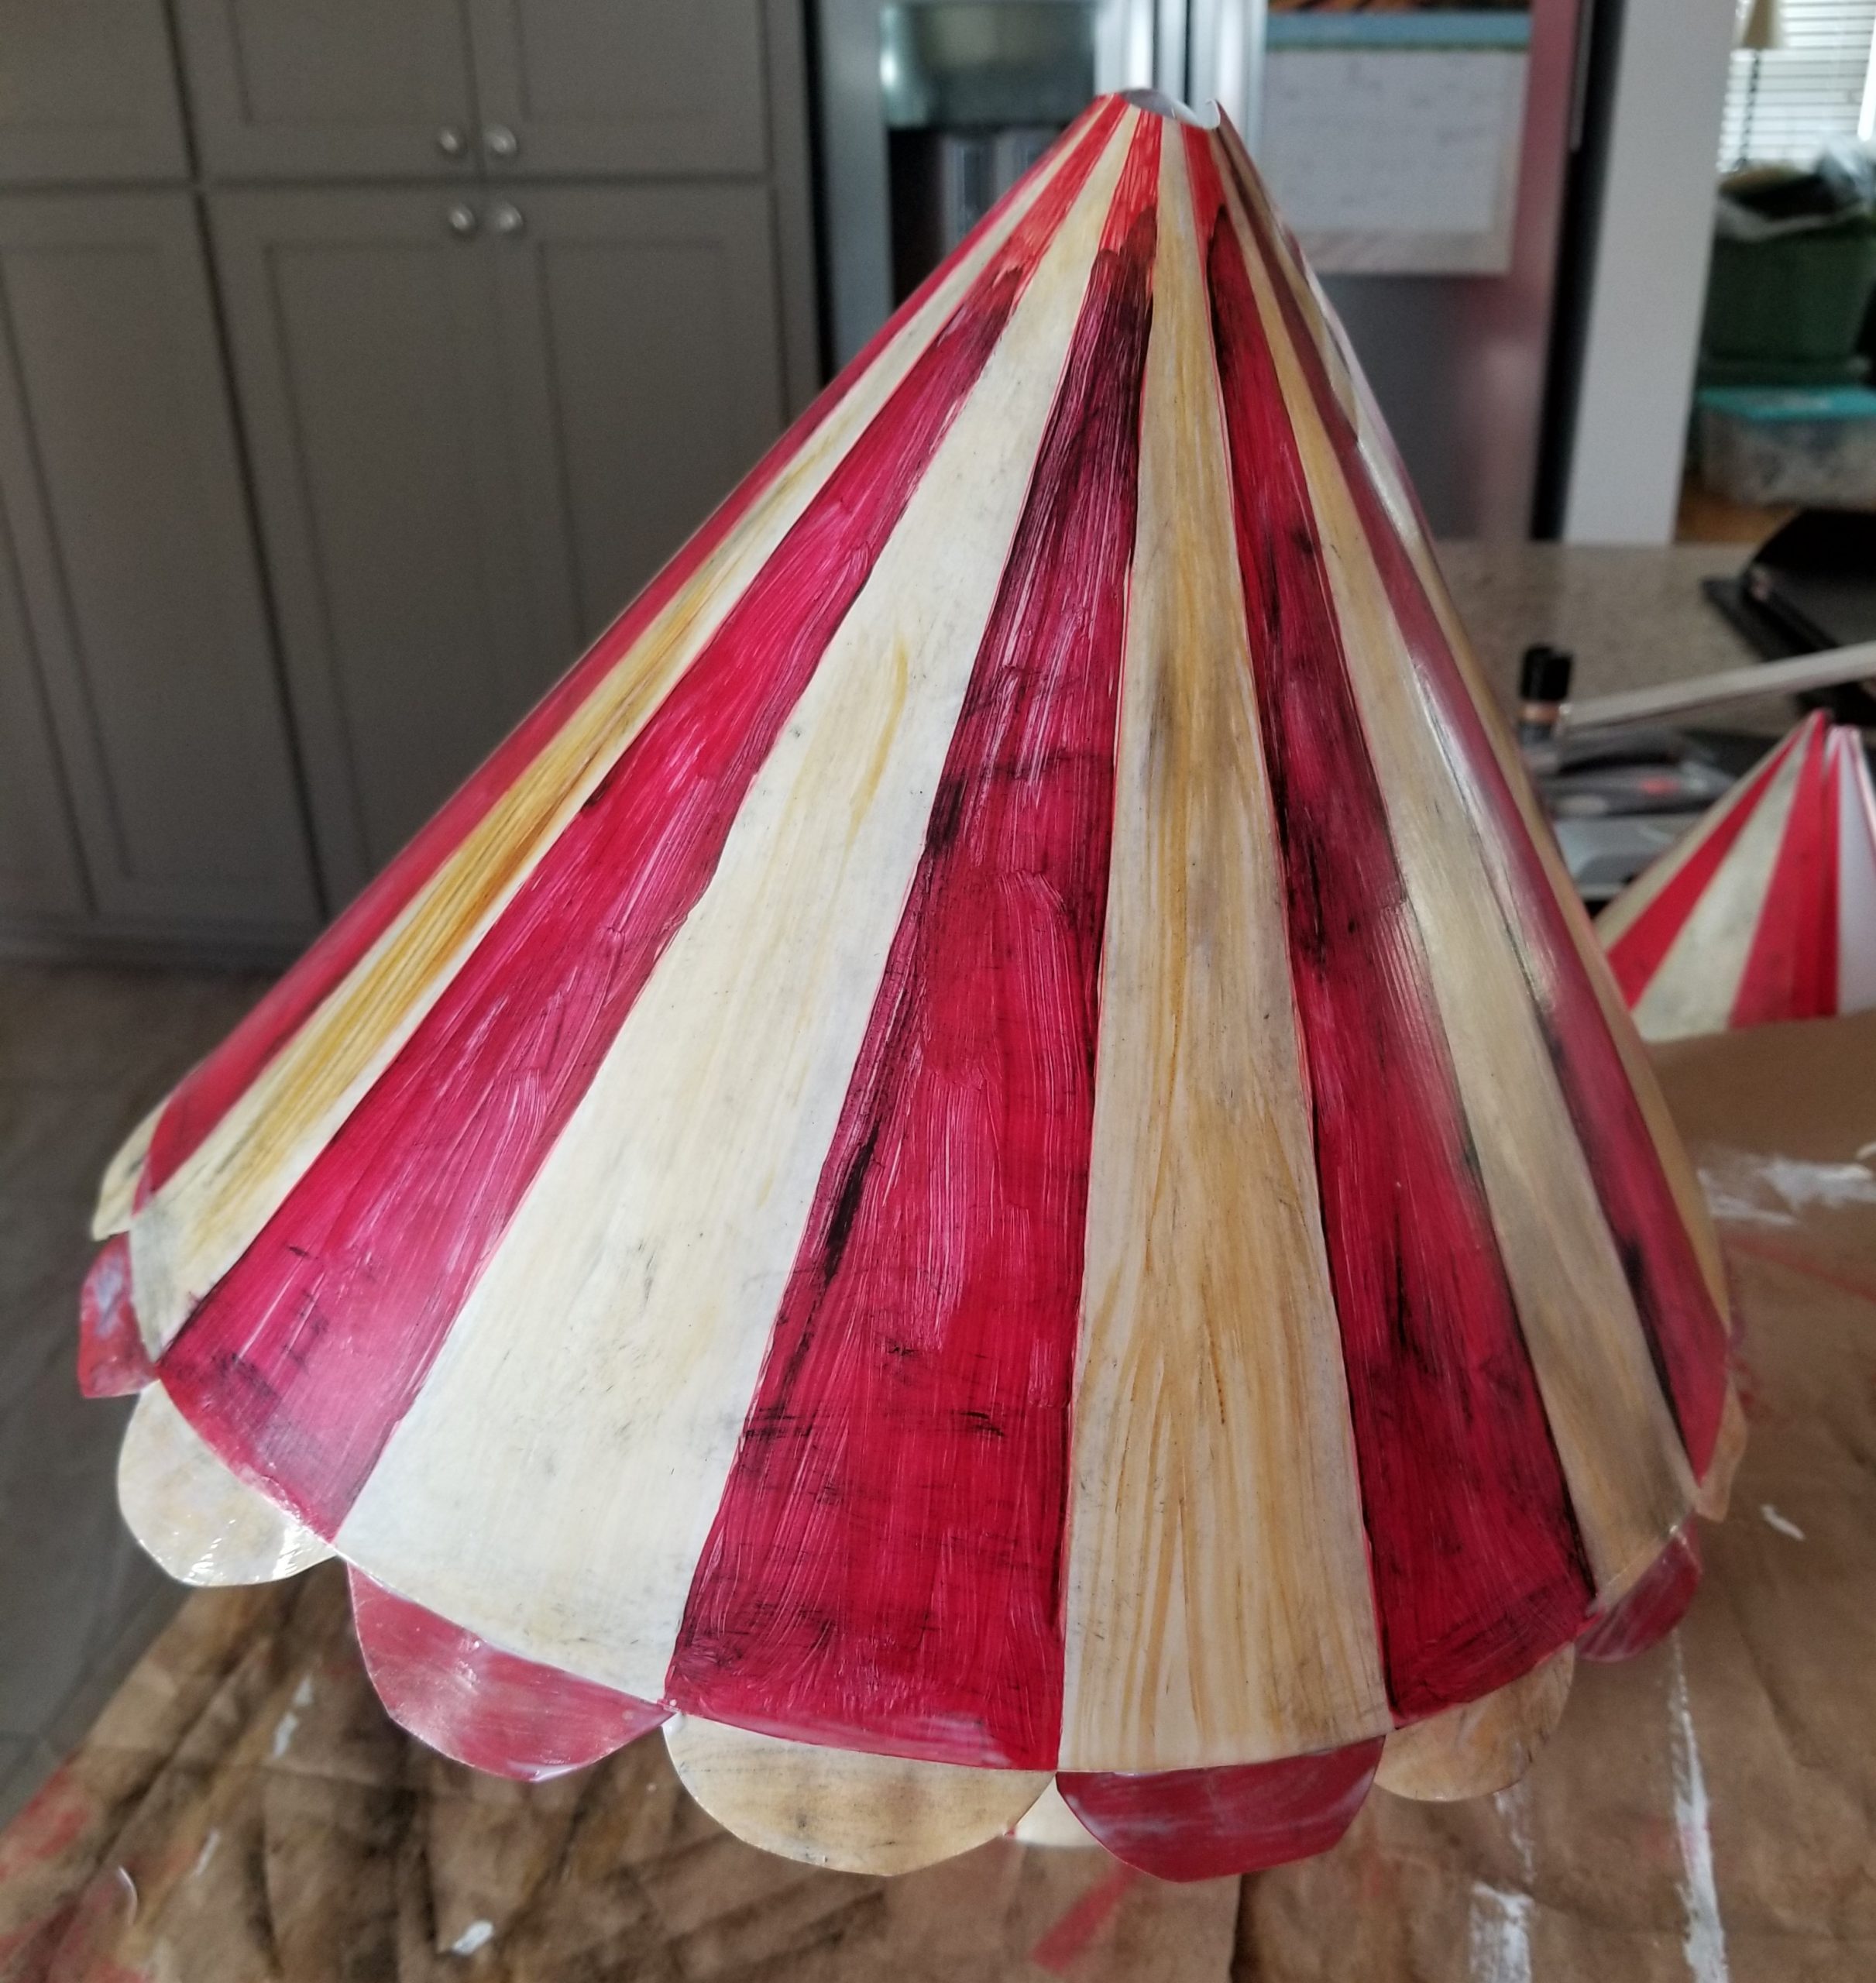
Tent Bottom (cylinder,): Glue the last of the 24″ x 12″ piece of aged scrapbook paper prepared in the first step to one piece of poster board and cut it out to give you a 24″ x 12″ rectangle of poster board covered with aged paper. Seal with Modge Podge and let dry completely. Once dry, shape the poster board into a cylinder by rolling it up and securing it with a few rubber bands. Let the poster board sit while you work on the cone for the top of the tent to allow the shape to set.
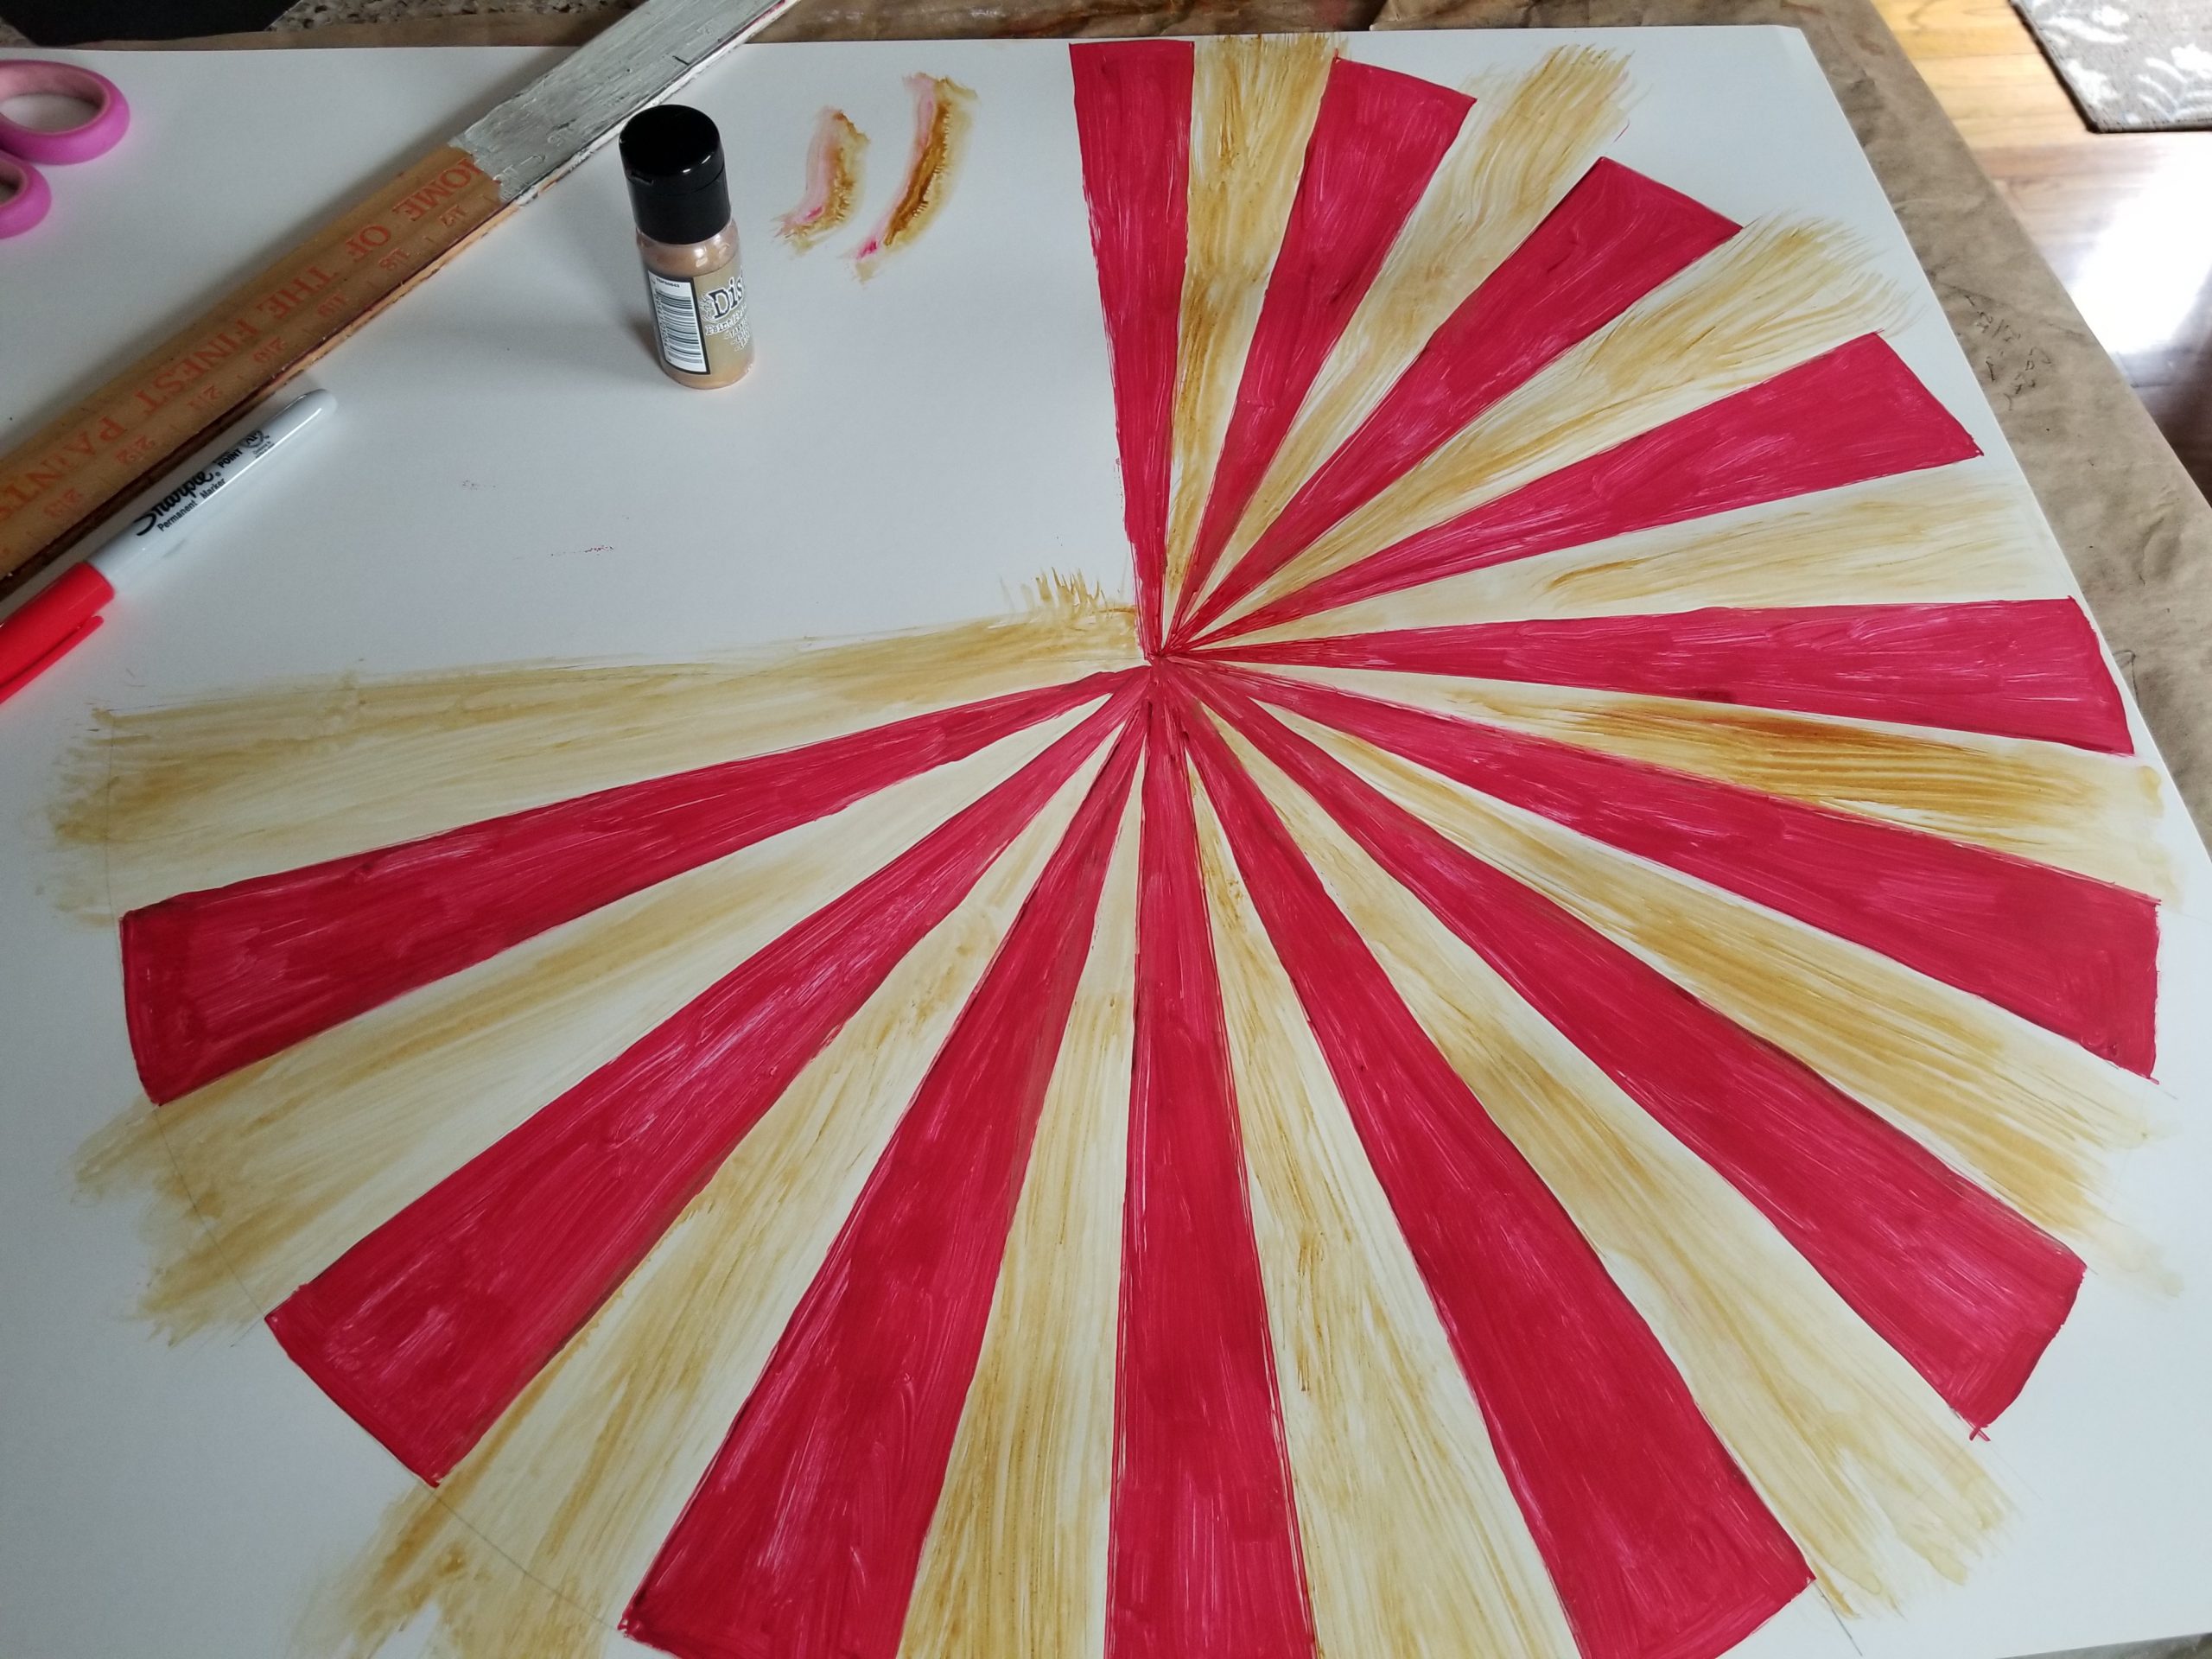
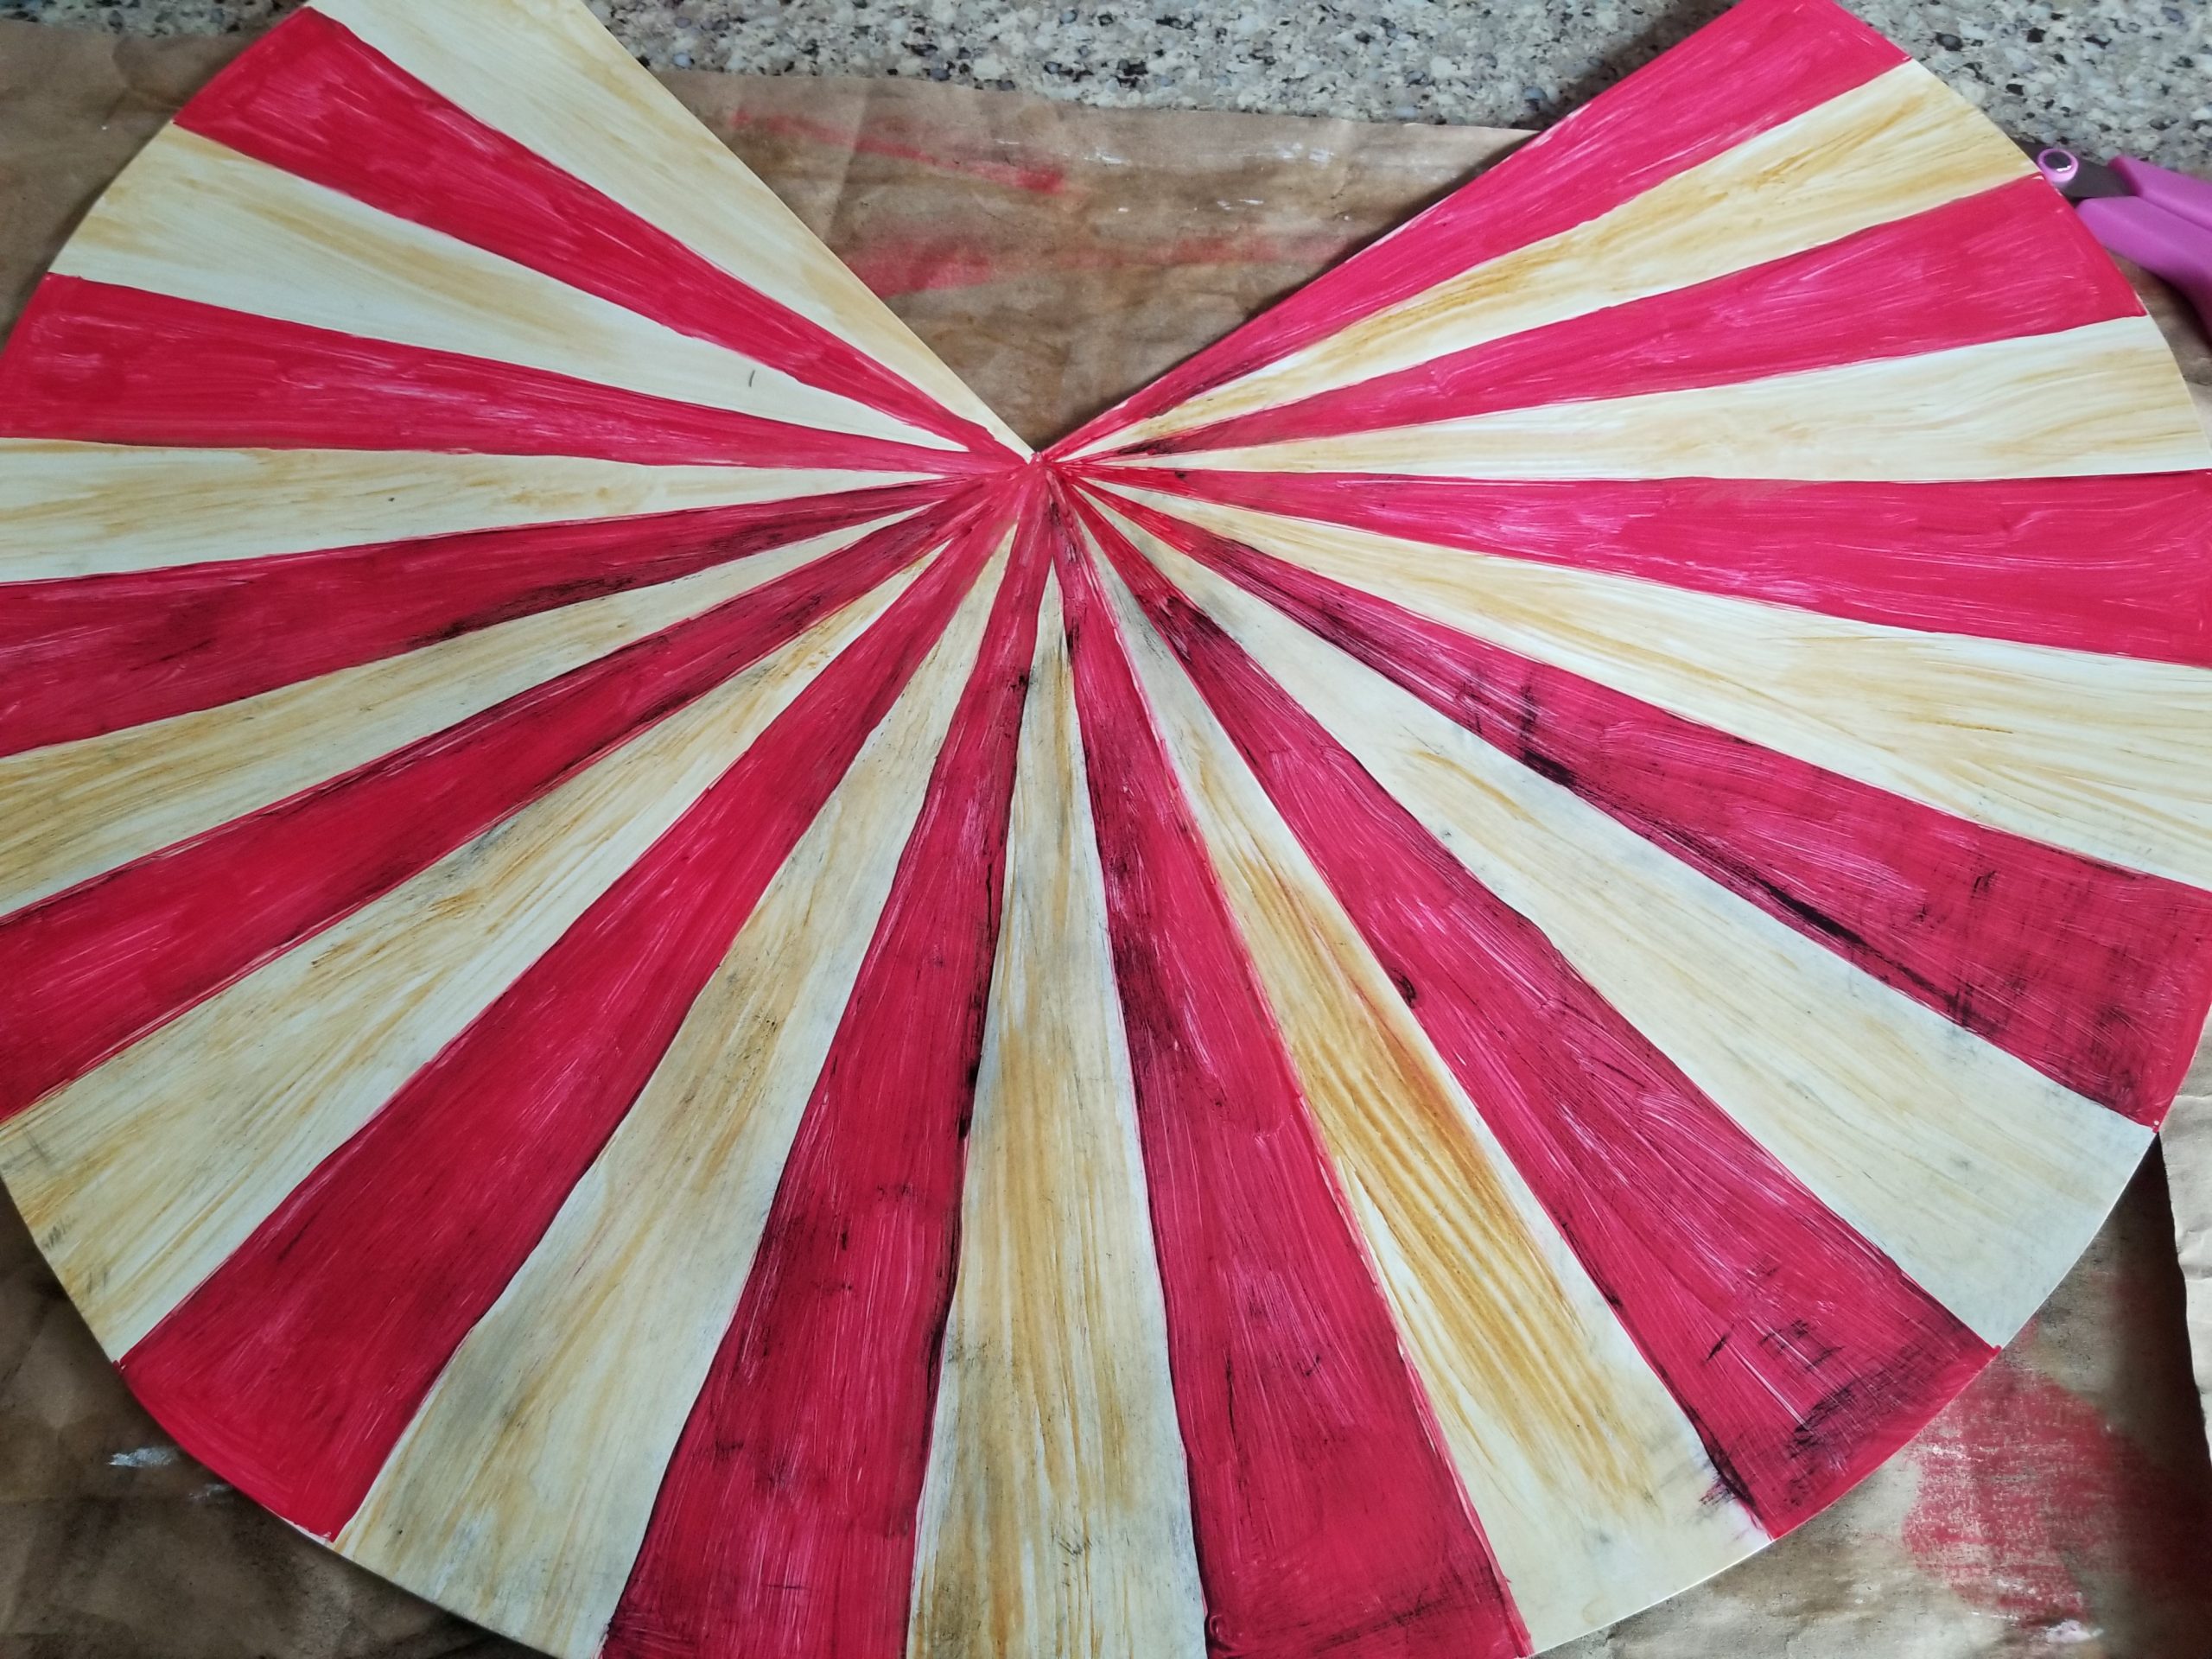
Tent Top (cone): On the other piece of poster board, draw a 22″ circle. Divide up the circle into 32 slices with a pencil. Paint every other slice red about 3/4 around the circle. Age the circle by applying the yellow and black paint as described above. Modge Podge to seal. Cut out the circle and then cut out the unpainted wedge of the circle and discard it. Cut out a 1- 1.5 inch circle from the center of the cone to make room for the chandelier chain. Set aside.
Sizing the cylinder: Remove the rubber bands and unroll your cylinder and place it on your chandelier to mark the size needed for the base of your tent. Trim if necessary. Once the size is right, place Velro tape on the edges to close the cylinder. Place the cylinder on the center section of the chandelier.
Sizing the Cone: Now it’s time to size the big top cone to your cylinder. Wrap the cone around the chandelier chain and adjust the diameter of the cone by wrapping the edges tighter until the cone sits nicely on the cylinder. Mark the overlap of the cone edges with a pencil and trim off excess of the 3/4 circle as needed. Place Velcro tape on the edges to close the cone.
Detail: Once your cone size is set and the Velcro been added to the tent top, add tent scallops to the the tent top by cutting out ~ 1.5 inch semicircles from scrap paper and glue to the bottom of the cone. Seal with Modge Podge and let dry.
Once dry, place tent top cone on top of the center tent cylinder. Assemble smaller tents by placing the tent sleeve over the lamp shades and top with the party hat topper.