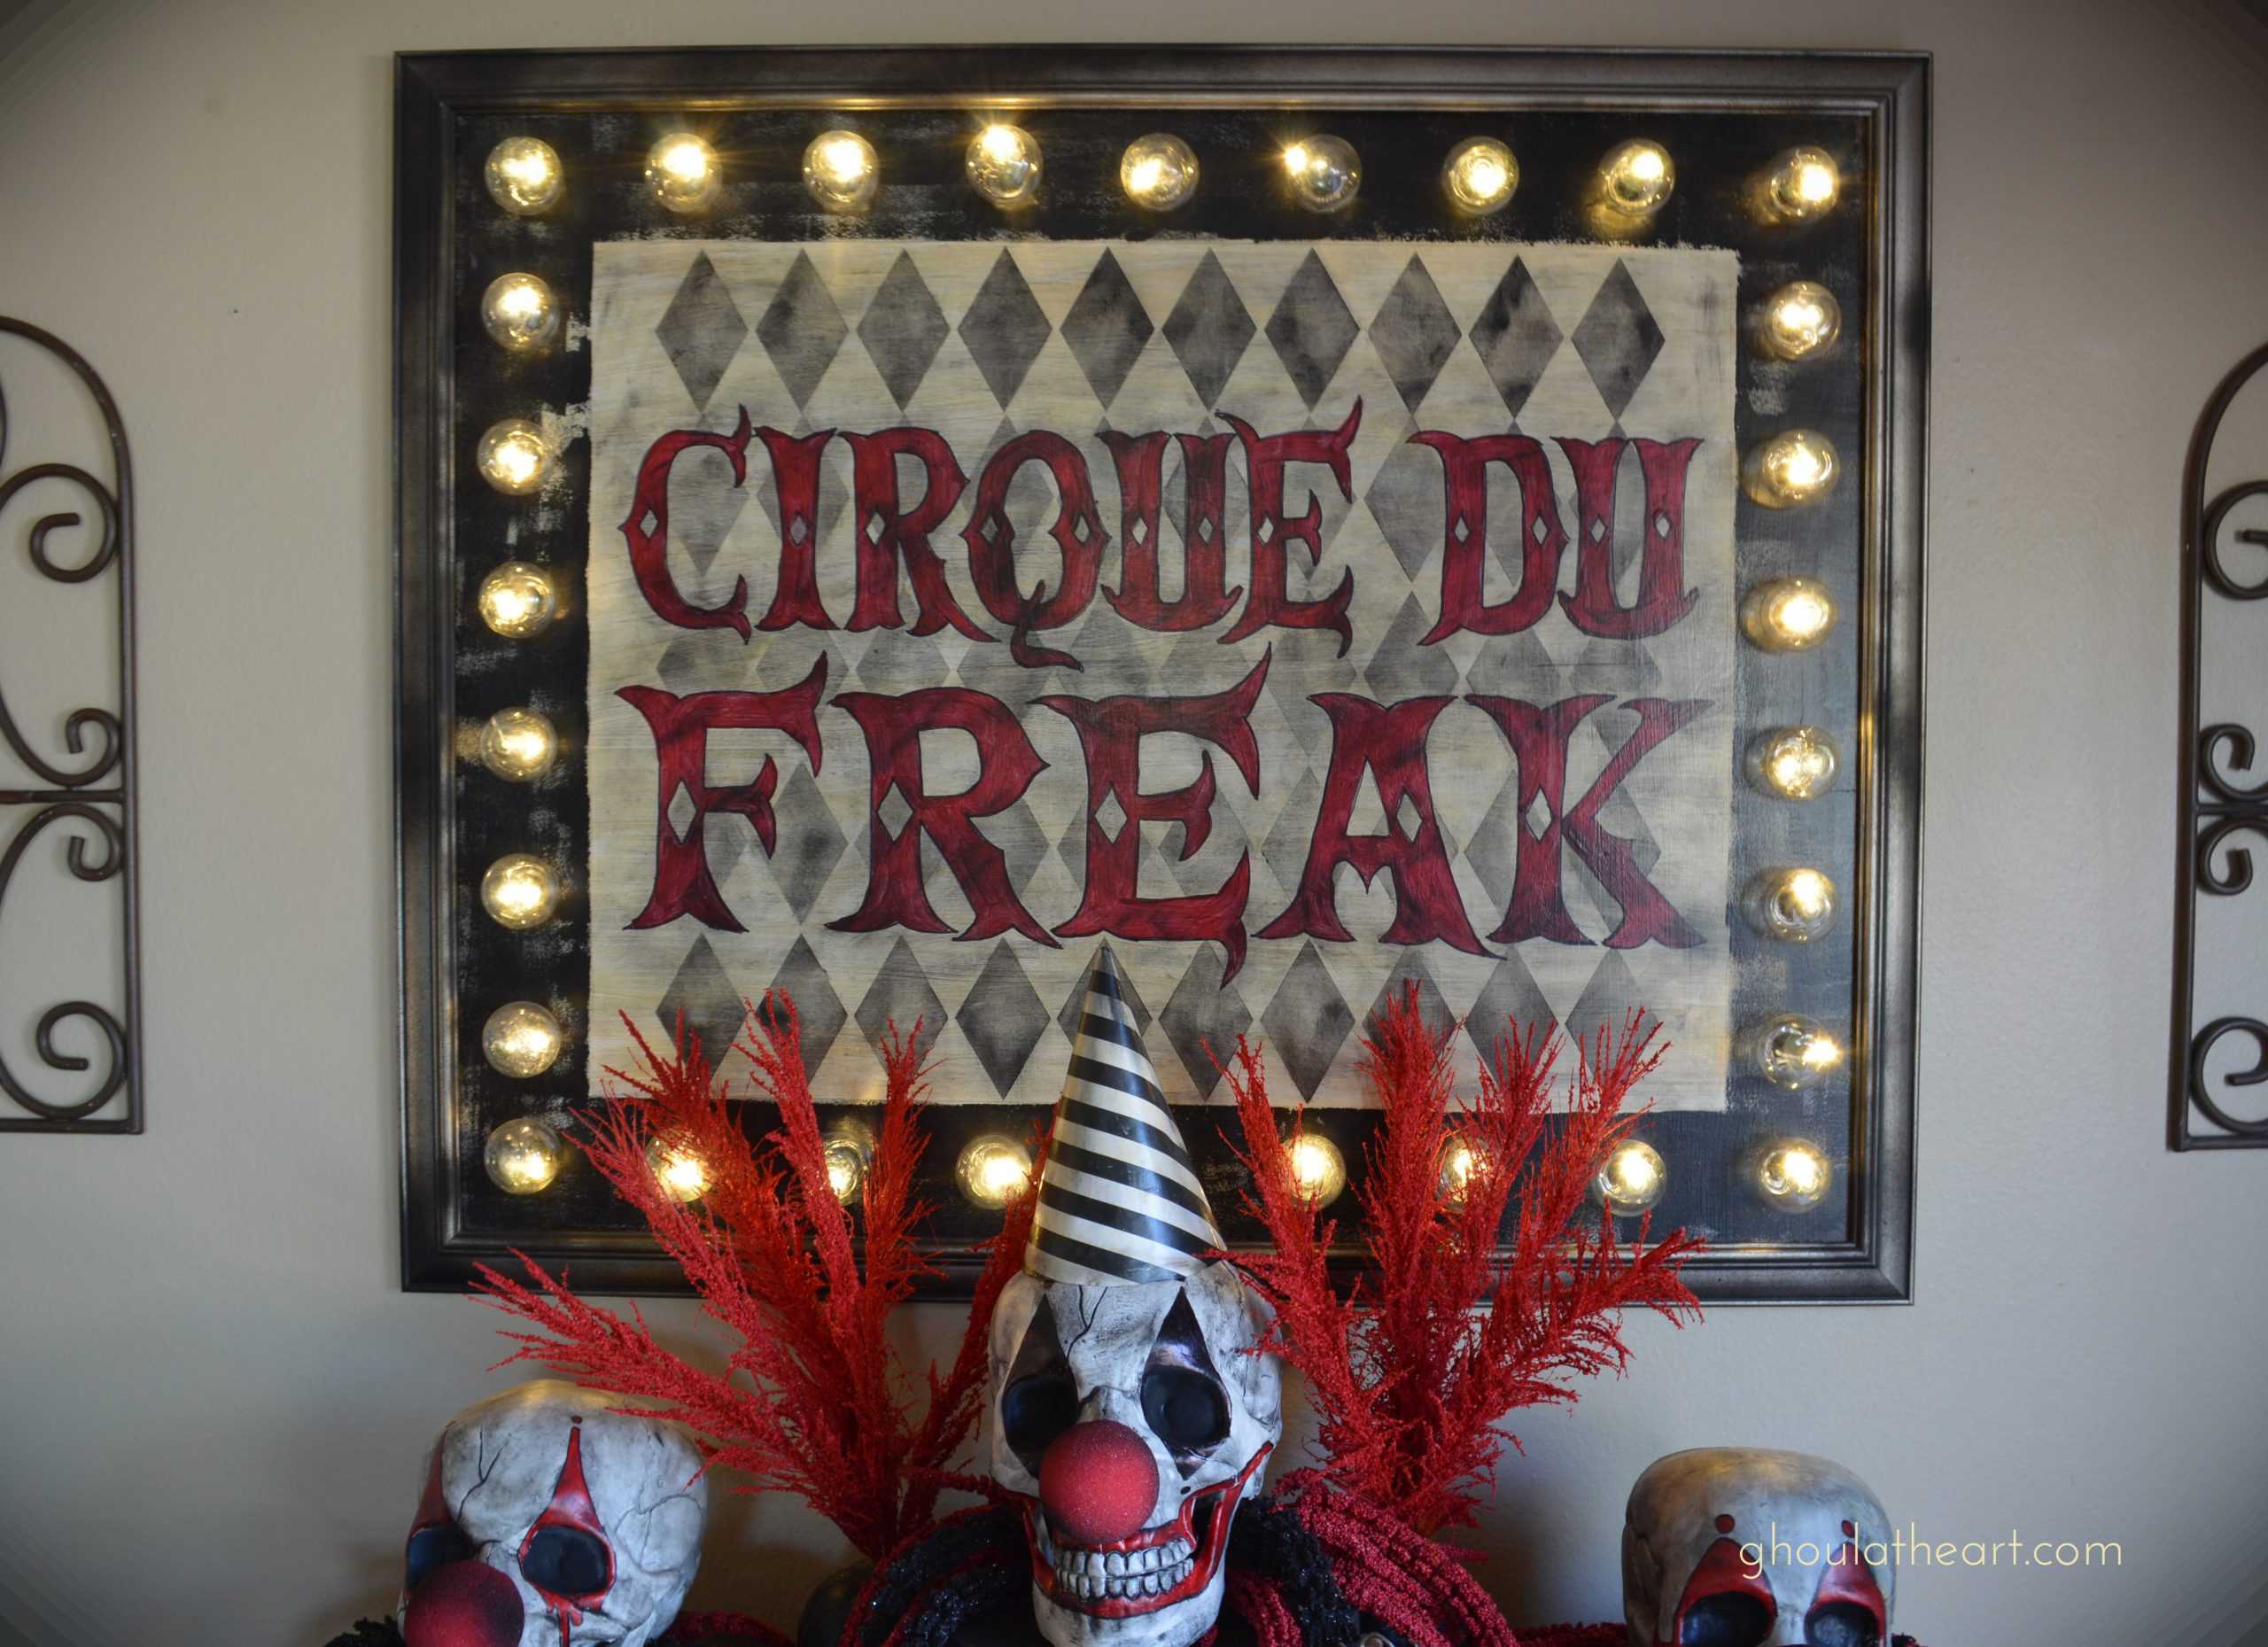
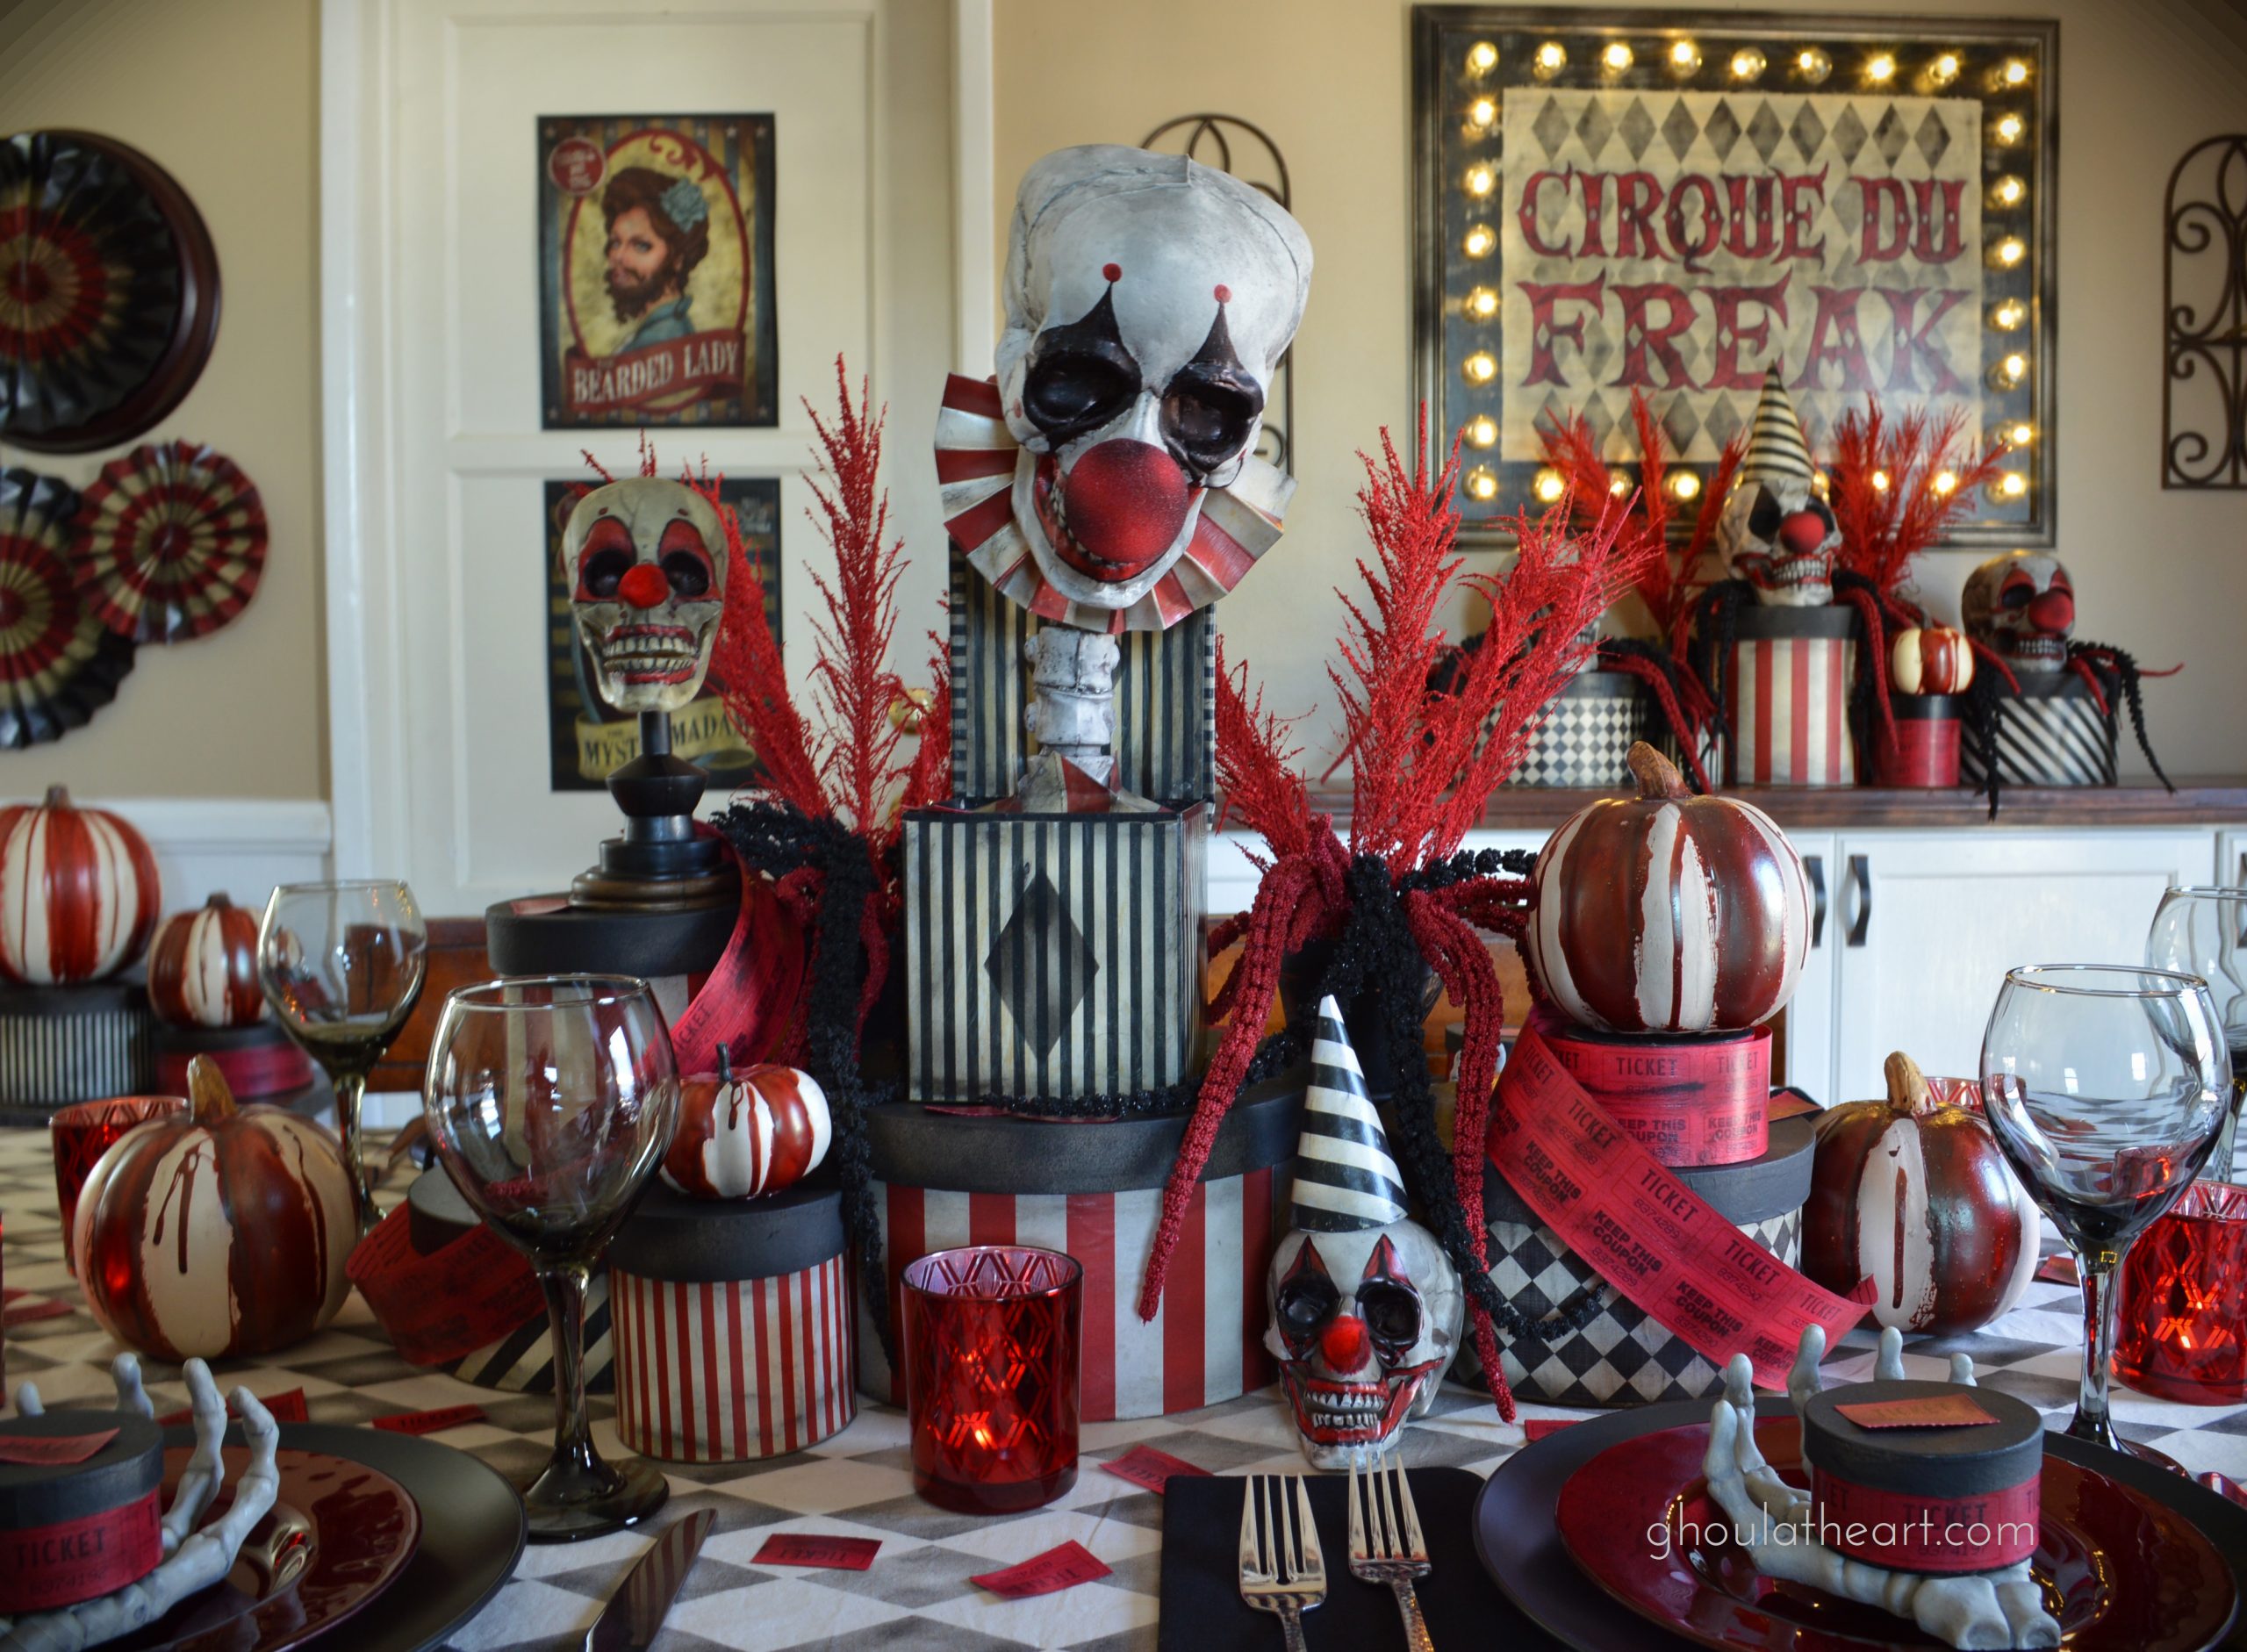
When I decorate my dining room for Halloween I begin with a focal point which typically is the centerpiece on the table. For this year’s Carn’evil theme, it was this adorable skull Jack-in-the-box. But just like when you go shopping or look into shop windows, you may see something that catches your eye which then causes you to want to see more. That’s what I tried to do here with this super fun marquee sign. Everywhere you look I want you to say…Oh, what’s that? And it draws you in. And despite my usual centerpiece being the focal point, I think the marquee is the first thing you see when looking at my dining room. I guess that’s exactly why marquee signs all have lights on them, to be noticed.
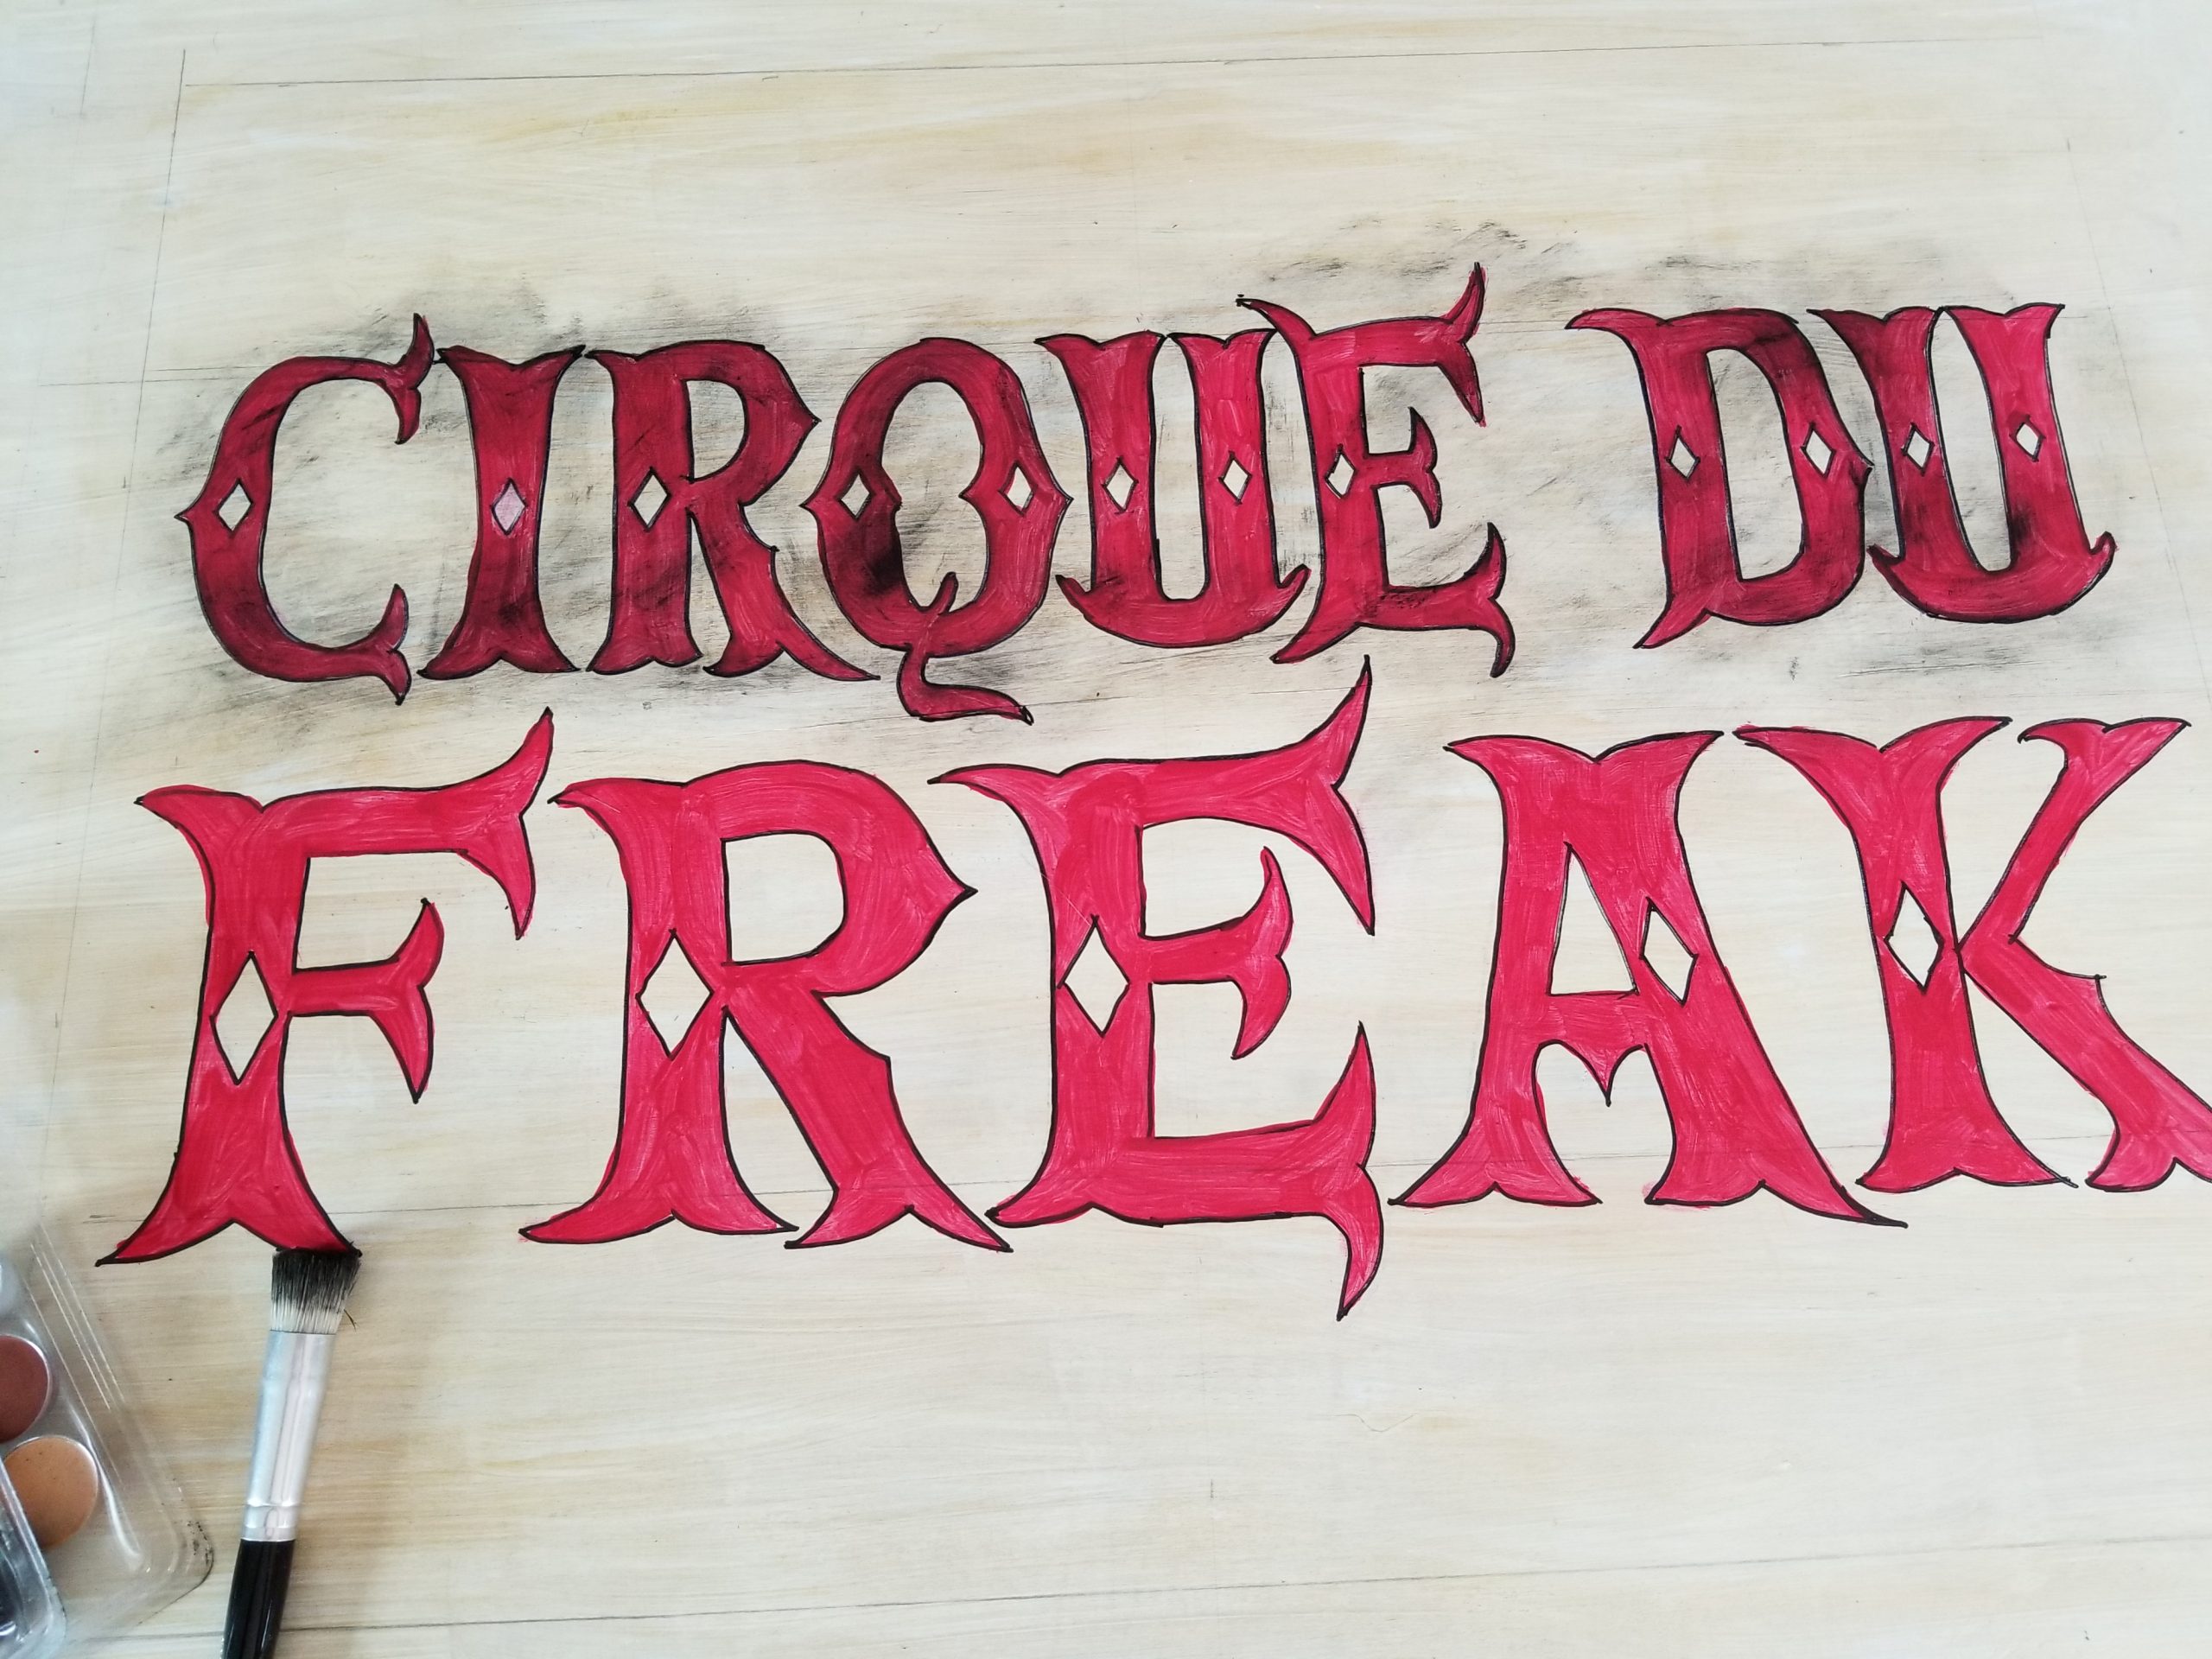
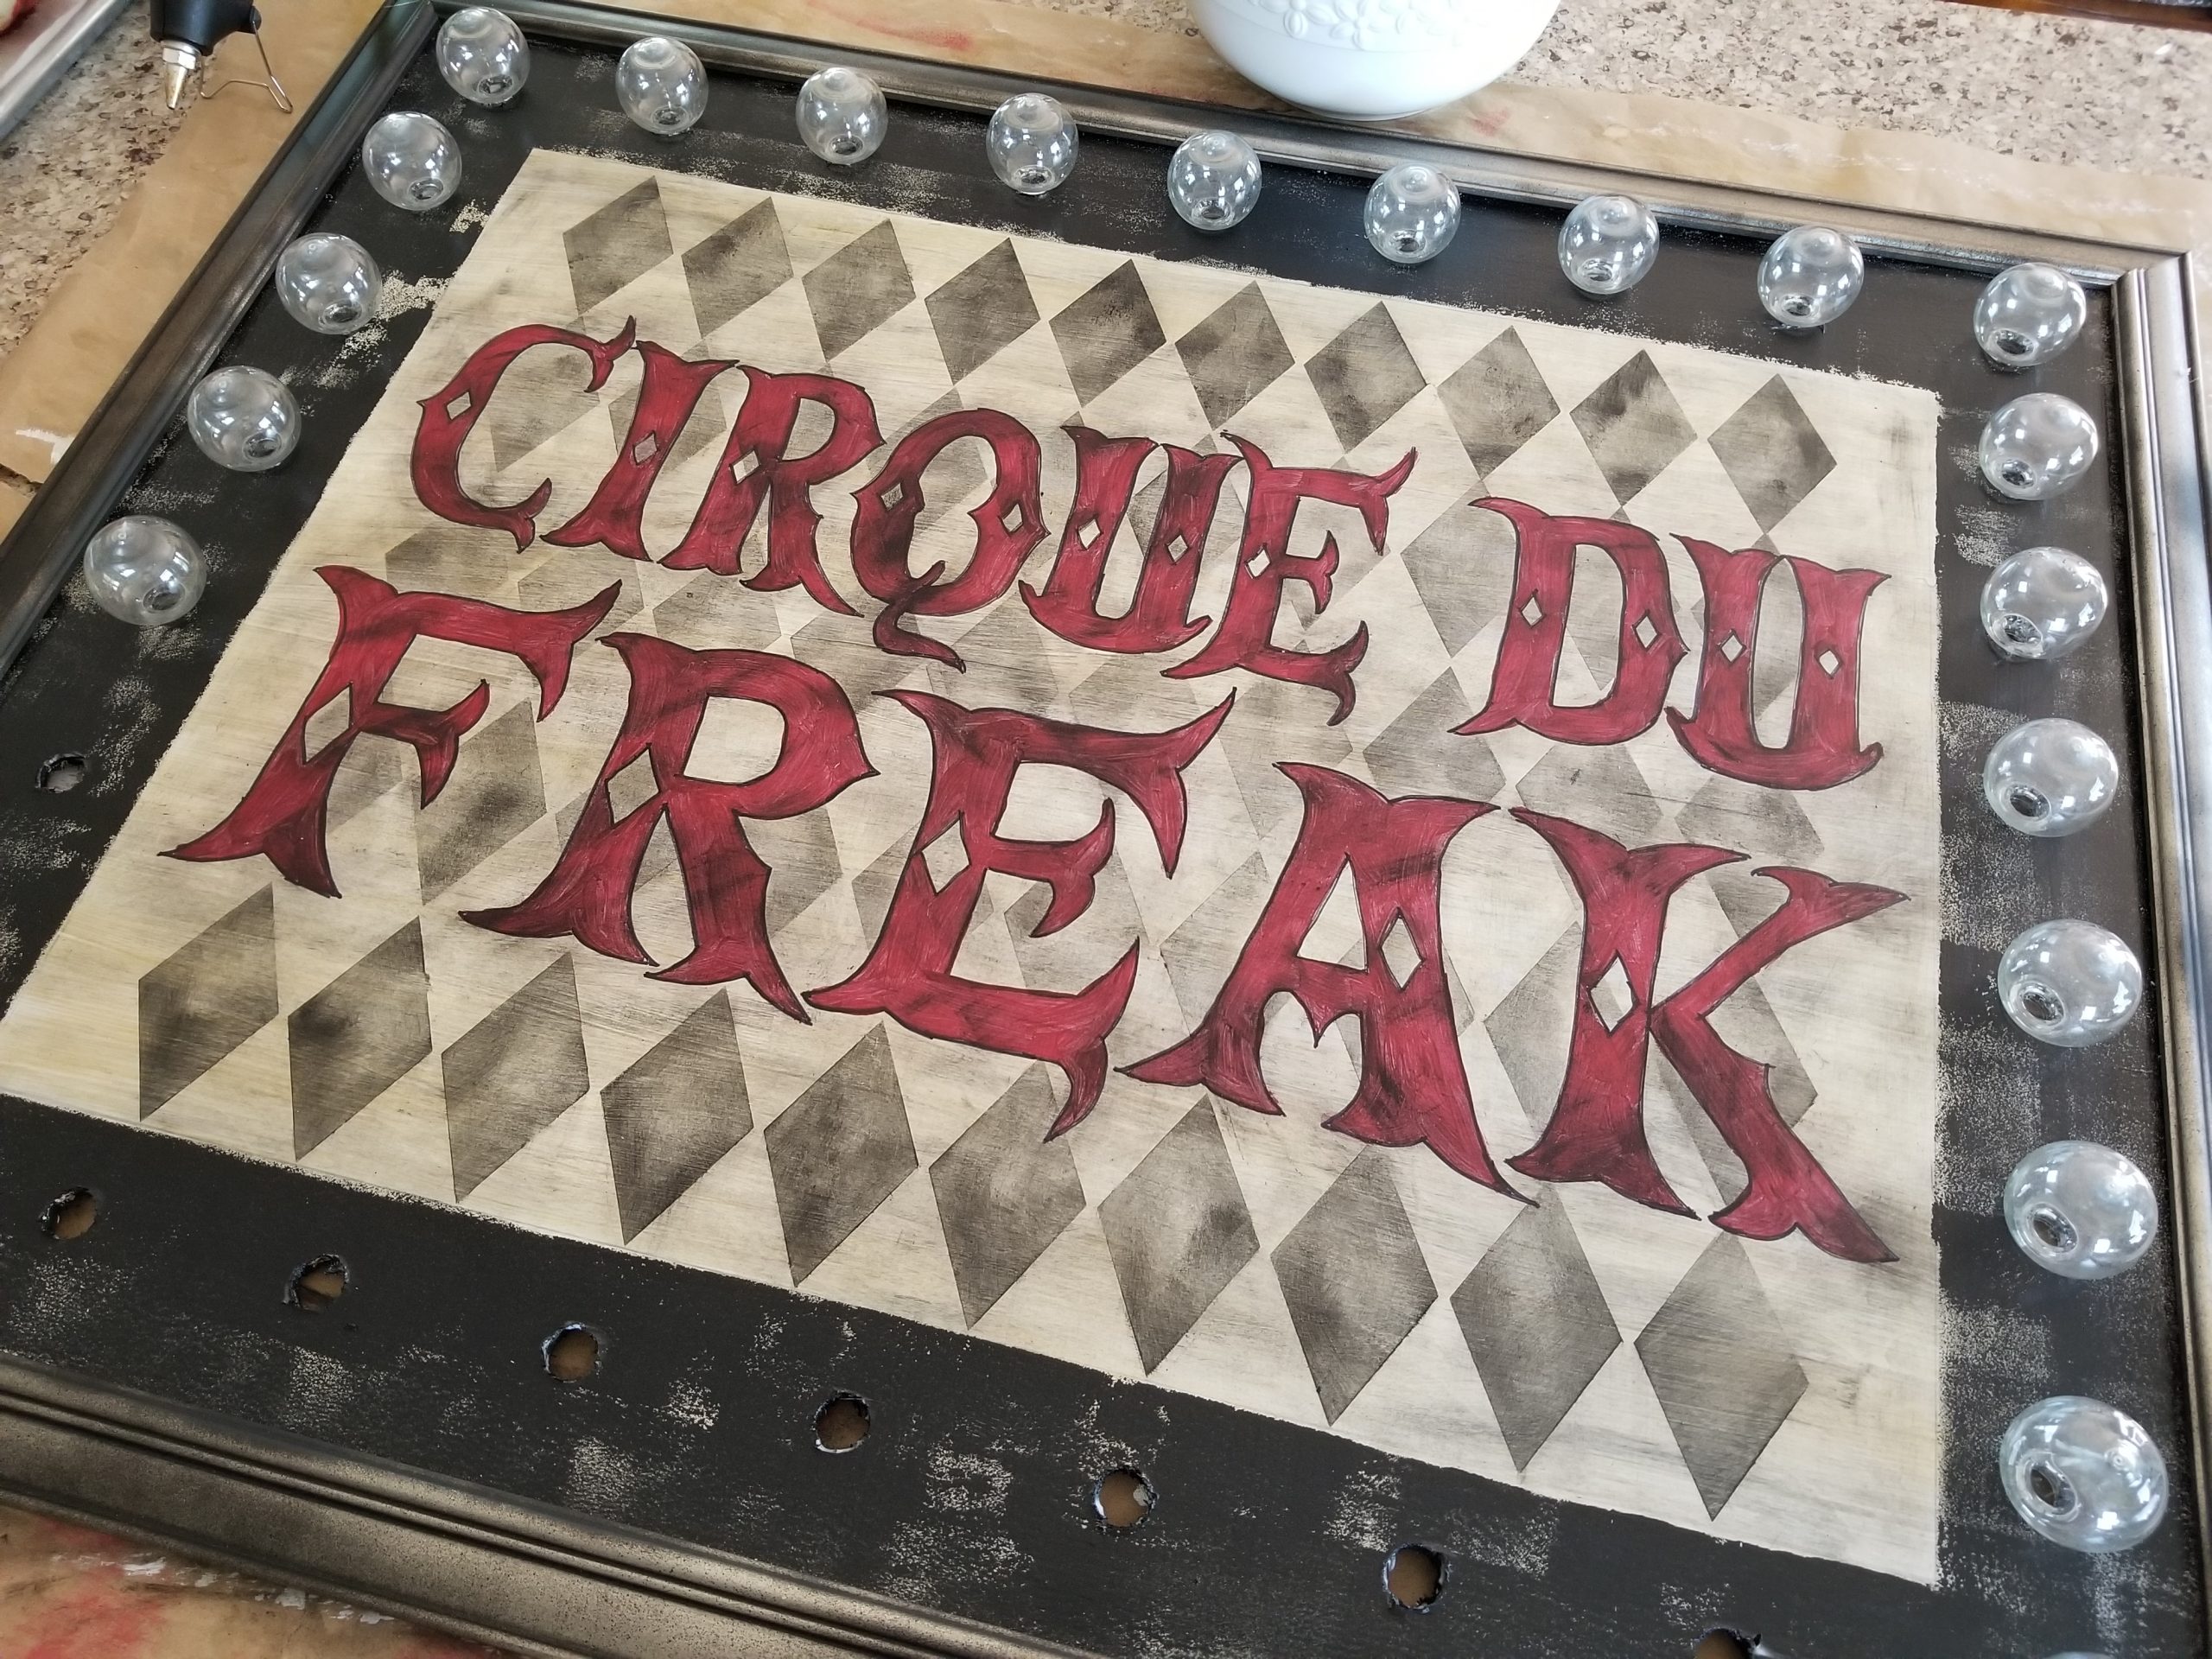
Anyway, here’s how I made this marquee sign using an old frame without the glass, plastic patio light covers from a burnt out string of lights, a little paint, a new string of Christmas lights and a lot of patience. As for the name I used for the sign, I read the book, Night Circus by Erin Morgenstern this summer and I was inspired to make a sign like the Le Cirque des Reves in the book. Basically, a sign in French. So I looked up a bunch of different possible names for the sign using the English to French translator, starting of course with freak show. The translator gave me, spectacle de monstre. OK, not bad, but not quite what I was looking for. I looked up a bunch of others and all of them were too long and complicated, so I decided on this Frenglish hybrid. Cirque du Freak, which I also discovered is a set of novels by Darren Shan, which I have not read, but now I want to. It’s about vampires and I love vampire books and movies…I’ll add it to my long list of books to read. Anyway, check out the how to below and keep a look out for the rest of my decorating posts coming soon.
Supplies Needed
Old frame without glass
1/4 inch thick wood cut to size of frame
string lights with plastic bulbs
new 30 bulb string lights
tracing paper
white, red and black acrylic and stencil paint
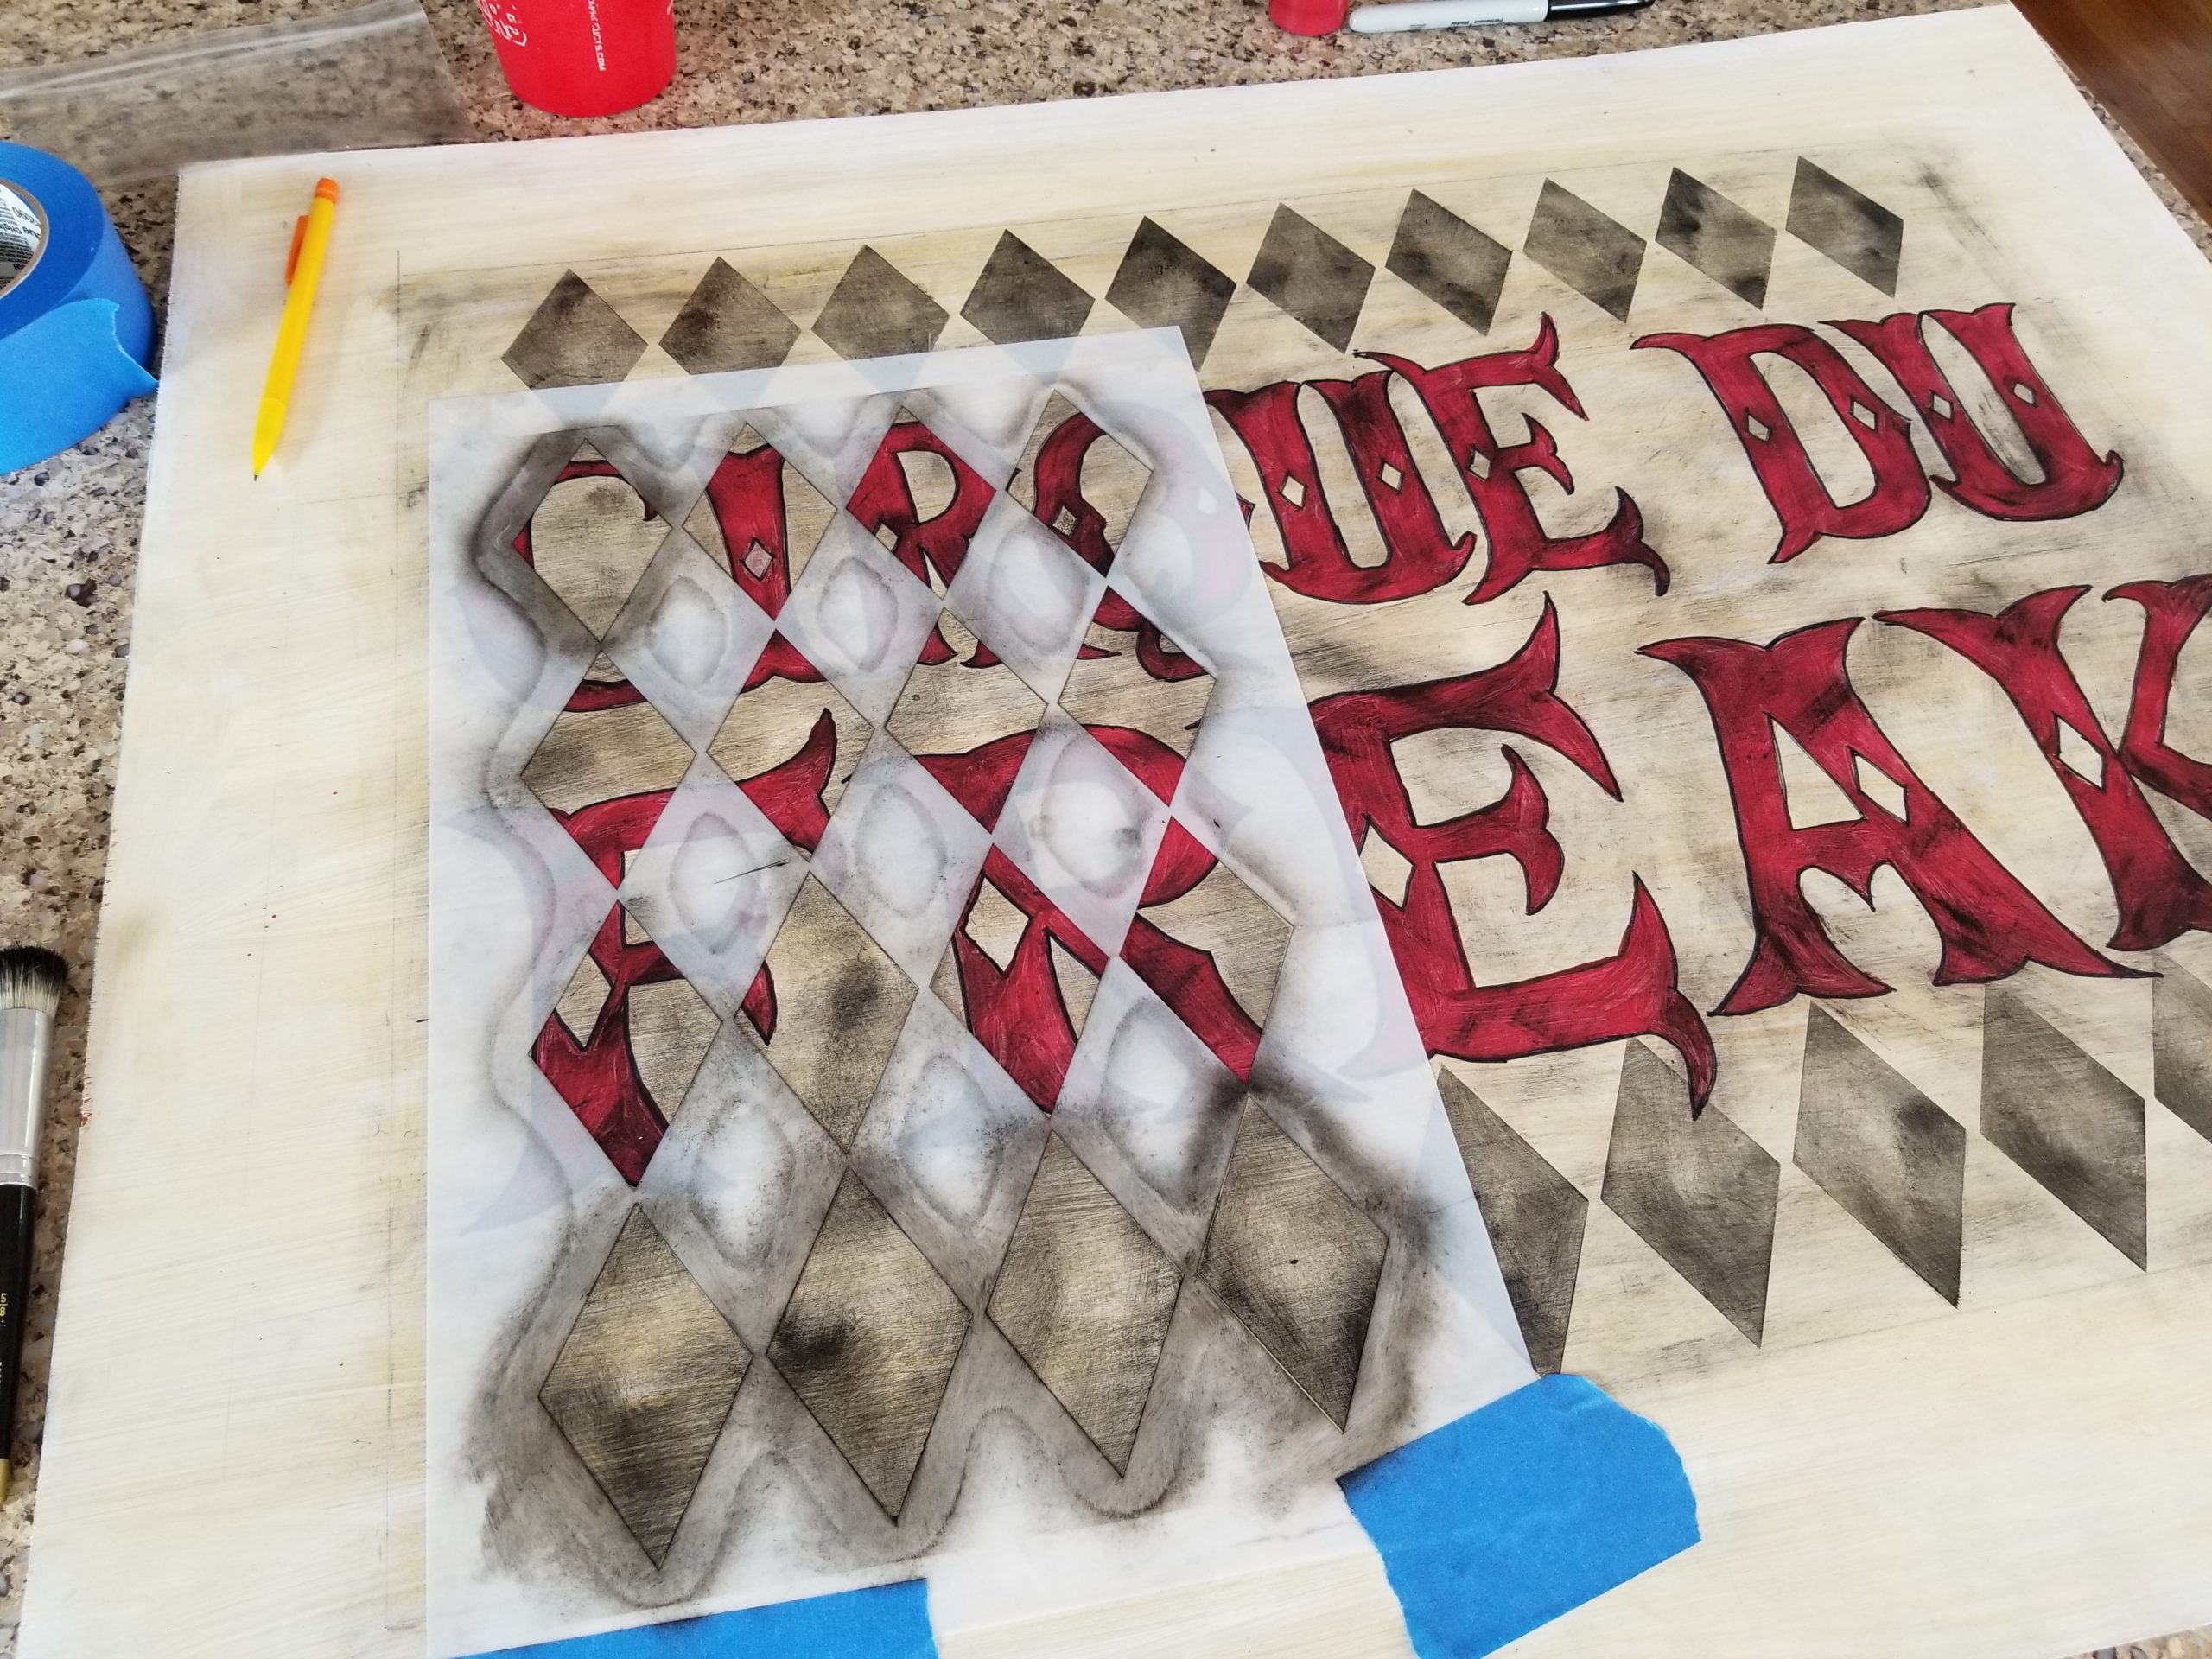
Diamond stencil
Modge Podge sealer
hot glue/ duct tape
Instructions
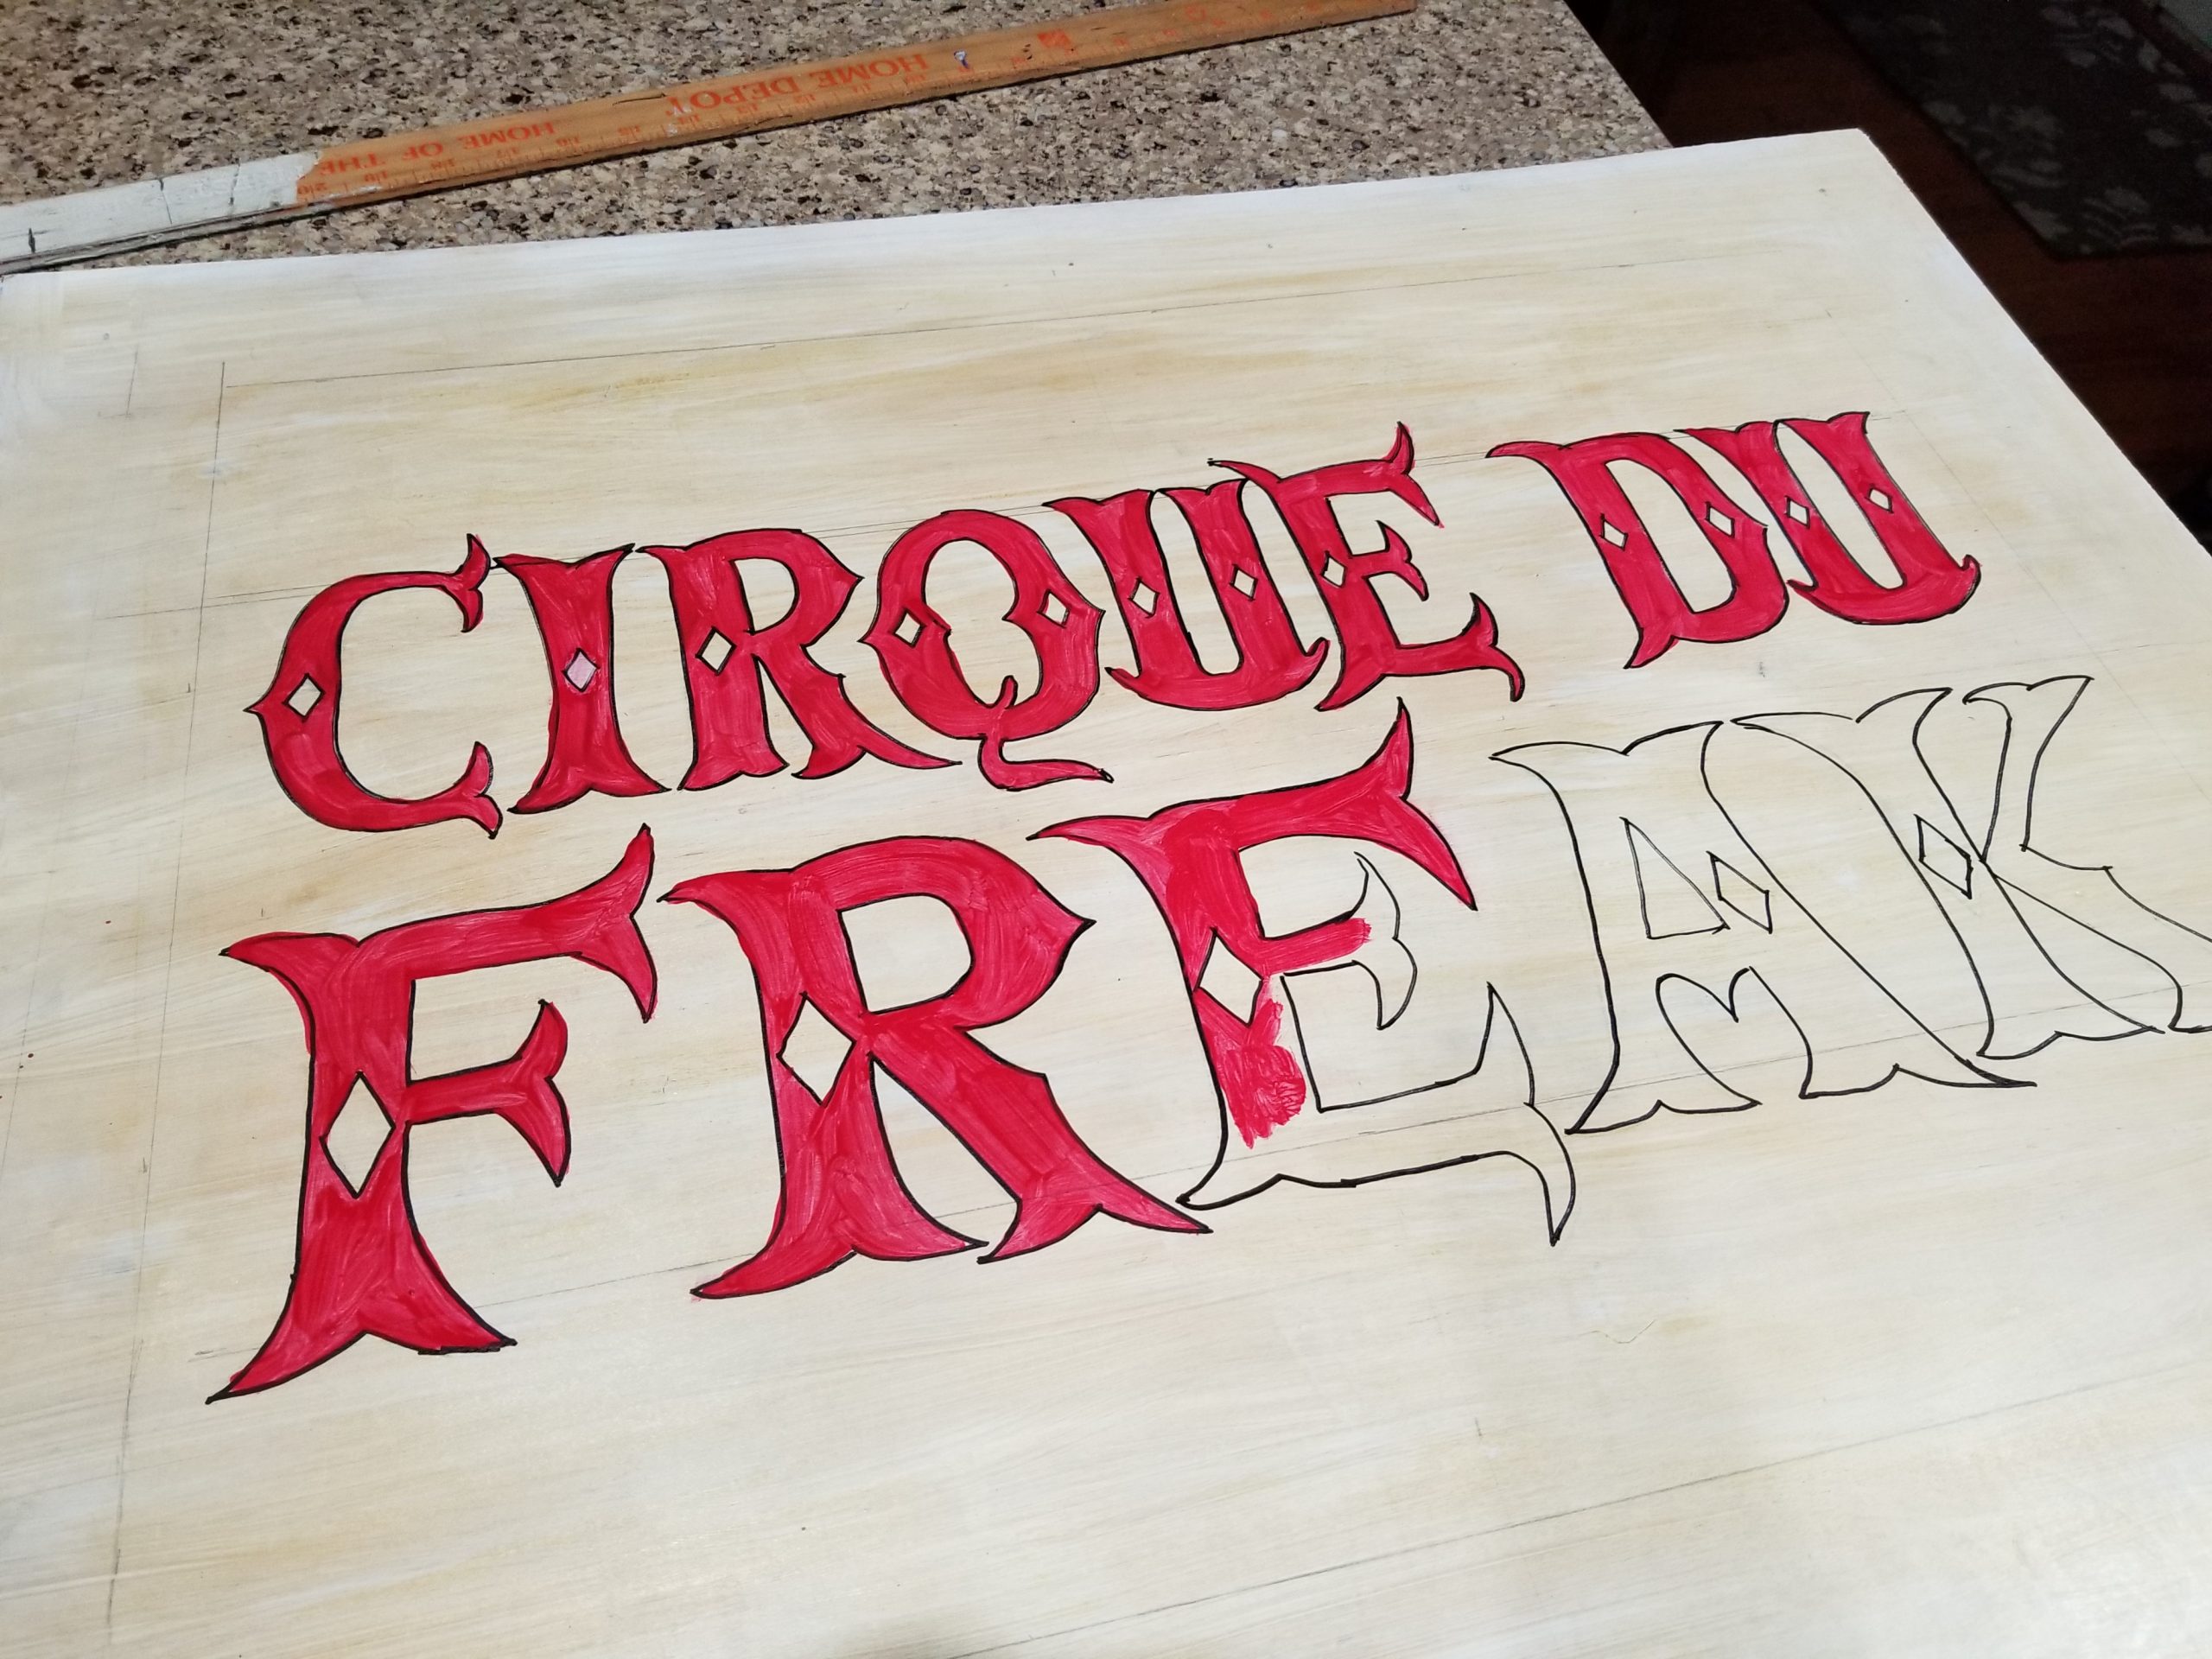
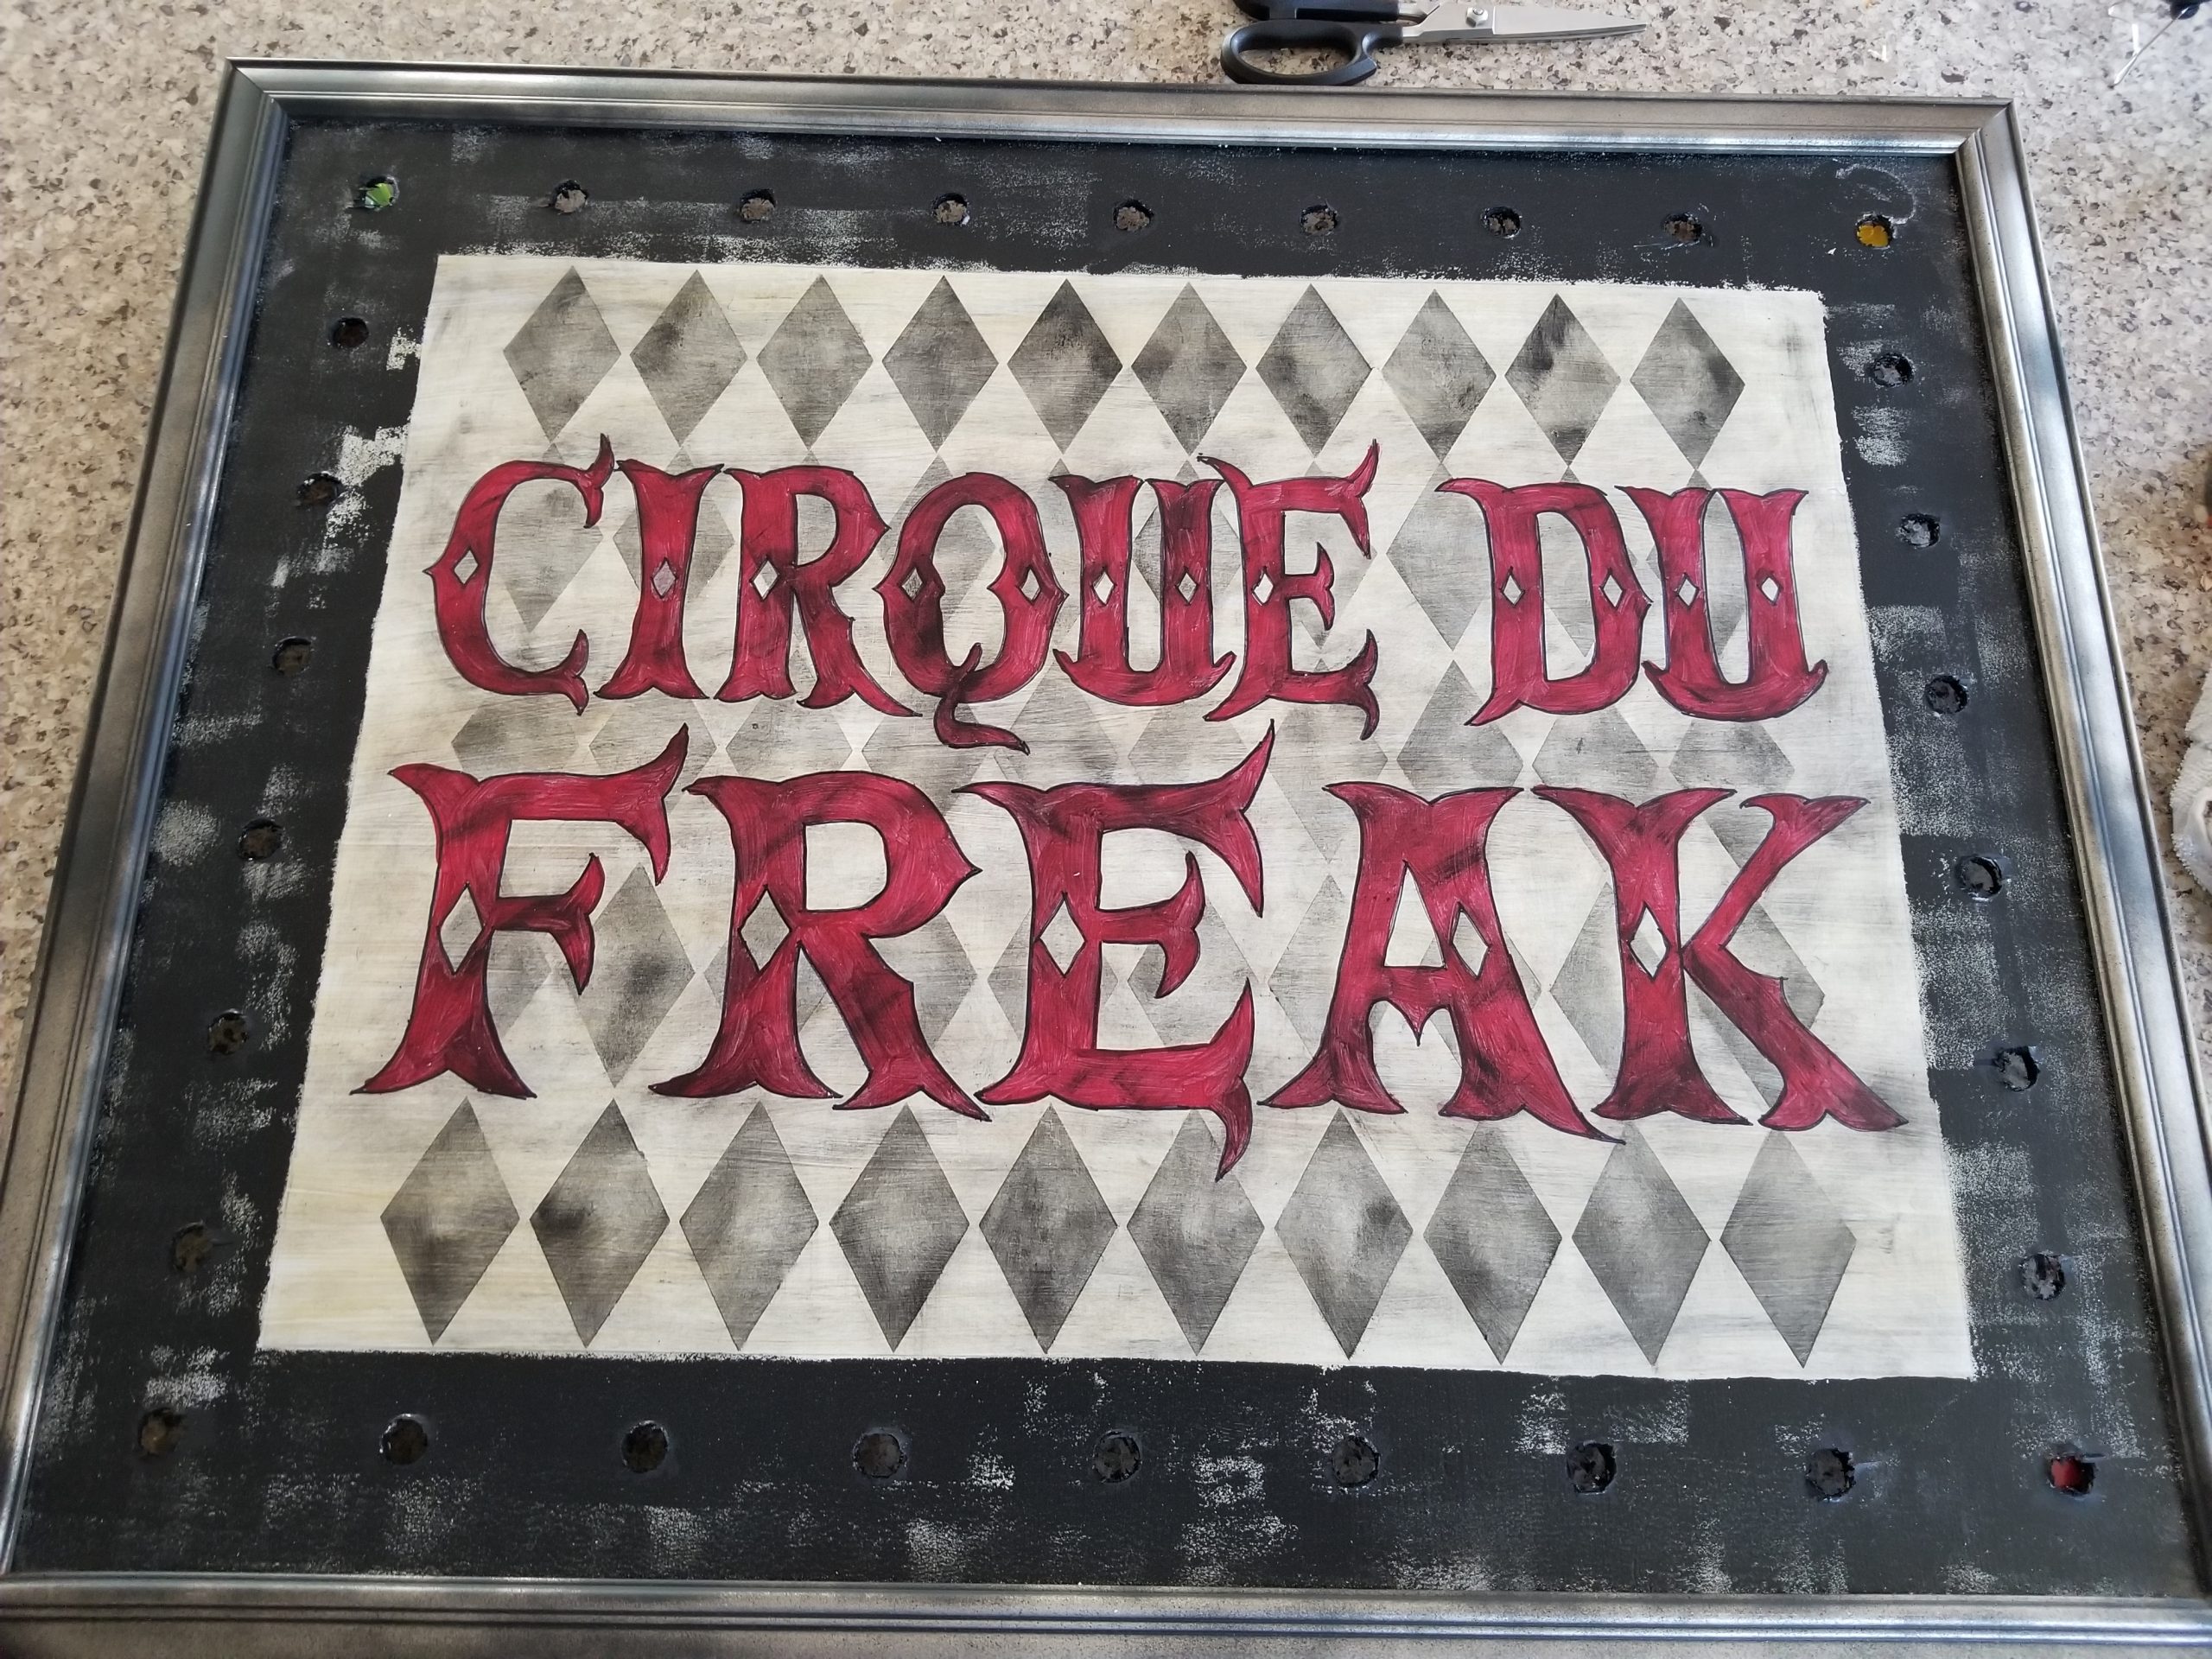
Cut 1/4 inch wood to size of frame and paint white and then age the white paint by washing it with diluted yellow paint or antiquing paint. Measure and mark out the border of the sign and mark with pencil where the lights will go. Measure and mark where the lettering will go. I drew my own lettering on tracing paper and then transferred it onto the sign. But you can also use some fonts from the internet if you don’t want to draw your own. Trace over the transferred lettering with a black permanent marker or paint if you have a steady hand and the right brush and then paint the lettering red. Then use a dry brush and black stencil paint to age the lettering and let dry. Tape the stencil in place and stencil the diamonds, taking care to only stencil the shape around the lettering so that the lettering looks like it’s behind the lettering. You don’t want the diamonds to lay over the lettering. Drill out holes for the plastic patio bulb covers before you paint the border. Use a foam roller to paint the border with black acrylic paint. Seal whole sign with sealer and let dry. Place the sign into the frame and hot glue the plastic bulbs into place. Attach the new string lights to the back of the sign threading them into each plastic bulb cover and duct tape into place. Hang it up and plug it in!
CLOWN MARQUEE
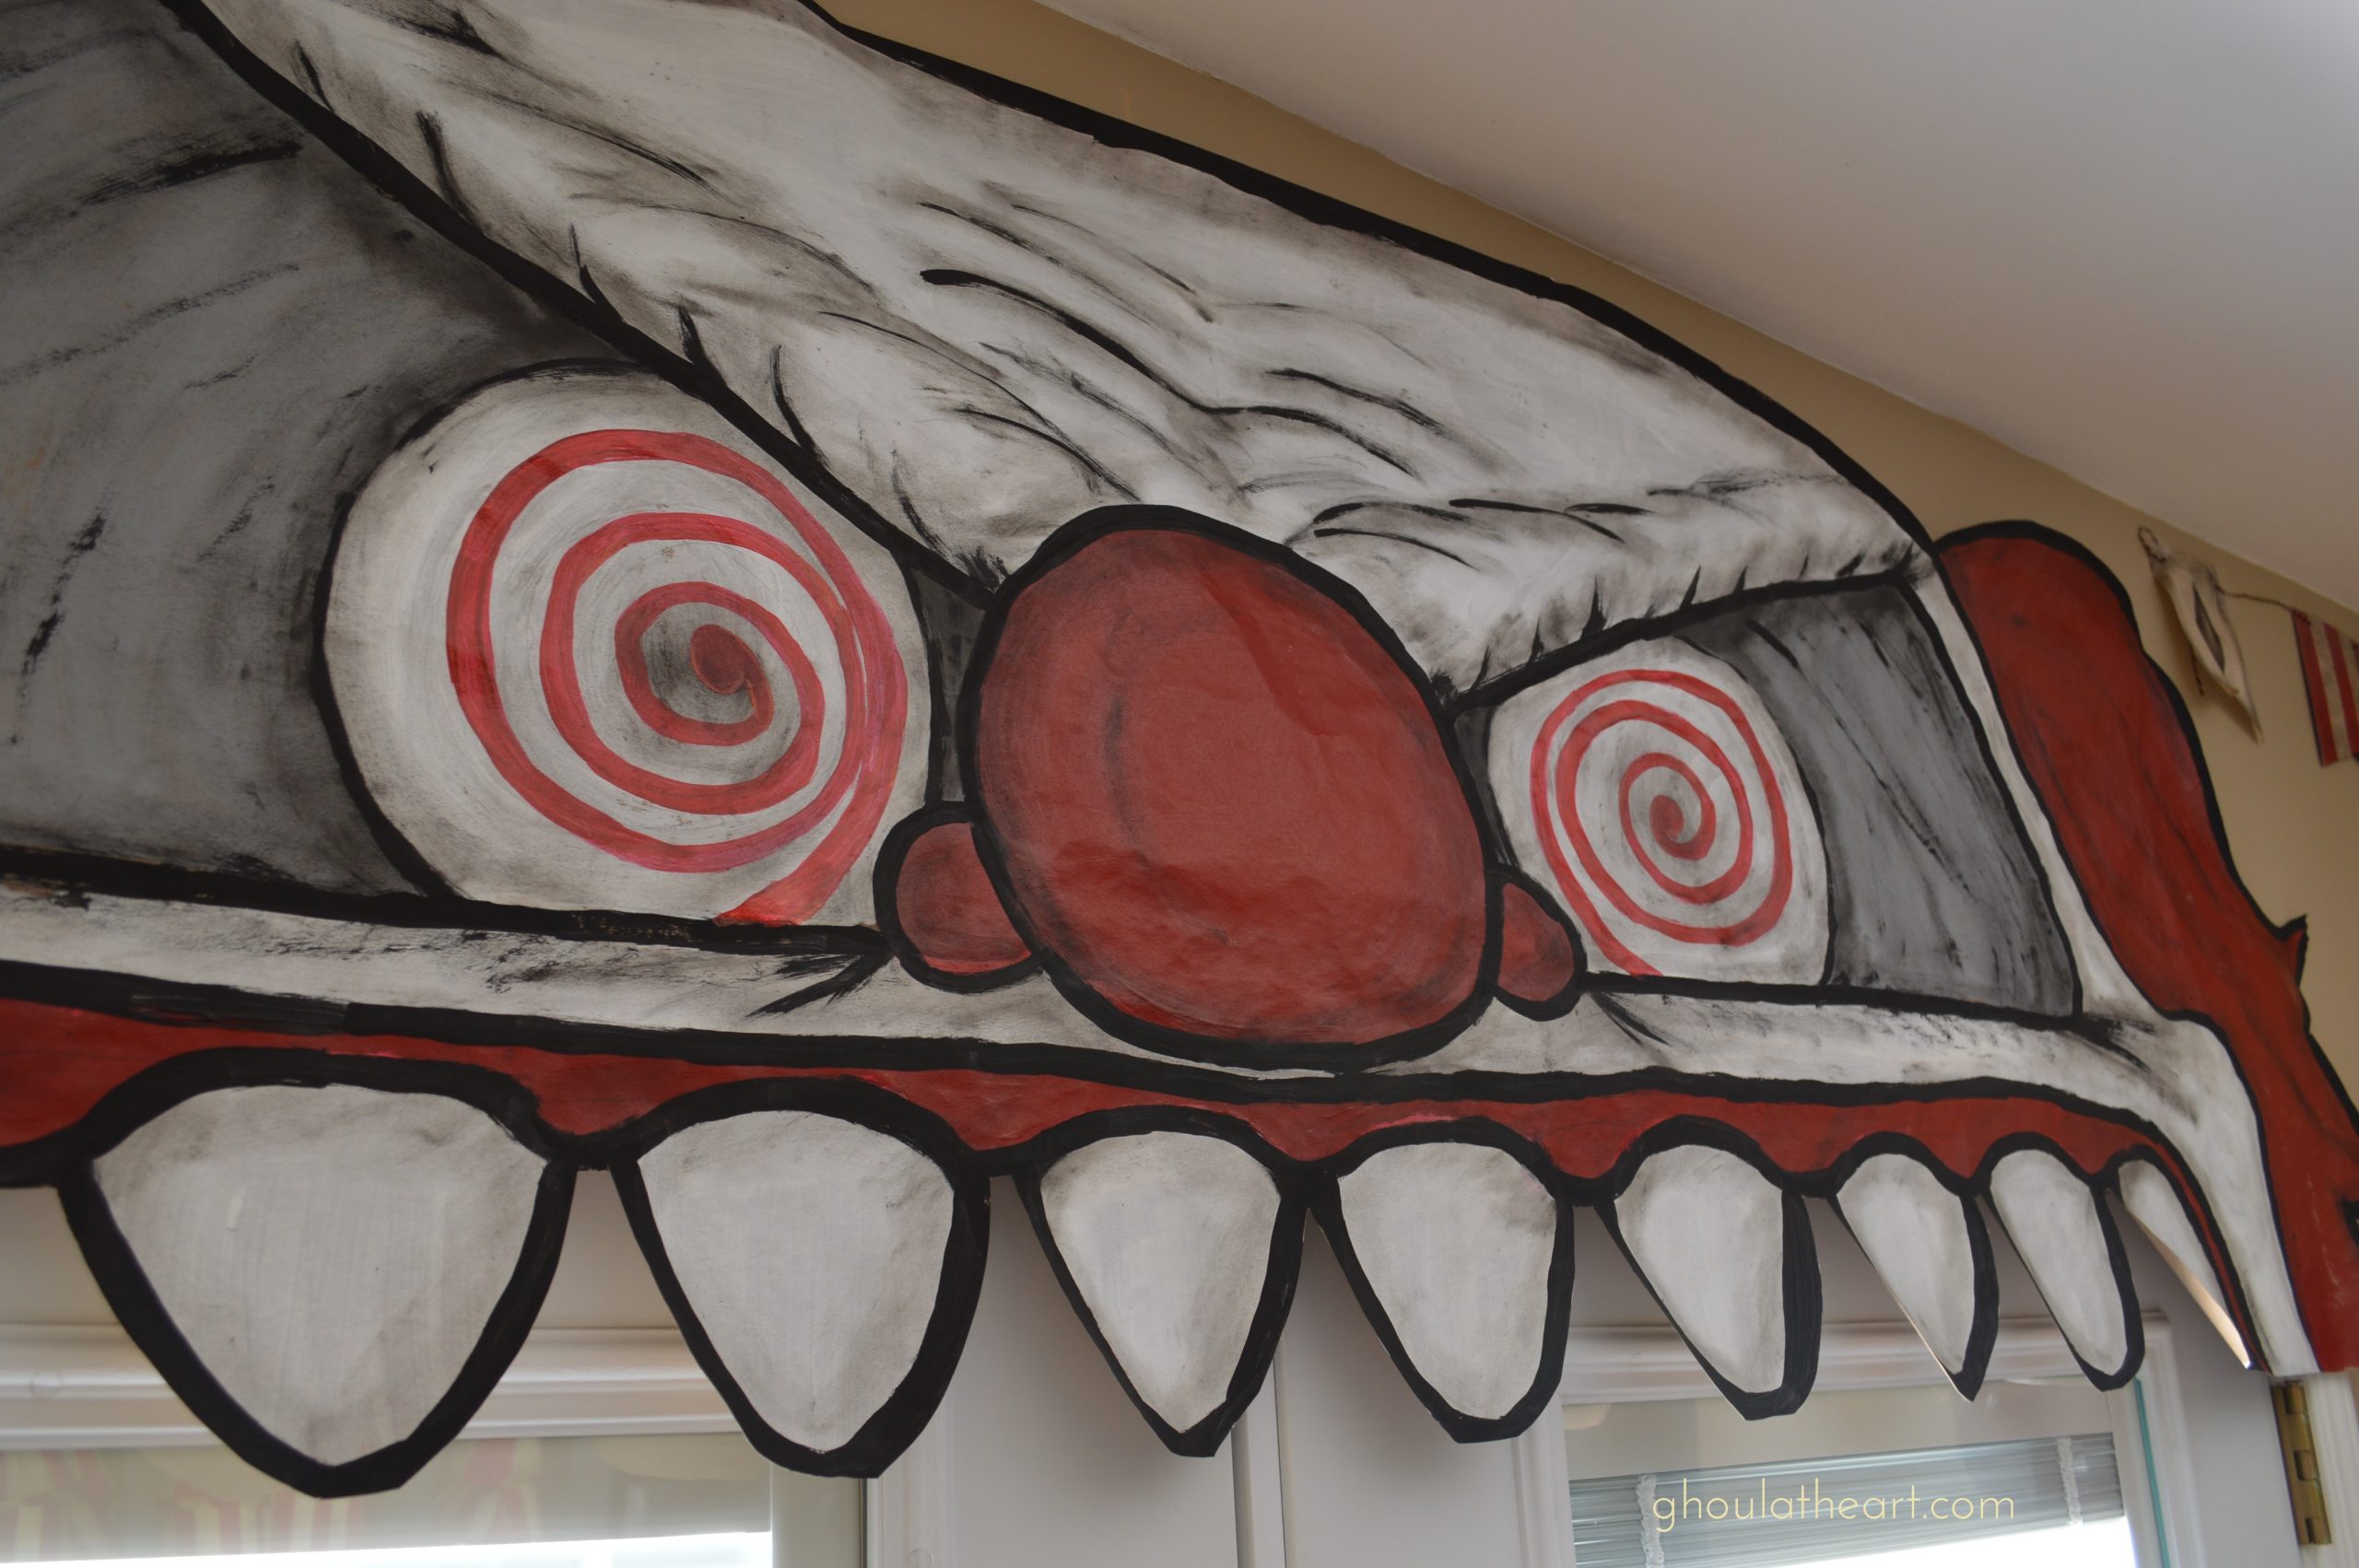
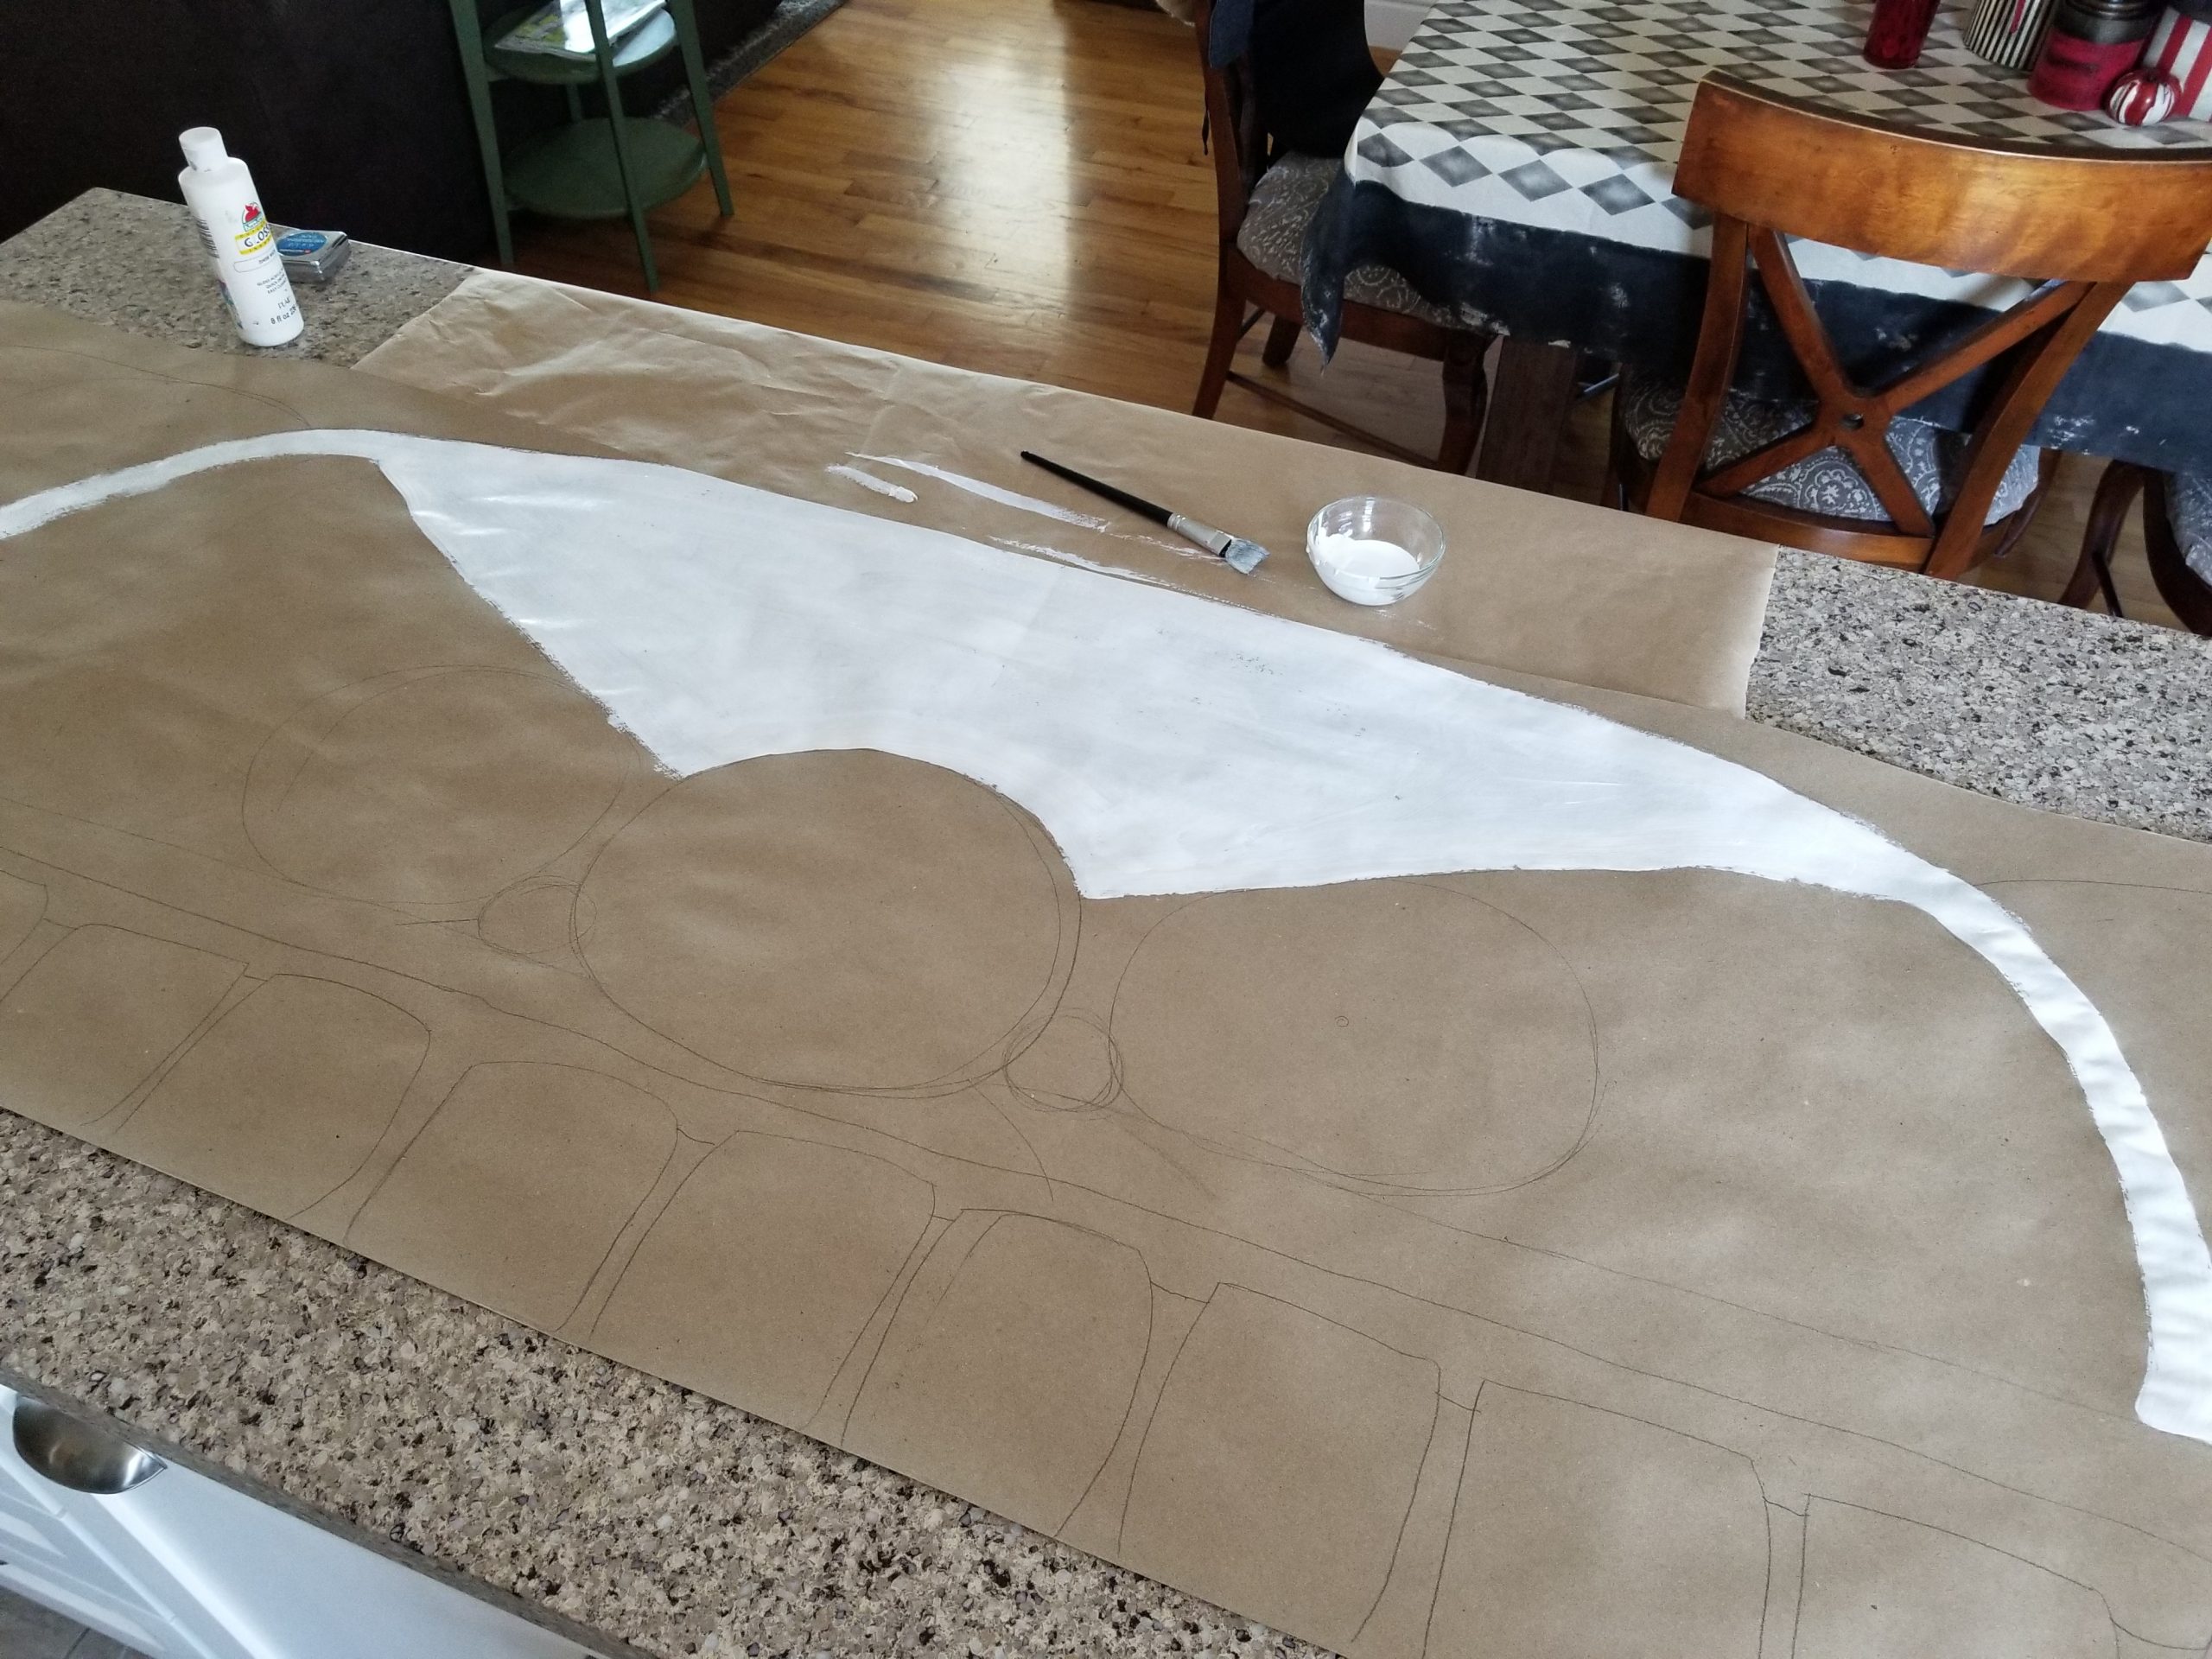
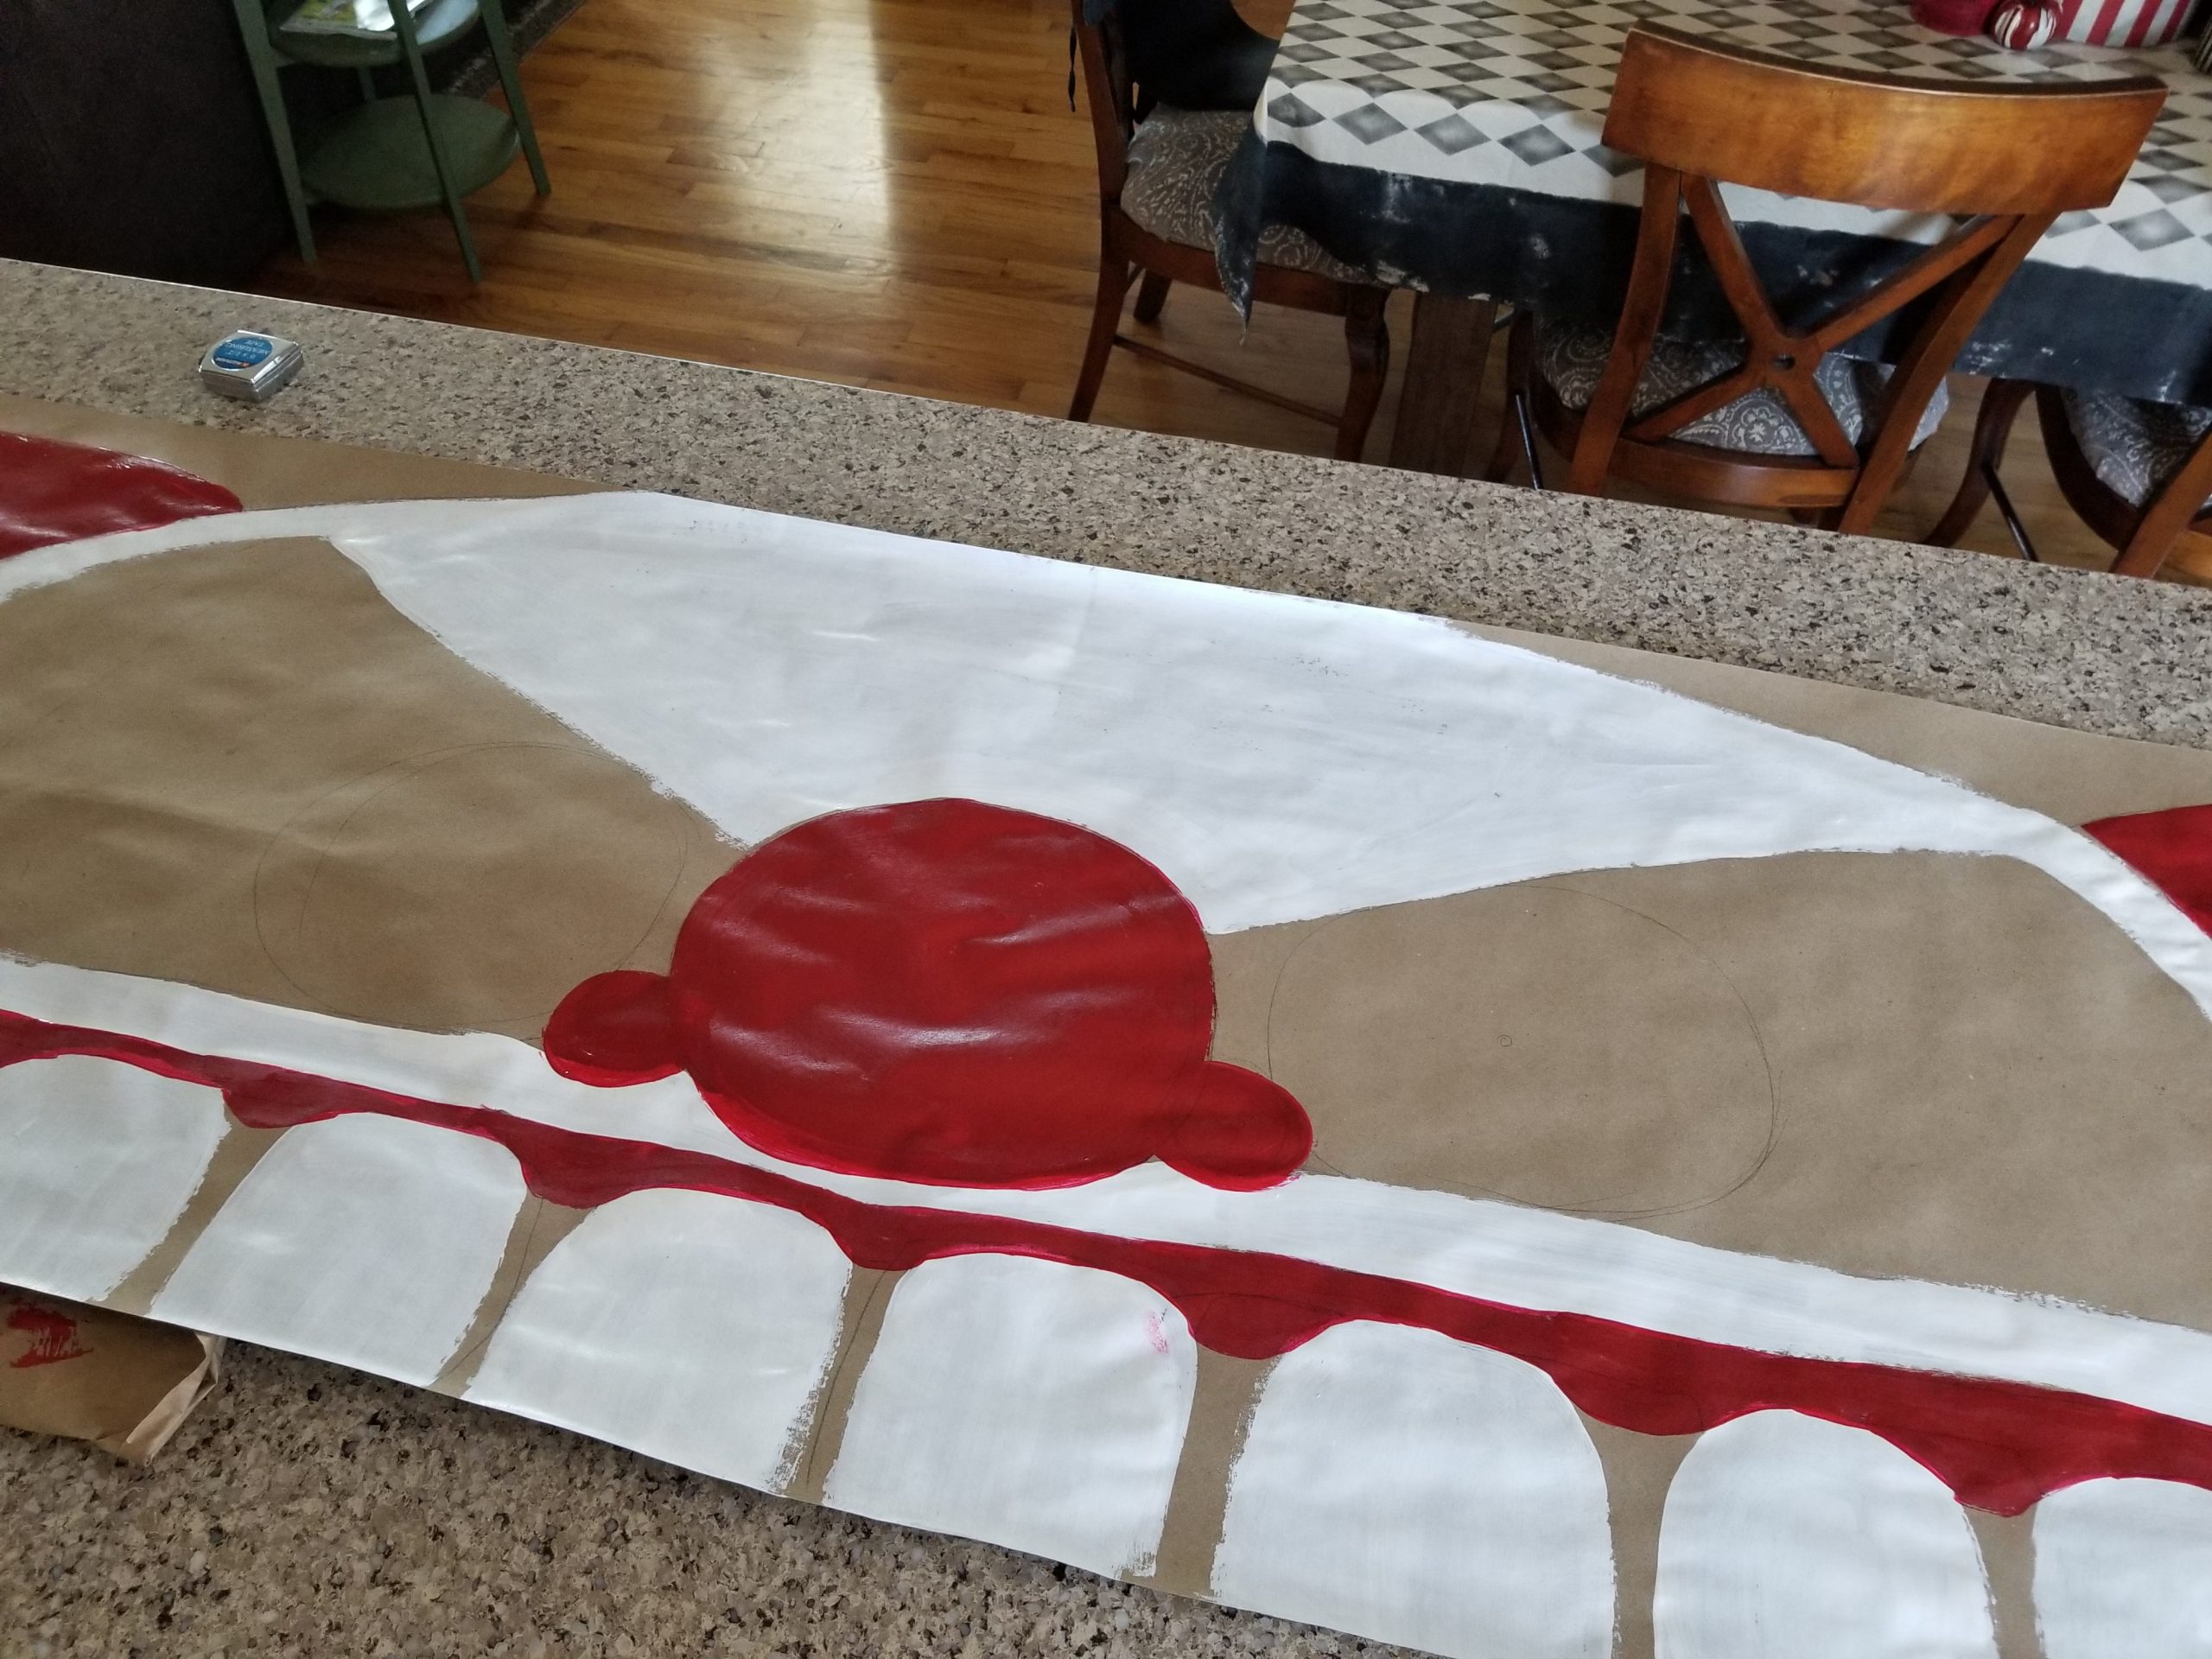
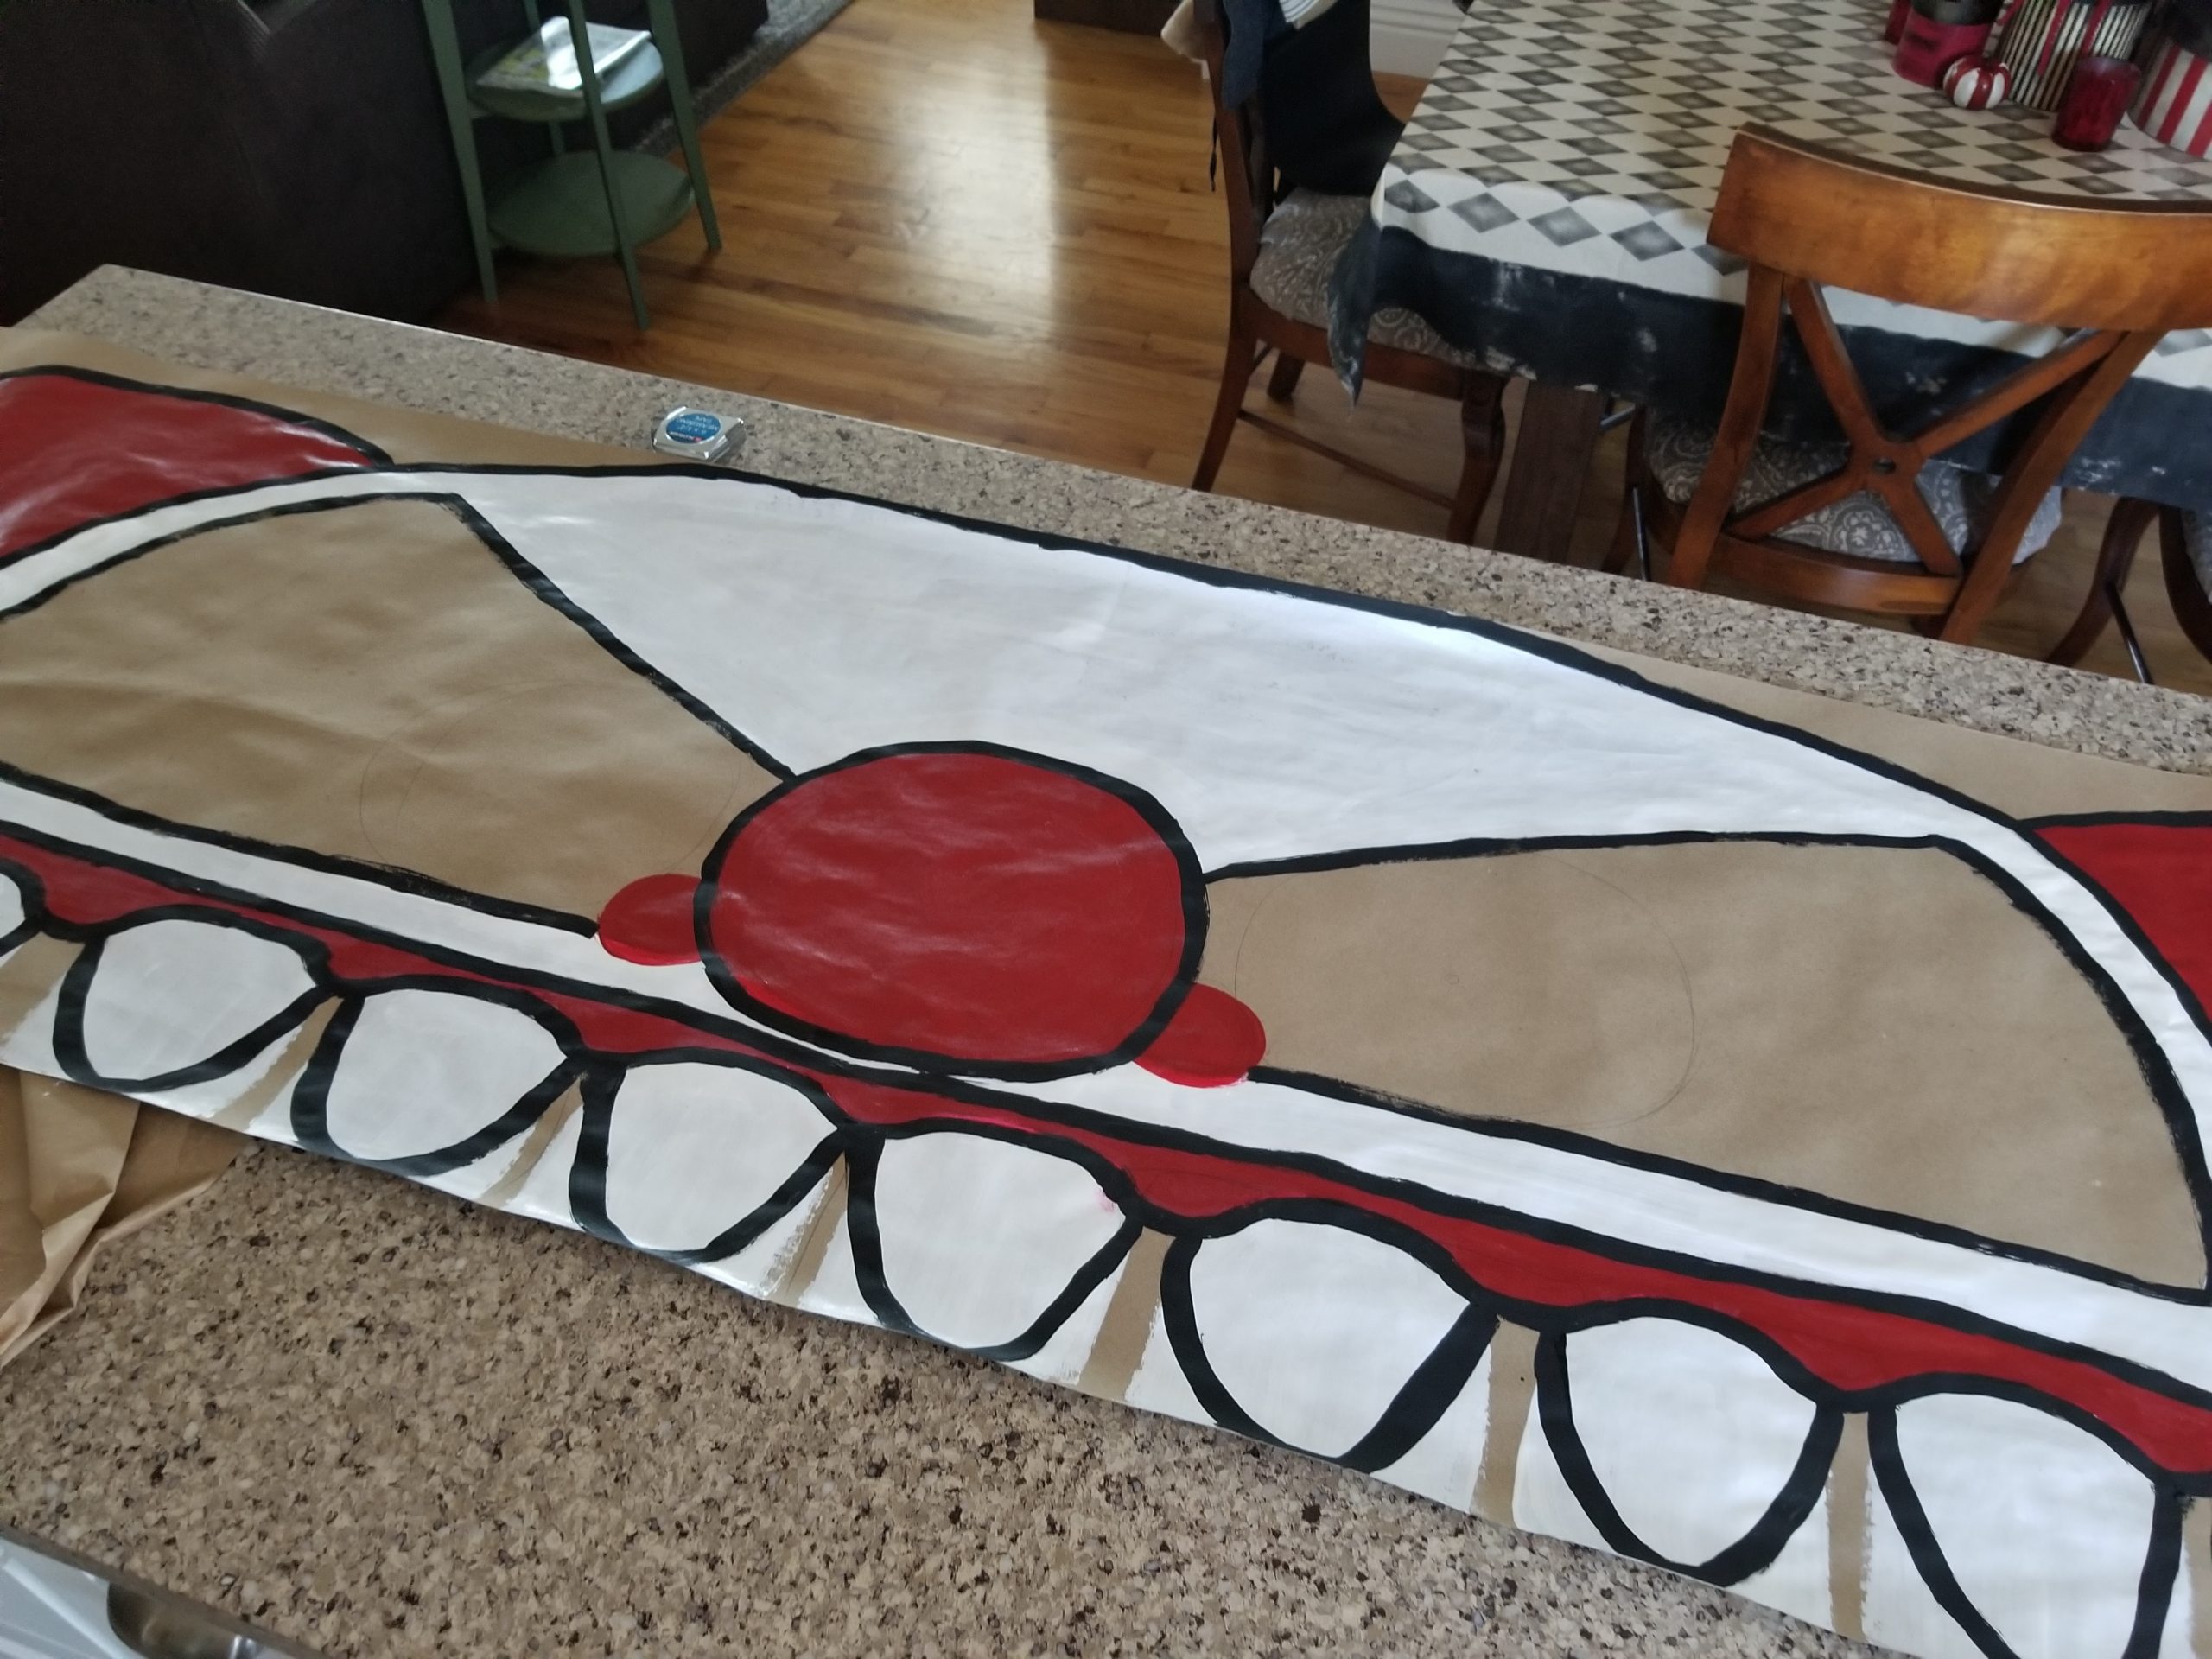
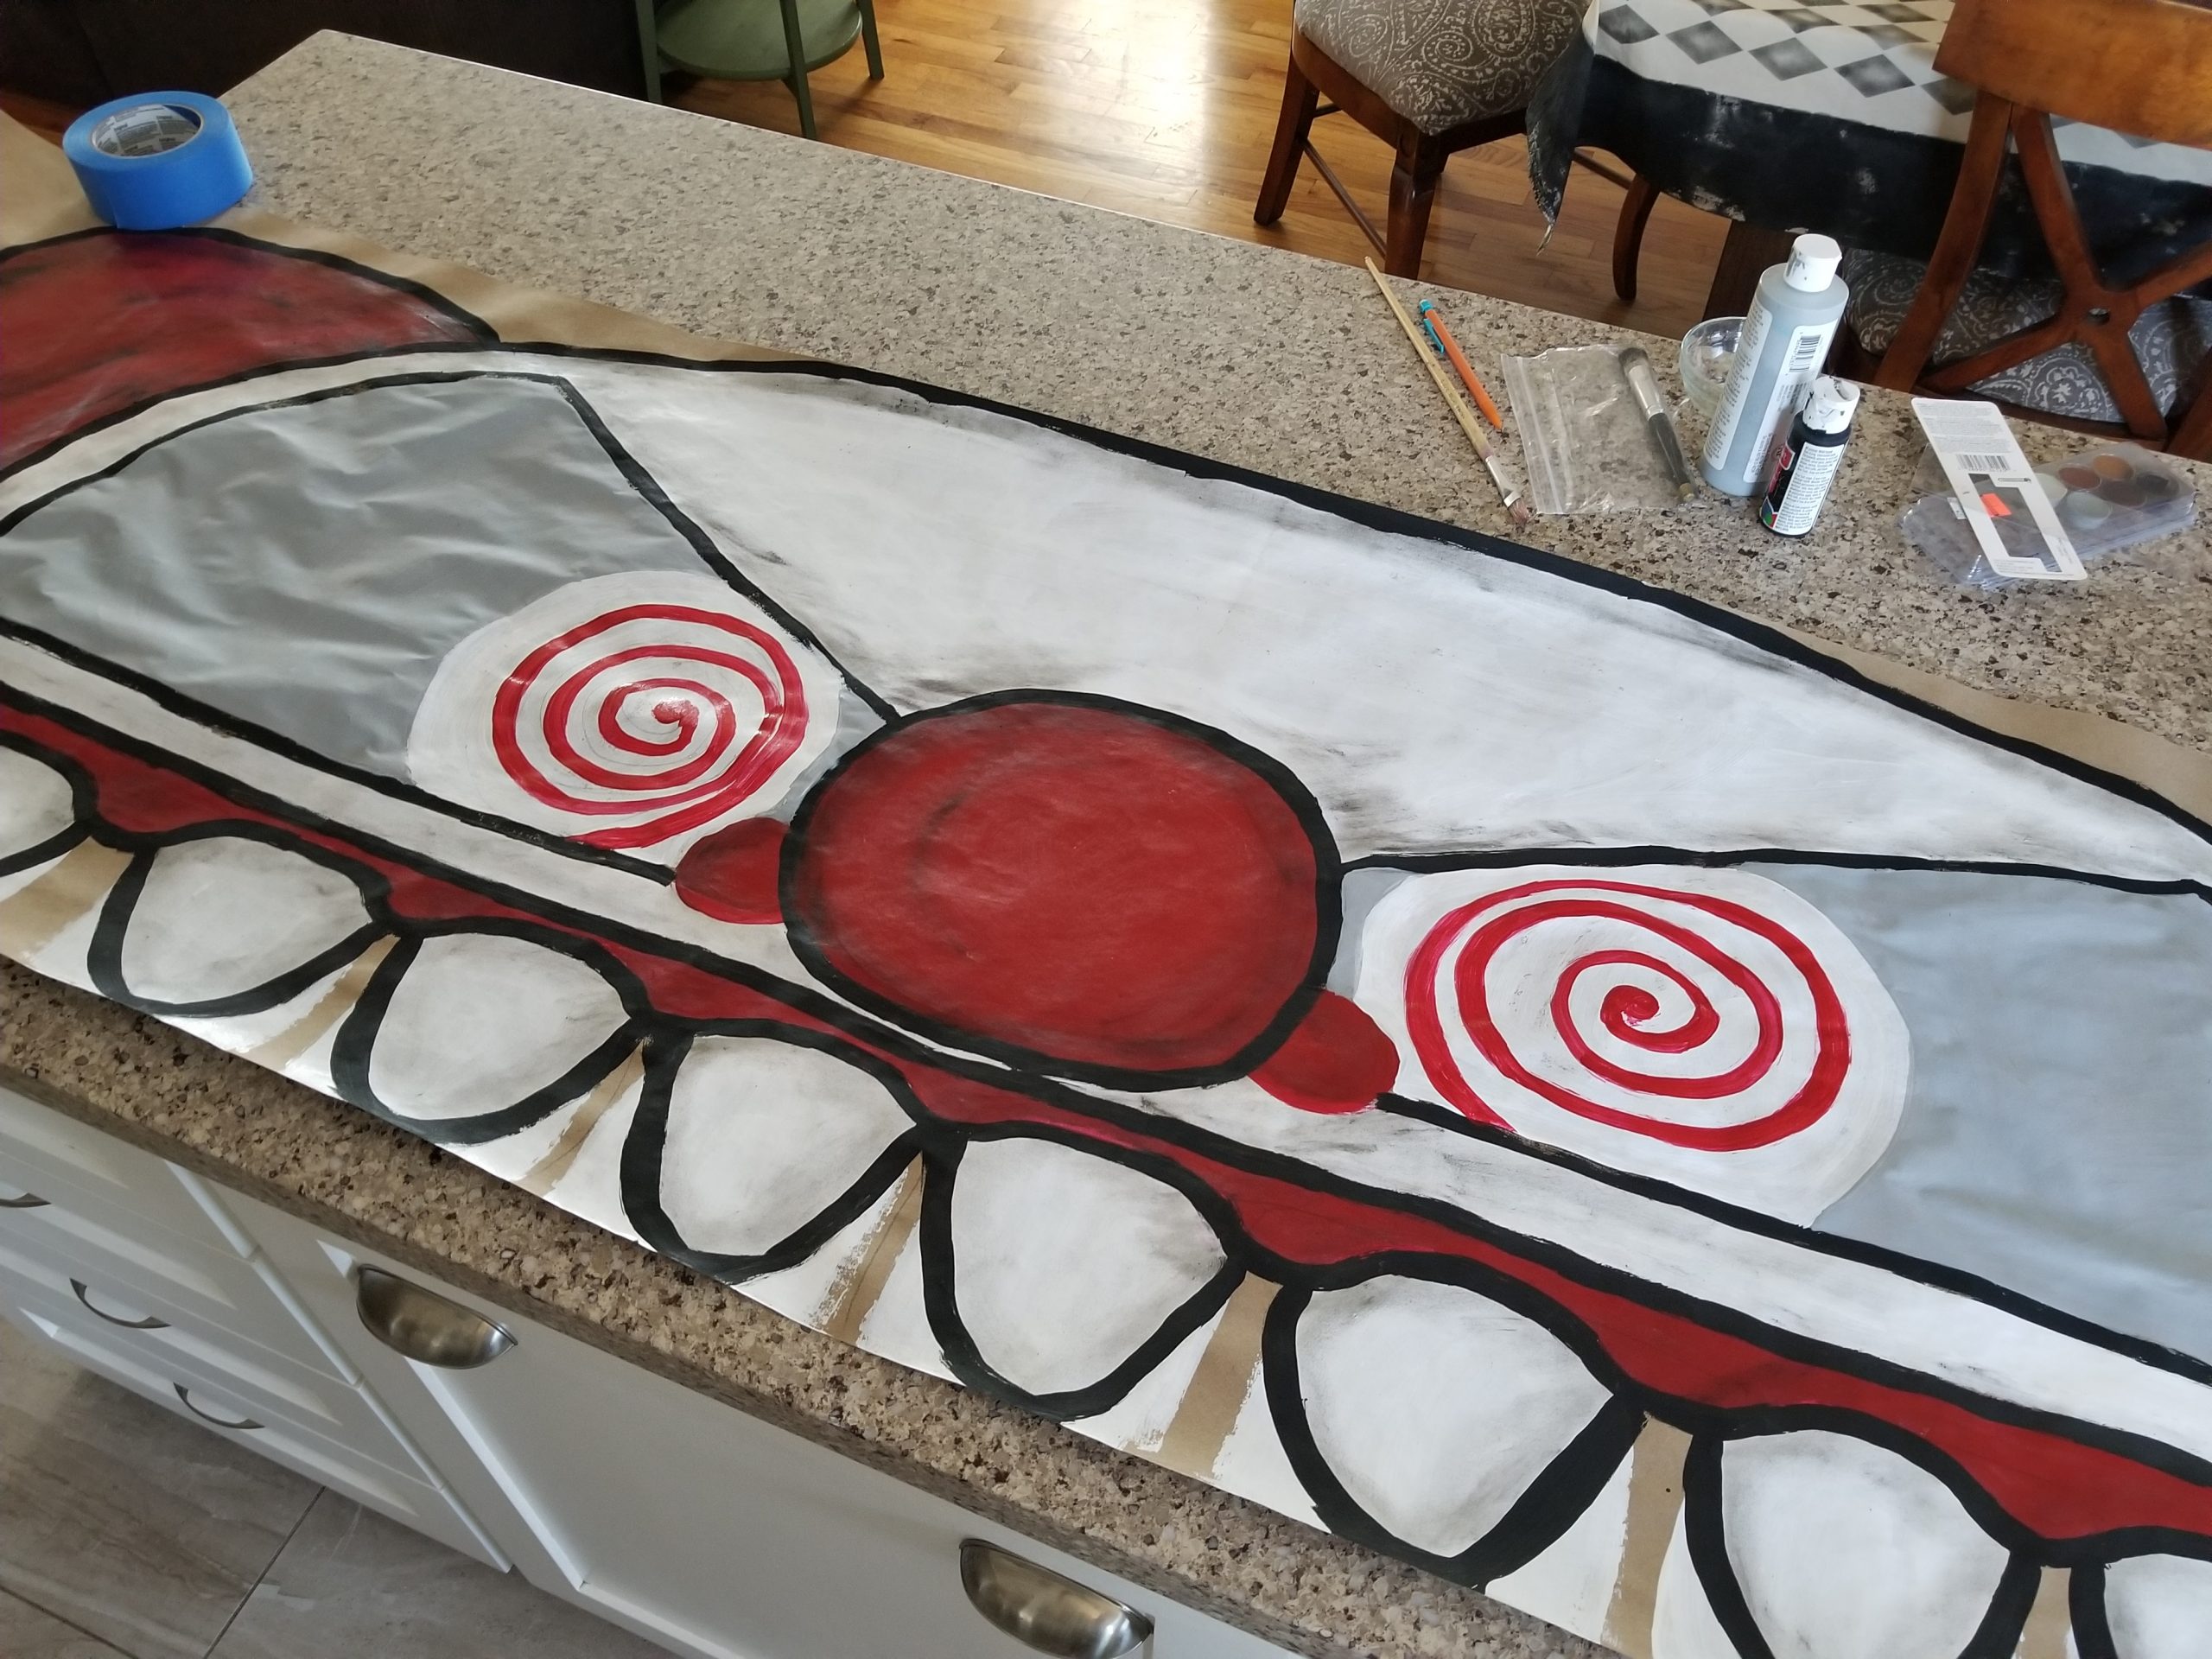
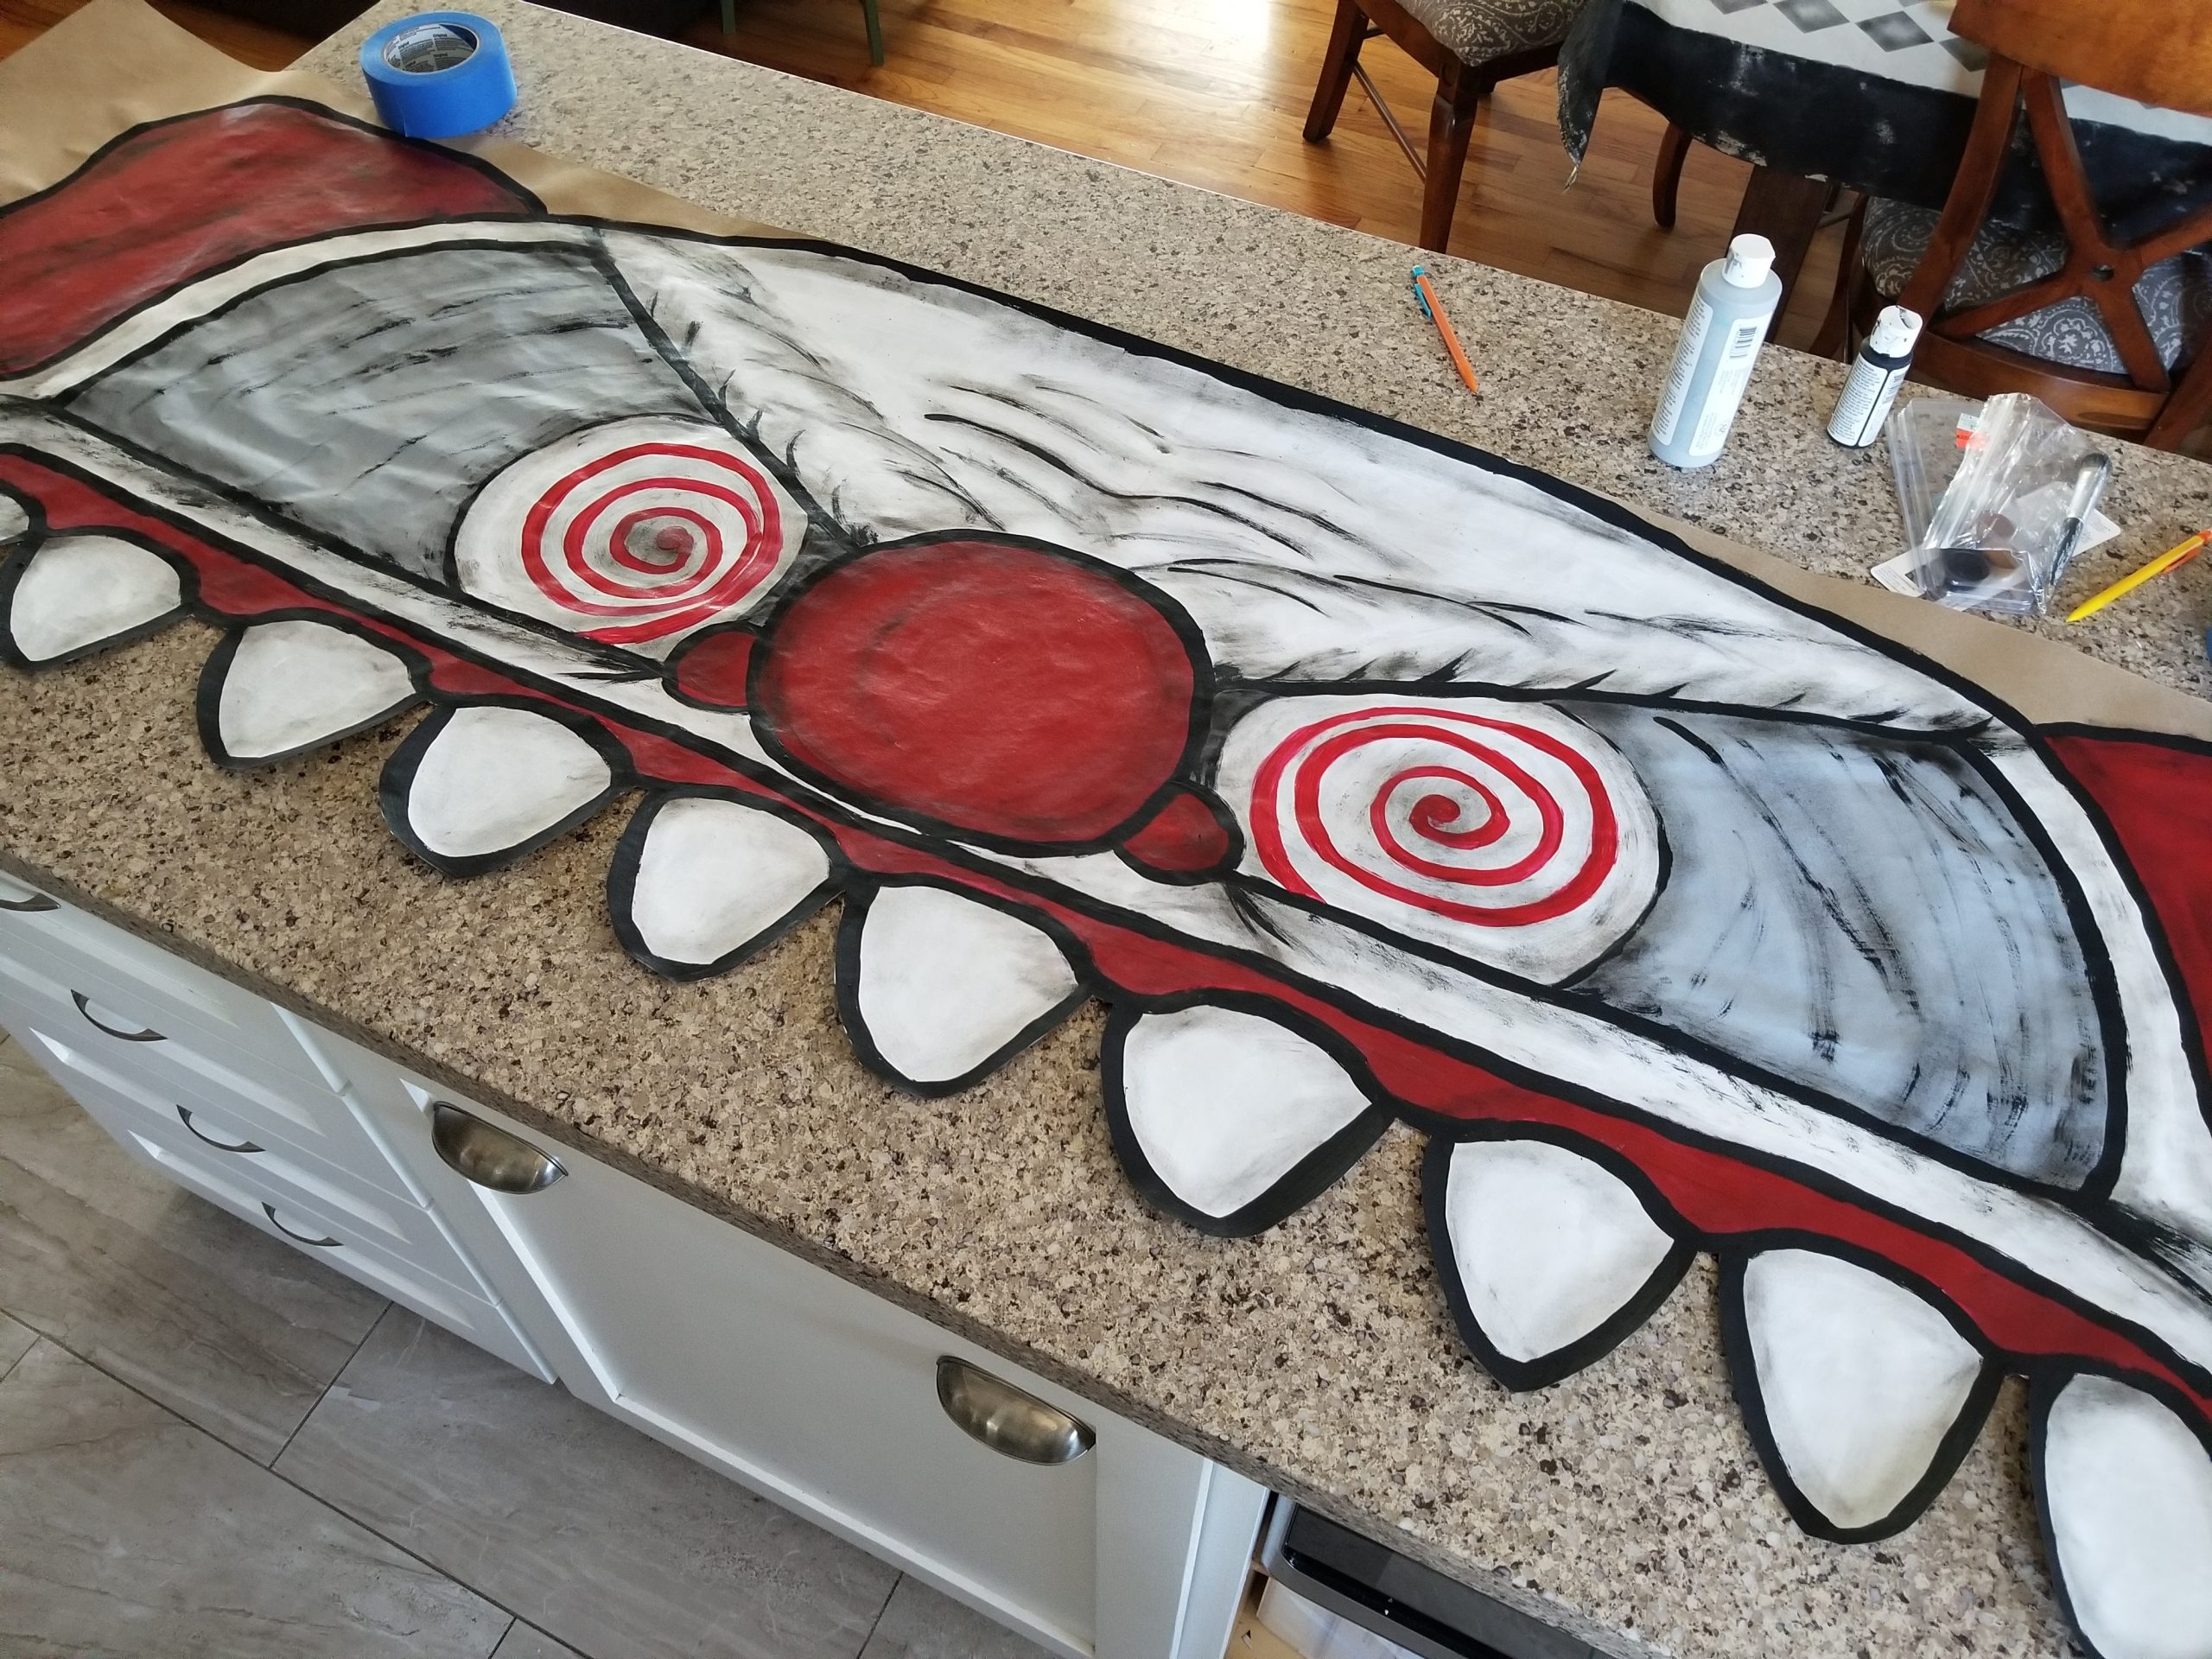
If the lighted marquee sign is a little too involved, here’s a simple paper clown marquee that I hung over my french doors in my dining room. This is a simple recreation of a marquee sign I did years ago for my son’s elementary school carnival’s maze entrance. You can read all about it on my old blog Castellon’s Kitchen, here. All you’ll need is a roll of craft paper, paint, and a pencil. I won’t go into the how to in detail, I’ll let the photos tell the story.