
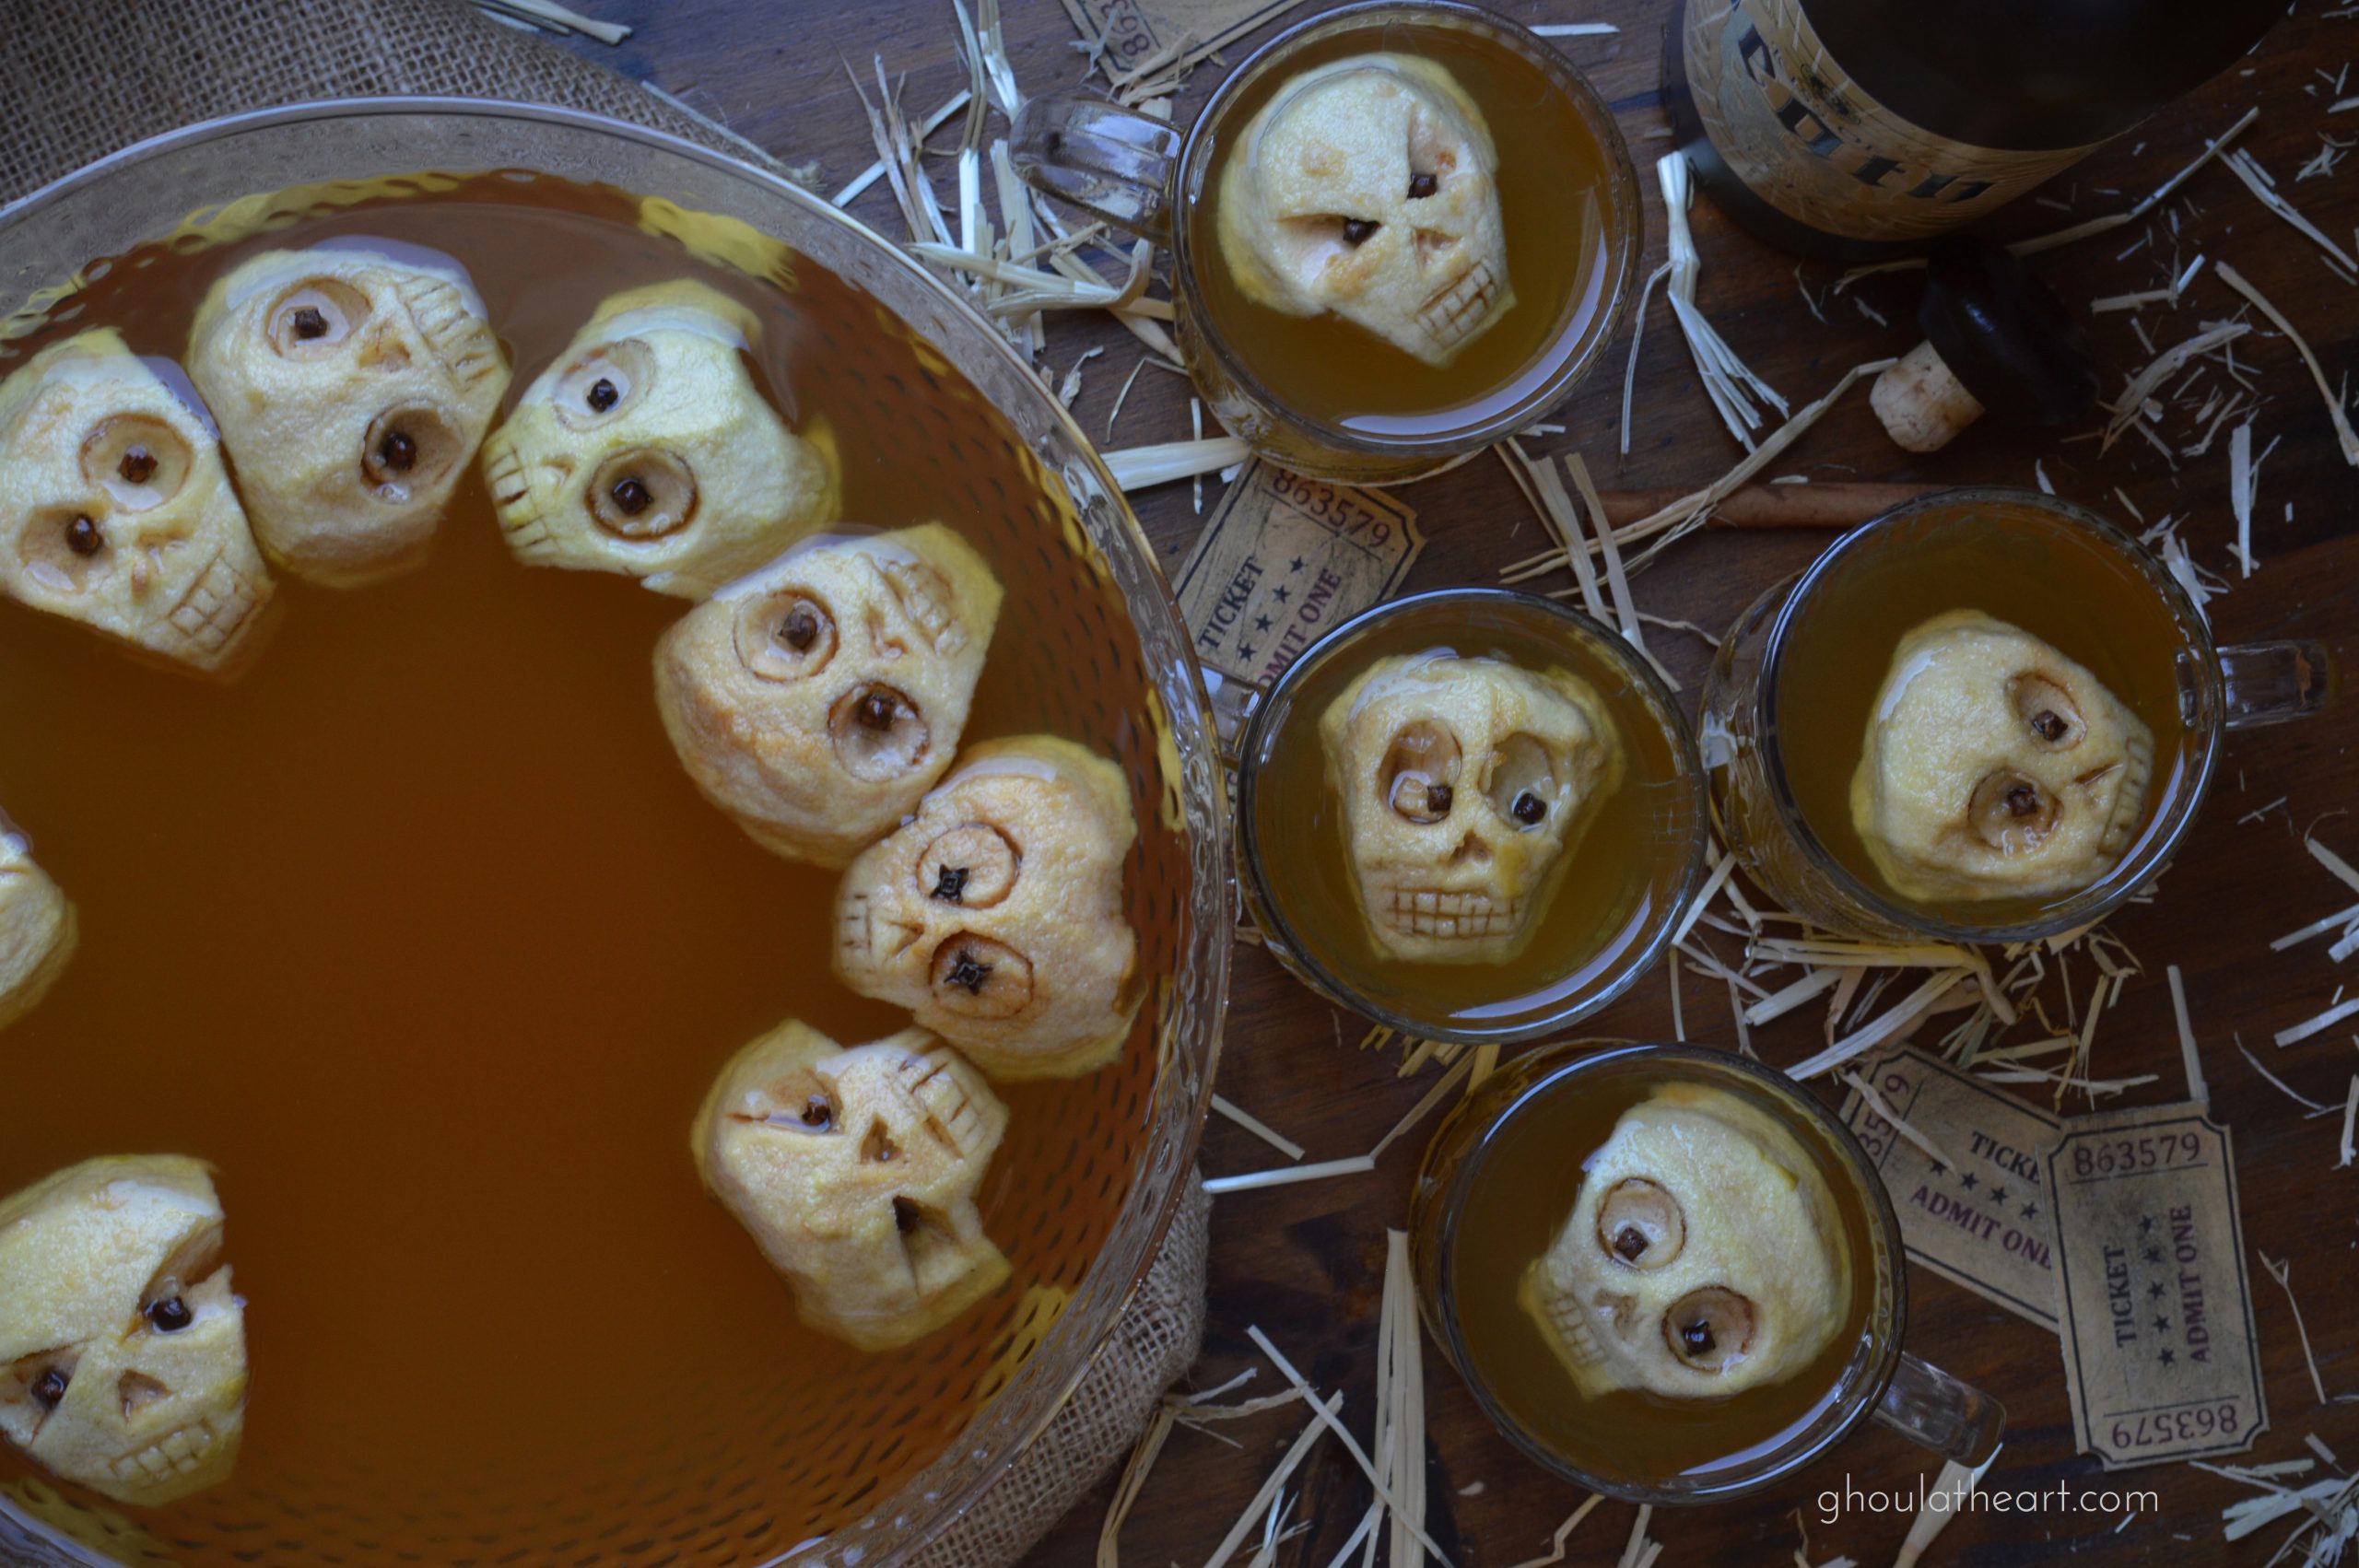
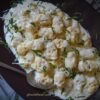
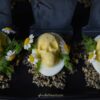
The Night Circus by Erin Morgenstern inspired me to include a cider recipe as part of my Carn’Evil’ menu this year. In the book, the circus serves apple cider and chocolate mice to circus goers, and the imagery of the kids pulling out a bag of chocolate mice and eating them with hot apple cider in the cool night air, just struck me as magical and fun. I had to find a way to make a Halloween version, so I looked at lots of cider recipes with shrunken heads, mainly for guidance on how to carve the faces. There are a lot of apple heads that are really detailed and look amazing. So I gave it a go. I attempted to make some scary heads with chiseled noses and furrowed brows and I quickly discovered that it’s not easy to carve all that detail. Mine came out terrible. So, I ditched the realistic apple head idea and instead opted for apple skulls. Super easy because…no noses or brows needed and ultimately, skulls were more fitting for my Carn’Evil’ menu. See how to make your own apple skulls to float in mulled cider, wine, and even in a cup of hot tea for a unexpected Halloween twist.

On a personal note, after I made these apple skulls they made me think of my dad. My dad passed away 5 years ago, but I think my dad would have loved these little faces floating in cider. They reminded me of something I made as a little girl . I was probably in 3rd or 4th grade and it was raining on a Saturday so of course I couldn’t go out to play. I was bored wandering around the house looking for something to do. There was a bag of dried white beans in the cupboard that had spilled a little so there was a few beans lying on the shelf. I picked them up and looked at the shape of them and immediately imagined faces on them with lots of different expressions. I scooped up a handful and ran to my room to draw faces on those beans. I came out to show my dad what I had created and I remember him looking at all the expressions I had drawn on them. From the smiling happy beans, the open mouthed beans that yawned and yelled, the scared beans, and the the crying beans. Think of them as early emoji’s. With each one, he smiled and commented until he came to the “chewing gum” bean. When he picked up that bean, he laughed with delight! He smiled and praised me as he looked at all the detail. It really did look like the bean was chewing gum. There was a natural bulge in the bean that looked like someone with a big wad of gum in the side of their mouth, so I drew it like that. My dad was so excited about that silly little bean and it made me so happy that he enjoyed it so much. I glued it inside a homemade birthday card for him that year and 40 years later, give or take, I found that card after he died. He had saved that card with the chewing gum bean all those years.
I’m sure my dad would’ve gotten a kick out of these little apple skulls. I love and miss you daddy. xo

Rotten Apple Cider
Ingredients
Rotten Apples Preparation
- 6 medium Granny Smith apples peeled, halved and cored
- 1/2 cup lemon juice
- 24 whole cloves (for eyes)
Mulled Cider
- 1 gallon Apple Juice or Cider
- 1/4 cup brown sugar
- 2 Tbsp mulling spices
- 1 cup Bourbon or Spiced Rum (optional)
Instructions
Rotten Apple Preparation
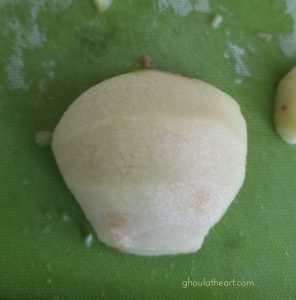
- Working one apple at a time, peel, half and core apple and roll it in lemon juice to prevent browning.
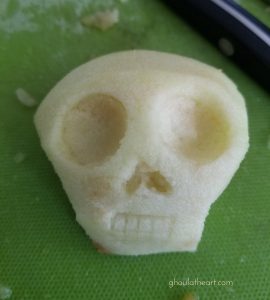
- To make the skulls, turn the half-apple so that the rounded sides of the apple lie up and down on your cutting board, creating a rounded top of the head and a rounded bottom. Trim off small wedges of the bottom by cutting at an angle to create the jaw of the skull.

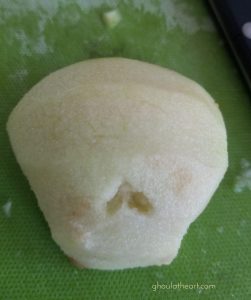
- Use a paring knife to cut out a small upside down heart to create the nose of the skull.

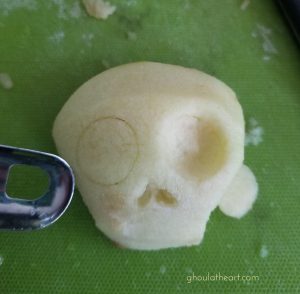
- Use an apple corer to make the eye holes and scoop out the eyes.

- Use a paring knife to score the the apple to make teeth. To make skulls with just the upper jaw, trim off a small bit of the bottom of the apple and score the teeth to the edge of the apple.

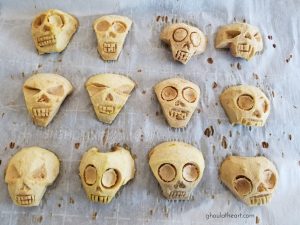
- Roll in lemon juice again and place apple skull on a parchment lined baking sheet and repeat process with remaining apples.
- Bake apples at 200 degrees for 2-3 hours until shrunken and wrinkled, but still chewy. Letapples cool while you prepare the cider.

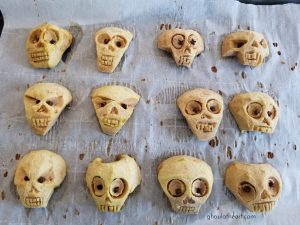
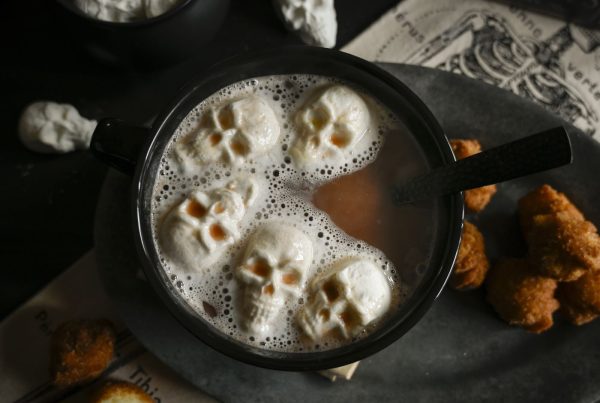
- While the cider simmers and when the rotten apples are cool enough to handle, add whole cloves to the eye sockets to give your heads some personality. Set aside.
- Here's a shot of our little skull friend. He's all dried out and looks a bit rough, but once he's dropped into hot cider, he will soften up as he absorbs the liquid which will make him perfect for eating, just remove the cloves before taking a bite. 🙂


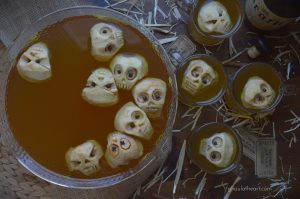
Mulled Cider
- In a large pot, add apple juice/cider, brown sugar, and mulling spices wrapped in cheese cloth and heat to a simmer for about 30-40 minutes. Remove mulling spices and ladle hot mulled cider into mugs. Add 1/2 oz. of Bourbon or Spiced Rum and serve with a rotten apple skull and enjoy!


This turned out so stinkin cute and I am no food artist! Ran across the photo on Instagram and gave it a go and it was so fun!
I’m so glad you made it Sarah, and I thank you for taking the time to comment to let me know that you enjoyed making them. I’m sure it will be a hit at your next party or just to float in some hot tea. Happy Halloween!
🖤Lori
Do you think you can make the apples the day before?
Hi Stephanie
Yes, You can make these the day or a few days before. They’ll continue to dry out if left on the counter for a day or two.
🖤Lori
Made this for my annual pumpkin carving competition party and it was amazingggg
That’s awesome my dear! So glad you enjoyed them! Thank you for taking the time to comment. Happy Halloween!🎃
Lori🖤
Everyone loved the apple skulls. It was so worth the effort!
Wonderful Christine! So glad everyone enjoyed them. Thank you for taking the time to share it with me.
Happy Halloween!🎃
Lori🖤