
This post contains affiliate links. As an Amazon affiliate, I earn from qualifying purchases. Read my disclosure policy here.
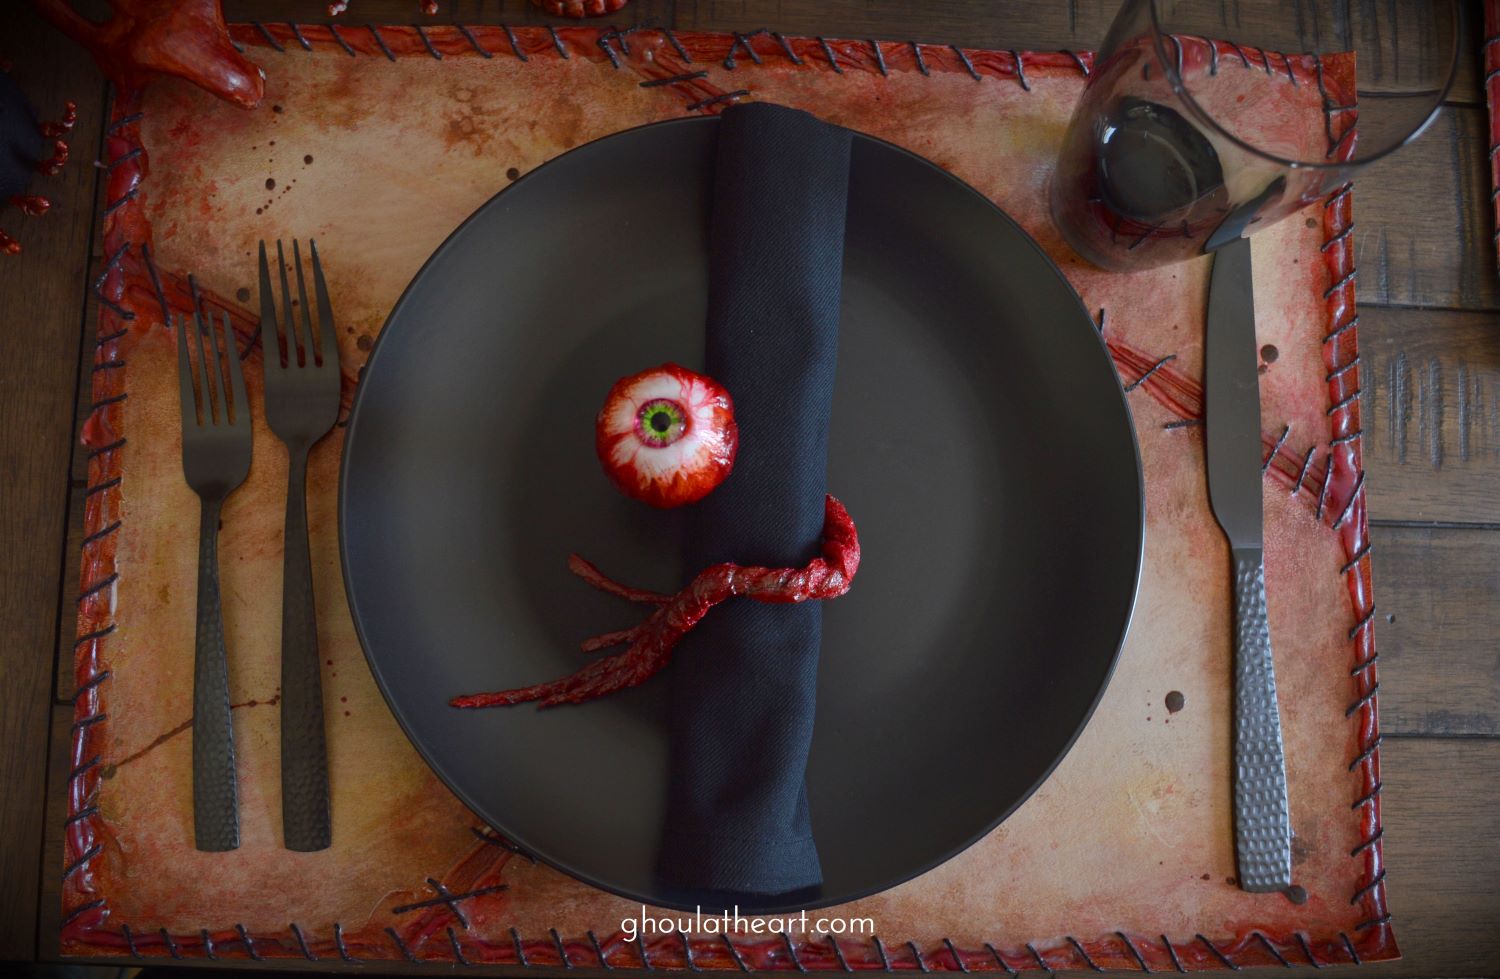
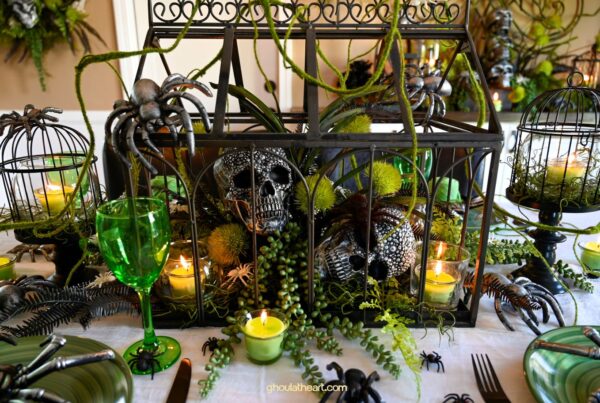
I’m a morning person. I function best in the morning and I love the dark and peaceful quiet that greets me while the world still sleeps. I come up with some of my best ideas during that time in the morning when I’m just waking up, still in bed with my eyes closed and my mind comes back on line. I start planning my day…planning how to get all the things I have to do done, so I can focus on the fun things I want to do. That’s when my mind seems to dream up the most fun ideas, that time between the ‘have to do’s’ and the ‘want to do’s.’ This idea came about that way, but this time the ‘have to do’ was my Dead Man’s BBQ themed tablescape. I was still working out how to finish it. I had the Post Mortem Placemats done, and all the barbequed skeletons painted, but I needed something more…another little touch for my table. That’s when I remembered the glass irises I bought from Michael’s a few years back and just like that, my ‘have to do’ became my ‘want to do’. Eyeball Napkin Rings!
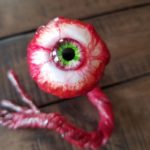
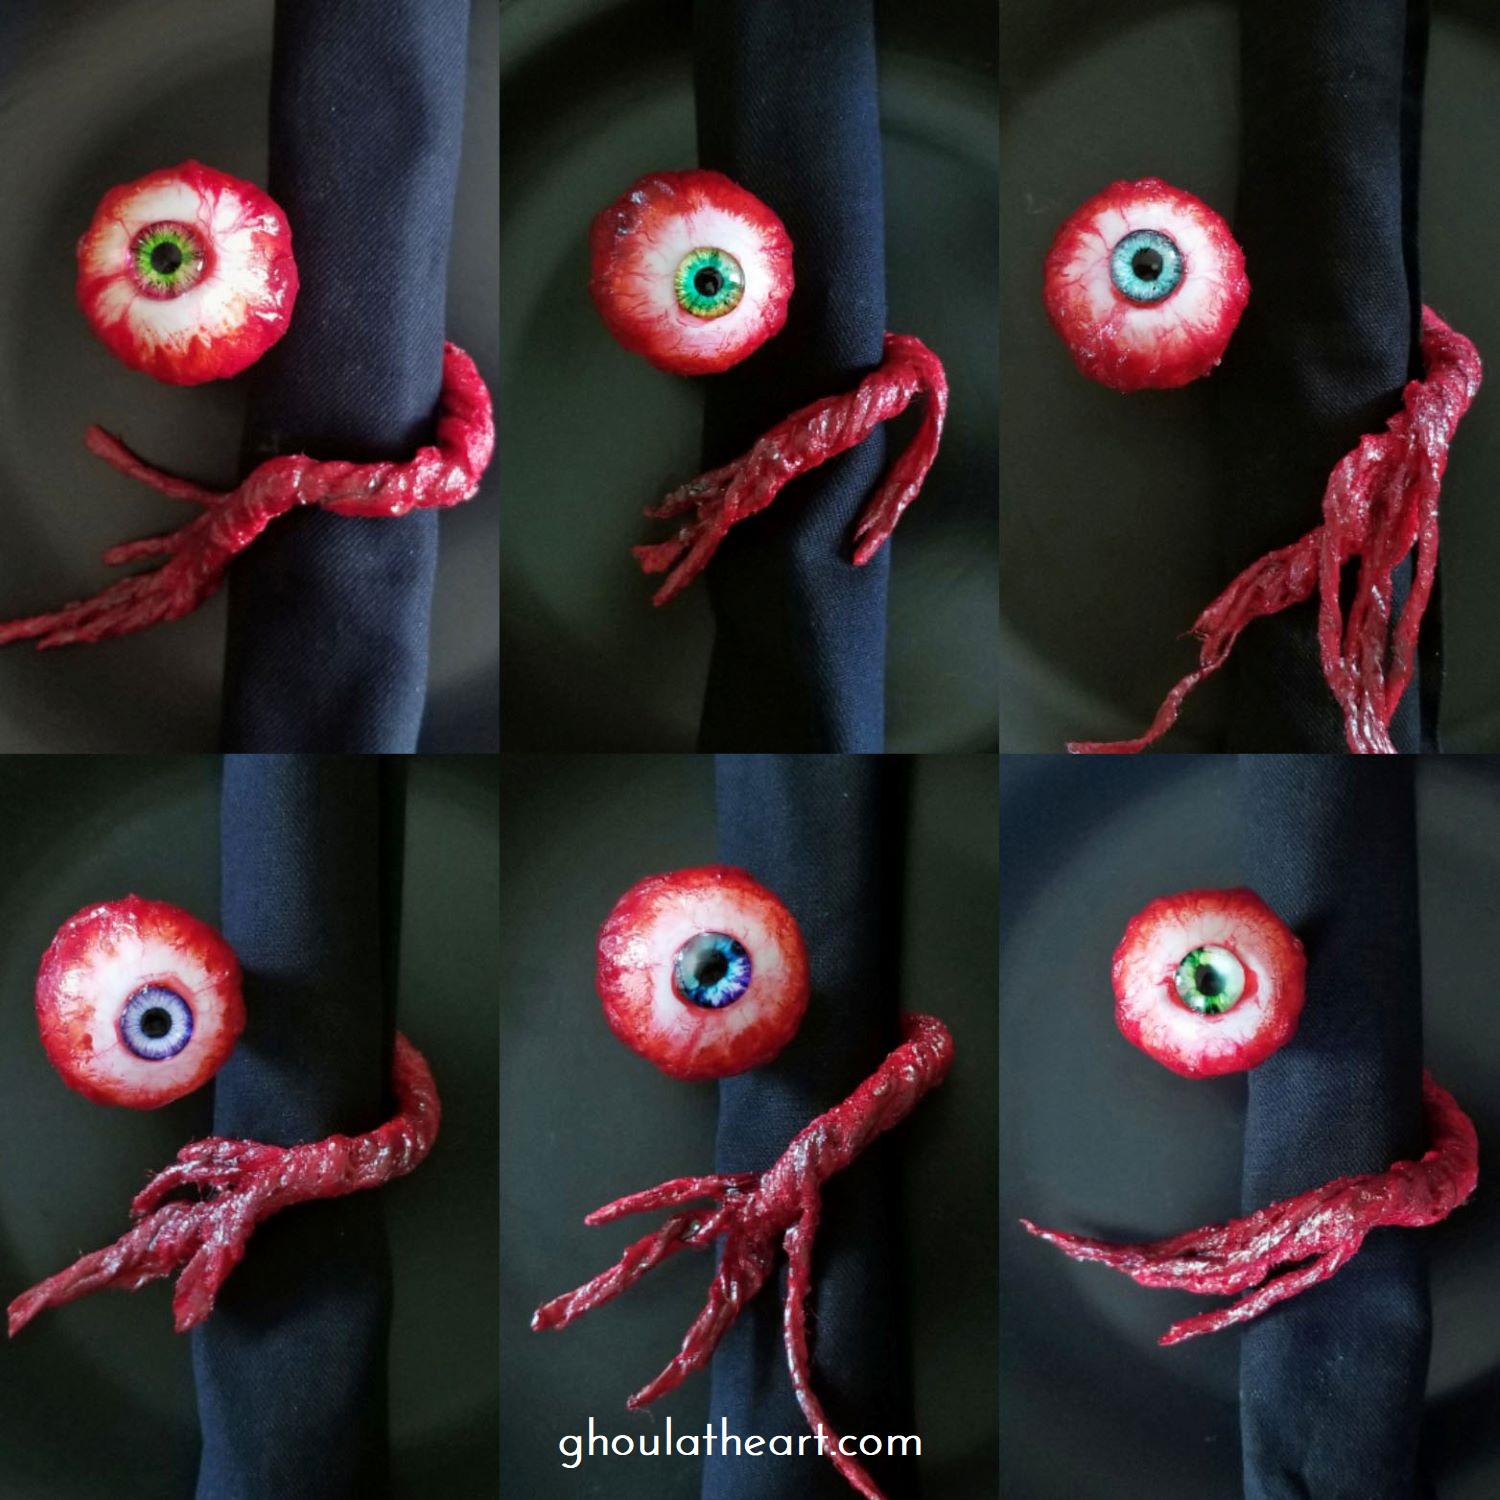
Eyeball Napkin Rings
Materials
- 6 ping pong balls
- 6 7" lengths of wrapped floral wire
- 1 ball red wool yarn
- 6 glass bead irises
- Mod Podge (matte and gloss)
- masking tape
- hot glue
Fake Blood Paint
- ½ cup Mod Podge (matte or gloss)
- ½ oz. red food coloring
- 1-2 drops green food coloring
Instructions
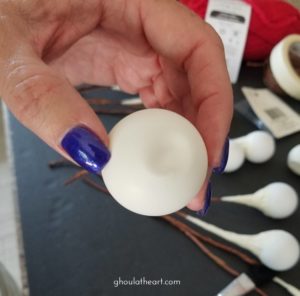
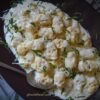
- Use a metal skewer to poke a hole in each ping pong ball. Hot glue the end of the floral wire and thread it into the hole of each ping pong ball. Use masking tape to build up the back of the eyeball to create the optic nerve portion along the floral wire.

- Use the blunt end of paintbrush or the eraser end of a pencil to create an indentation in the ping pong balls for the irises.

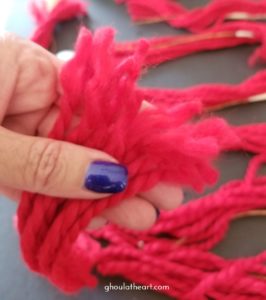
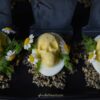
- Cut eight, 10 inch lengths of red yard for each eyeball. Fray the ends of one end of the red yarn.

- Hot glue the frayed yarn to the masking tape area of each eyeball allowing the frayed edges to cover about half of the ping pong ball. Twist the yarn down along the floral wire and secure each strand with a dot of hot glue to the end of the wire leaving some of the yarn loose.
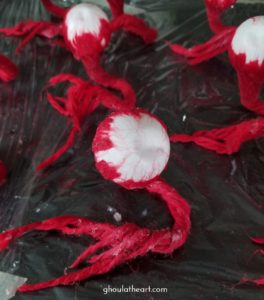
- Use Mod Podge to glue the frayed yarn to the ping pong ball. The yarn will string out and create the look of blood vessels while gluing it to the ping pong ball. Let them dry by standing them up in a tall glass. (Note: The optic nerve tail end of the eyeball is not covered in Mod Podge at this time, only the eyeball.)

- Bend the optic nerve tail of each eyeball so that it sits upright and so a napkin can slide through it. Trim the length of the wire as needed. Mod Podge the yarn along the optic nerve tail, twisting some of the loose ends into frayed ligaments as though the eye was ripped out of it's socket. (eww...) Place Mod Podge coated eyeballs on plastic wrap to dry.

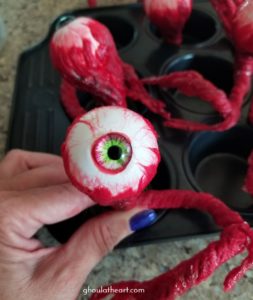
- Glue glass iris to the indentation on the front of the ping pong ball.

- Mix up a bit of the Mod Podge fake blood and paint some of the yarn to add a darker red color to the yarn and around the ping pong ball to give dimension and detail to eyeball.

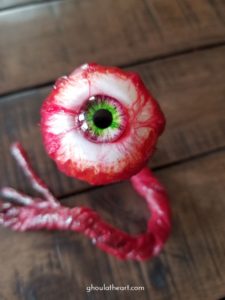
- Give the eyeball and optic nerve a final coat of glossy Mod Podge and let dry.


Your projects and theme is beyond words!! I am in AWE of your talents! LOVE LOVE LOVE! And now I’m determined to give them a go for this year.
With the yarn, it looks really thick, what ply/weight is it? I’ve found a 170g ball at my local store which I “think” looks similar
Thank you so much Helen, that makes me so happy that you are enjoying it. I got this yarn from Michaels, its the Loops and Threads Cozy Wool.( https://www.michaels.com/cozy-wool-yarn-by-loops-and-threads/M10160527.html ) Hope that helps and please share with me how they come out! They’re pretty easy, just lots of drying time.
🖤Lori
That really helps, thanks so much. Yay, very similar to the chunky yarn I found online.
I have table tennis balls, yarn, and skulls ordered. Can’t wait till everything arrives so I can get started! Will definitely let u know how I go 🙂 🙂
Great! Yes, please let me know how they turn out. 😊
🖤Lori
I was nervous to start so it took me a while to get going, but I am on the home stretch now. Just need to add some detail with dark red, glue on the the irises then give it a final coat with Super Gloss Mod Podge.
I did run into a couple of issues along the way though. I bought ping pong balls and they did not want to stay indented. I tried a couple of times, but they all (mostly) popped back out overnight. So I’m just going to glue printed irises over the top. I don’t like the little creases that happen doing it that way, but oh well shouldn’t be too noticeable.
My yarn must have been a little thicker than yours, so after the first eyeball I reduced the strands to 7.
Also, your optic nerves look quite smooth and very shiny, but mine are fuzzy looking and semi-matte (despite trying to trim off some of the fuzzies before a second coat of gloss Mod Podge). And the second coat maybe even looks worse – like it’s crystallised the fuzzies. No idea if maybe I didn’t apply it thick enough. I tried to brush it on quickly and not over-brush. So I’m hoping the Super Gloss MP will help a little.
Anyway, they still look pretty awesome though so far (just not as magnificent as yours!!)
I also bought some upholstery vinyl (cheaper than marine) for the placements and have them cut up ready for painting. But…I’m a bit concerned that the high heat of the glue from the gun would melt the vinyl. U didn’t find that? Ohhh…unless of course marine vinyl can withstand more heat than upholstery vinyl?!
I’ll be showing photos of my finished beauties, once done, on an Australian Halloween Lovers Facebook page. I’m assuming it’s okay for me to point them to your page/instructions as the original creator?
Hi Helen,
Thank you for telling me about your progress. I also found out later that my eyeball indents didn’t stay either. They stayed for a few weeks then they worked their way back out. But I think it still looked pretty good despite it. Yes, I put on heavy coats around the optic nerve to control all the fuzz from the yarn, I also twisted and smoothed them with my fingers once it was coated to try and tighten up the threads. But I did have to coat them a few times until I got the look I wanted, so keep at it. The best thing about decorating for Halloween is that things don’t have to be perfect, imperfections adds to the spooky look. As for the upholstery vinyl, I’m not sure how it will react to the hot glue, I’d imagine it should be ok, but try putting some on a scrap piece and see how it how it holds up. The marine vinyl did not melt with the hot glue. I can’t wait to see your finished projects so yes, please feel free to tag me or the website so I can see your post! Thank you so much for taking the time to comment Helen. Happy Halloween!
🖤Lori