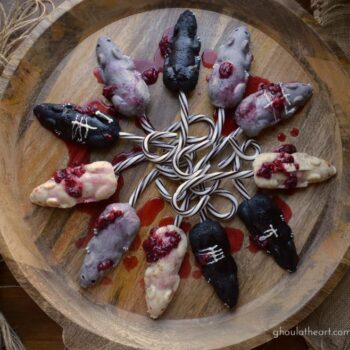
Rat King Cakes
Now Showing in the Carn'Evil' Oddities tent...the mysterious Rat King Cakes!
Print
Pin
Servings: 16
Equipment
Ingredients
Rat Cakes
- 1 box chocolate cake mix but this recipe uses only 1 of the cake layers
- 1 box white cake mix
- 2 cans prepared frosting (chocolate and vanilla)
- black and red candy
- white chocolate chips
Blackberry Sauce
- 1 cup blackberries
- 1/2 cup sugar
- 1/4 cup water
Re-shaping Candy Canes
- 2 dozen black and white candy canes
Instructions
Rat Cakes
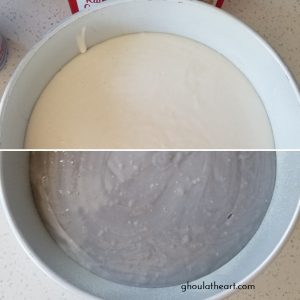
- Prepare white cake according to package directions. Take half the batter and and add 2-3 drops of black food coloring and mix to make a gray batter. Pour the gray and white batter into two cake pans and bake according to package directions. Cool completely and then crumble into two bowls. Add 1-2 tablespoons of vanilla frosting and mix until crumbs hold together.
- Repeat with the chocolate cake preparing according to box directions. For black rats, add a few drops of black food coloring to the batter, omit for brown rats. Pour batter into two cake pans and bake according to package directions. Cool completely and crumble only ONE of the cake layers into a medium bowl and add 1-2 T of chocolate frosting and mix until crumbs hold together. (Frost the other layer and eat as is. :)
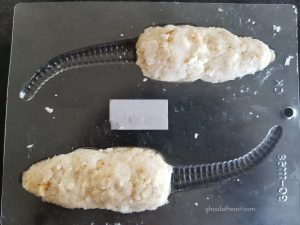
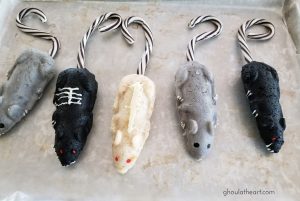
- Work with one color at a time, beginning with the white cake and press cake crumbs into rat molds and overfill the molds so that the rat has a little girth to it so that you'll have a big enough piece of cake to stick the candy cane tail into. Gently turn mold over, supporting the rat cake in your hand and bend the mold starting at the tail and the rat cake will easily fall into your hand.
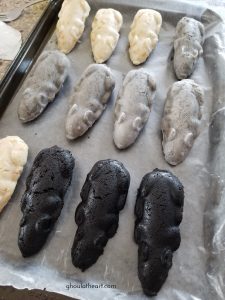
- Place molded rats on a wax paper lined cookie sheet. Line up molded rats, cover with plastic wrap and refrigerate for at least two hours or overnight to solidify the cake pops. While the cakes refrigerate, prep the blackberry sauce and reshape the candy canes into curled tails.
Blackberry Sauce
- Heat blackberries, sugar and water in a small saucepan. Mash berries with a potato masher and bring to a boil. Lower the heat and simmer for about 10 minutes. Remove from heat and allow to cool and then refrigerate until ready to serve.
Shaping Candy Cane Tails
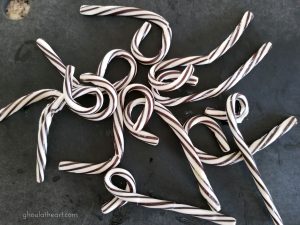
- Preheat oven to 250 degrees. Place 2-3 candy canes on a parchment lined cookie sheet and heat for 10 minutes until candy begins to soften but not melt. I used these Oreo flavored candy canes.

- Remove from oven. The candy will be hot as well as the cookie sheet, so use chopsticks to gently nudge the candy canes, bending the curved end further or curving the straight end of the candy cane. Working gently, but quickly as the candy can crack as it cools. Transfer re-shaped candy canes to another cookie sheet to let cool completely. Repeat the process, working in small batches.
- Use the end of a chopstick to make a hole for the eyes and then place a small black or red candy for the eyes. Melt white chocolate in a pastry bag and pipe claws, teeth and bones and rib cages for added detail. Note: I'm terrible with the melting chocolate so most of my bones look pretty lame, but like all Halloween food...it doesn't have to be perfect and there's nothing a lot of bloody berry sauce can't hide to make it look better.
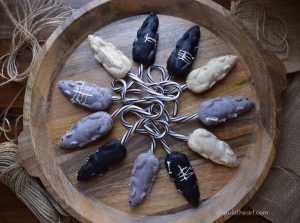
- Add candy cane tail and arrange on platter allowing the tails to tangle and overlap. When ready to serve, top with blackberry sauce and enjoy!
Notes
Recipe inspiration for the rat tails came from these adorable Candy Cane Mice from sprinklebakes.com, of course I had to go and ruin a perfectly good Christmas idea and make it spooky. :)